Routing with the aid of clear overhead film
I am working on a couple of real courses, and first I tried the eyeballing method. Besides getting half blind I felt it was not reliable, so I spent a night trying to understand the technique of Mike New on his site. It may be more exact, but a bit complicated. So I adopted some of his ideas, and came up with this one. Perhaps more people are using it, but I have not heard of anyone. If so, please mail me and tell me your tricks, so that I can add them to this tutorial.
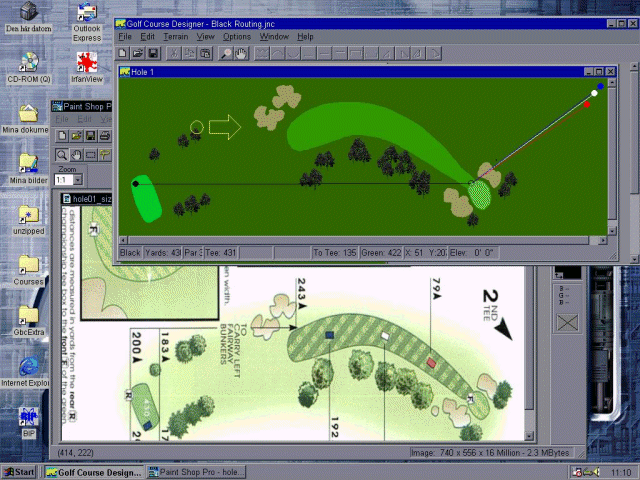
1. The first thing I do is to set the start and the end of the hole in the designer, in this case the first hole of Bethpage. I set up the tee and green by the length of the hole adjusting for the angle if it is a dogleg hole. If it was a straight hole, I wouldn´t even need to set any shot points inbetween. The next and only more thing I do in the designer for now is to draw a line from the tee point and the green point to the edge of the hole window (see pic above). I use the out of bounds texture, but that is unimportant. This is only to make it easier to line it up with the strokesaver at next stage.
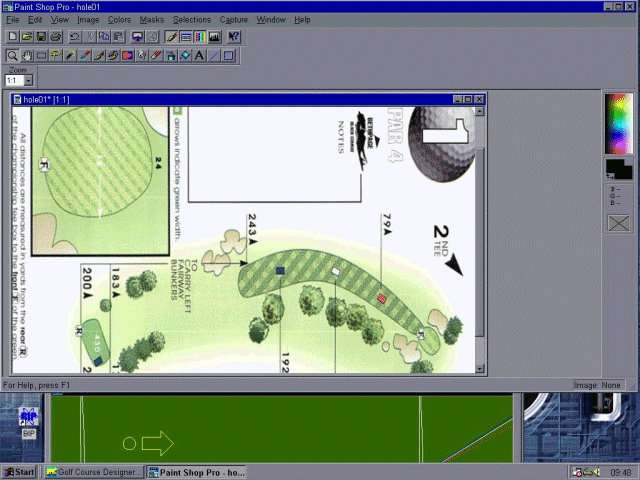
2. Open up your paint program and load the strokesaver pic. Decrease the window size of both the paint pgm and the designer, so that you can see both at the same time (see pics). As you can see in the lower portion of the first screenshot, the lines I made from the tee and greens are visible in the edge of the hole window in the designer. Now comes the tedious part, resizing of the stroke saver to match the hole in the designer. Stretch or shrink your strokesaver pic in your paint pgm untill it´s tee and green are lined up with the tee and green of your hole window in the designer. Be certain that the option "maintain aspect ratio" is on when resizing, otherwise the hole will not be in scale.
3. Now it´s time for the overhead projector film. Use tape to attach it on your screen over the strokesaver in your paint pgm. With a good pencil, just follow the contures of the tee, fairway, green and bunkers. If the strokesaver shows where trees are, you can even plant some for reference.
4. You can now minimize or close your paint program. Maximize the designer and place your hole window under the overhead film. Fill in the shapes for fairway etc. from the contures of the hole you just pencilled on the film. Now the routing is finished. See next screenshot for the end result, they are already exact copies. When I checked the distance my hole was only 3 yards shorter than it should have been. Simple eh? Took me 15 minutes.
5. You now have the basic of your hole. Of course you will have to zoom in and finetune all your shapes. By "splitting segments" and editing them by freehand, all bunkers and greens should soon have the same size and shape as their originals. If you have a good strokesaver you can check and adjust the exact distance from bunkers to greens too.