Welcome to this solo playthrough of Final Fantasy 4. Meet our protagonist, Kain.
Kain will be tackling all of FF4 on his own. Since this is well short of a standard playthrough, I'm going to assume that you are familiar with the game and its general mechanics, and not describe all the details.
Now, if you are familiar with the game, you may feel that there is something wrong with what I'm attempting to do, but don't worry: I know what I'm doing. Admittedly, I don't know that I know what I'm doing at the time of writing, but by the time you read this, I will know that I know what I'm doing, because otherwise I wouldn't have put this up where anyone else could see it.
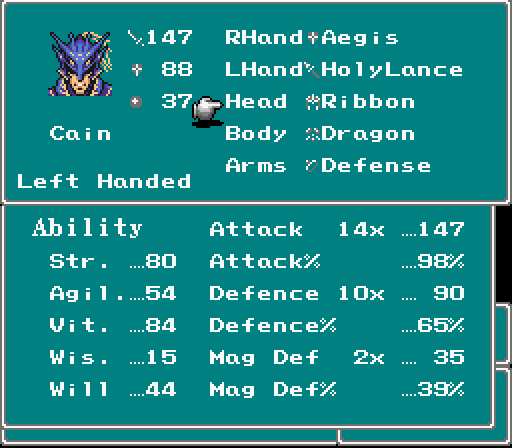
Now that I've properly confused you, let's get started. First, let me describe Kain: he's your usual tank/damage dealer. He equips heavy armour, and wields primarily spears, but also swords and other fighter type weapons. His special move is Jump, which takes longer time, but does double damage, ignores row penalties and (very) briefly takes him out of harm's way. Because of this, Kain will be spending more time in the back row than is traditional for his ilk.
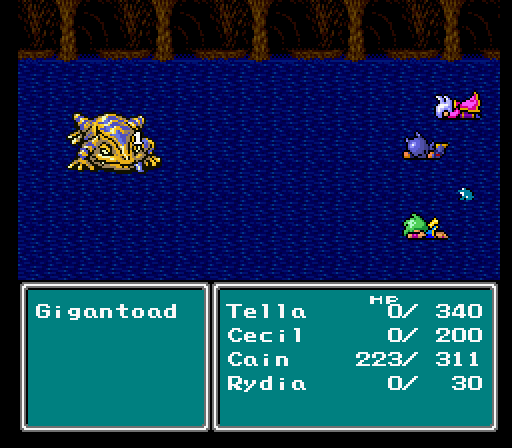
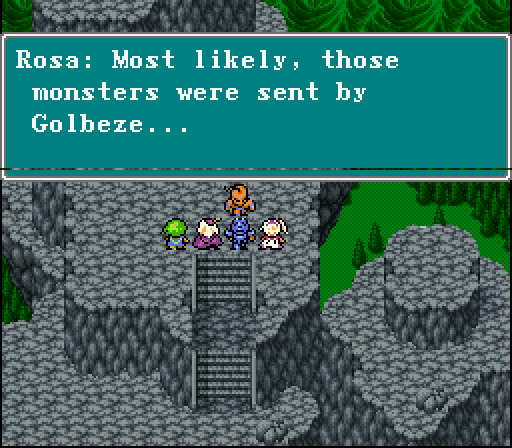
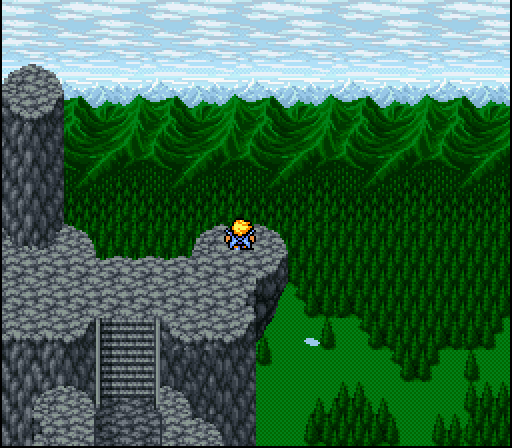
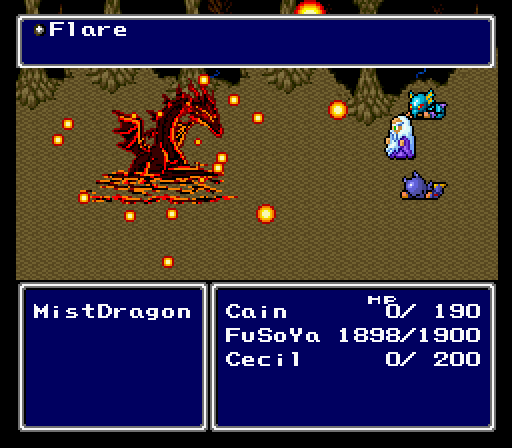
At the start of the game the enemies are so weak they go down to a normal hit, even from the back row. I did start jumping against the Mist Dragon,
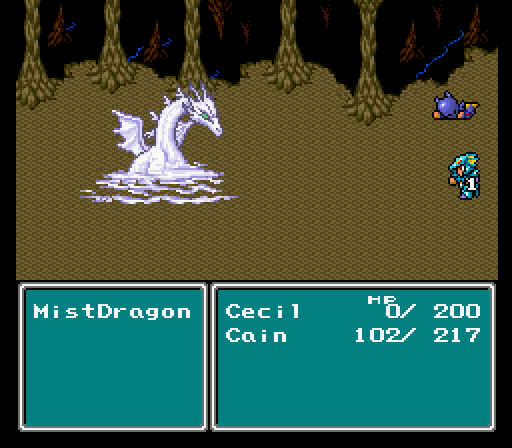
who was completely incapable of hurting me. After the battle and the cutscenes in Mist, Kain moves on towards Kaipo.
(Yes, I will explain how I did that later.)
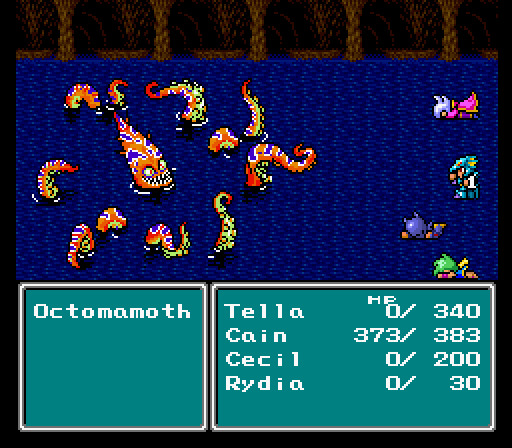
The early parts of the game were quite easy for Kain, and the only interesting thing to happen in the underground waterway to Damcyan was this:


It turns out that, while Kain cannot normally jump in toad form, he can if the status takes effect after choosing the jump command. Presumably this also holds for the other transformation based status effects. We may see pigs fly yet.
When I wrote that nothing interesting happened, that included the boss.
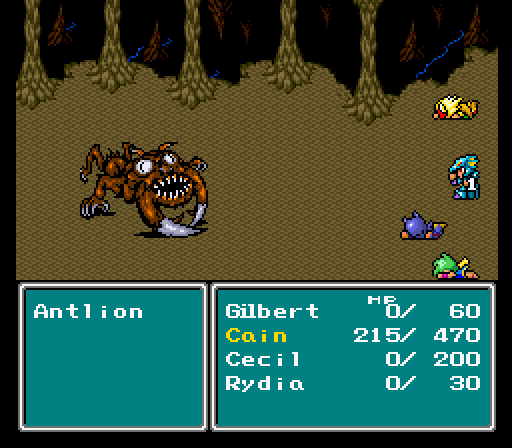
The same goes for the antlion, who was extra easy since Kain's jumps did not trigger counterattacks.
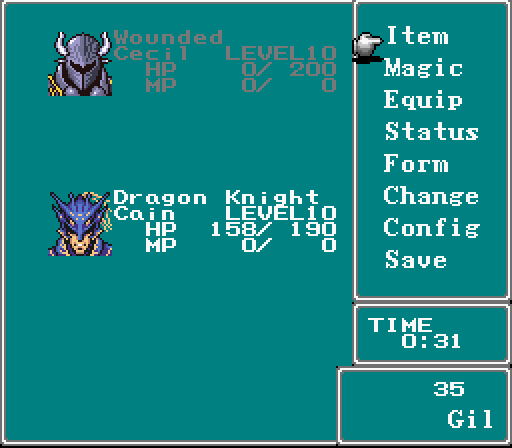
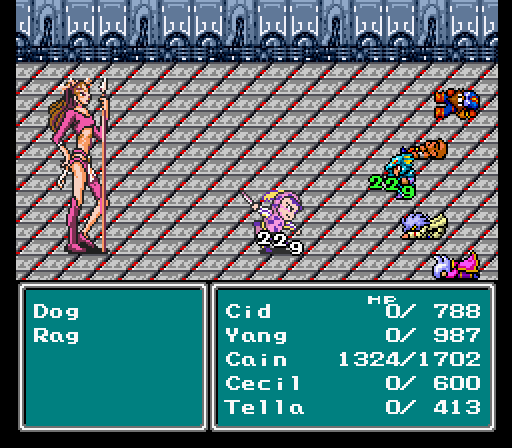
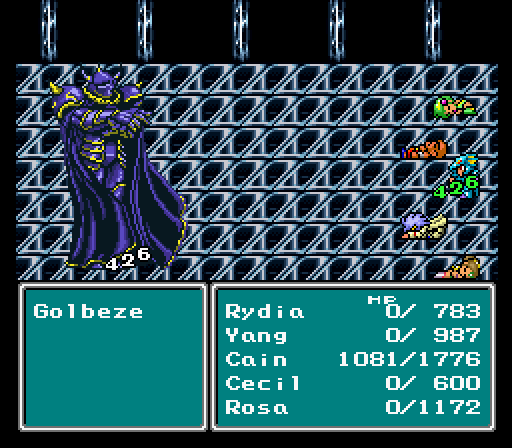
And that takes us to Mount Hobs, where things get interesting in two ways. One of those ways is the boss, who is not hard but at least does something other than plink me for one damage. But before that is Yang. The thing that makes Yang joining special is that this is the first point in the game where you get a full party of five. A party that does not normally include Kain, to be specific. So now is a good time to talk about how I've been modifying the party composition. First, let's take a look at what the party looks like in the SNES's memory.
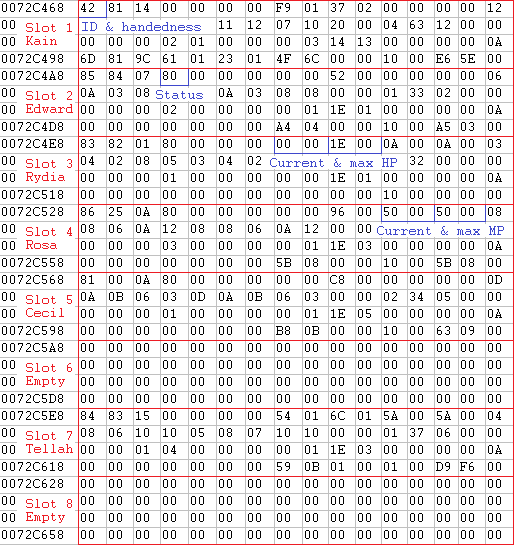
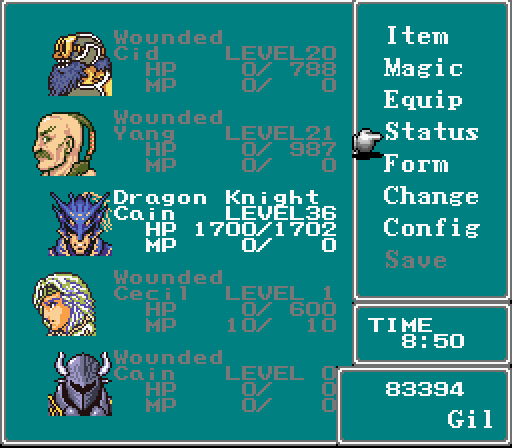
Each character is represented by a block of memory 64 bytes long, placed one after another in order of middle character, top character, bottom, top middle, bottom middle (if you rearrange your party, you also rearrange their location in memory). You may notice that there are more than five slots: there are actually ten. The last five are the shadow party, where characters temporarily out of the party are kept. They gain experience points after battle, just like (living) members of the active party. Kain would normally be in slot 6 at this point in the game.
What happens when the game tries to add a character to a full party, you may wonder. Bad things, is what. In this case, the game locks up on a black screen just before showing Yang's solo battle. My supposition, based on some experimentation in other parts of the game, is that the character to be added simply disappears. In this case this means that there are no characters in the battle, and the game locks up in confusion.
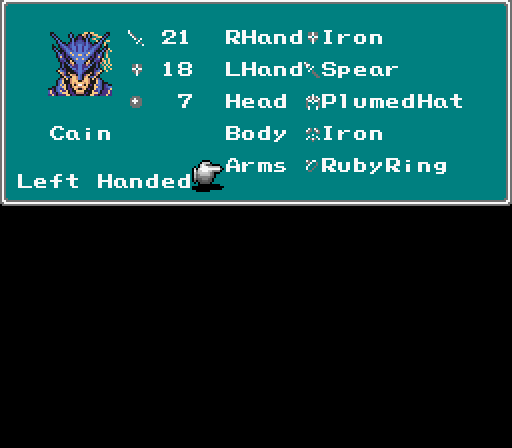
A few notes if you want to try doing stuff like this yourself: I use a program called ArtMoney to view and edit memory. There are almost certainly other programs also suitable for this purpose. The memory addresses shown in the image above can not be relied on, as they will vary depending on what version of what emulator you are using, and may even be partially random for some emulators. Instead, the best way of finding the right memory address is probably to find the address for character one's current HP, and counting back seven bytes. That will be the start of the character data memory block, and will have hexadecimal value 81 (decimal 129) if character one is dark knight Cecil, or 8B (decimal 139), if paladin Cecil.
Note also that the version I am using is the original Japanese ROM patched with some version of the J2e translation (I don't know which, it's been sitting in my SNES ROMs folder for a decade). The details of how characters are represented in memory may vary in other versions, though it is very likely identical in any patched or unpatched version of the Japanese ROM, probably identical for the US release, possibly but probably not identical for the GBA version, and if it is identical in the NDS remake, I will eat my hat. No, strike that, I will eat a classical Prussian helmet, spike and all.
Disclaimer: directly editing the memory of a running process is not the safest thing you can do with your computer. I take no responsibility if you manage to break your OS, reformat your HD, or spawn a malevolent, hyperintelligent AI that destroys humanity.
Getting back to the game, the way to get past this point is to move a character (I chose Rosa) to the shadow party.
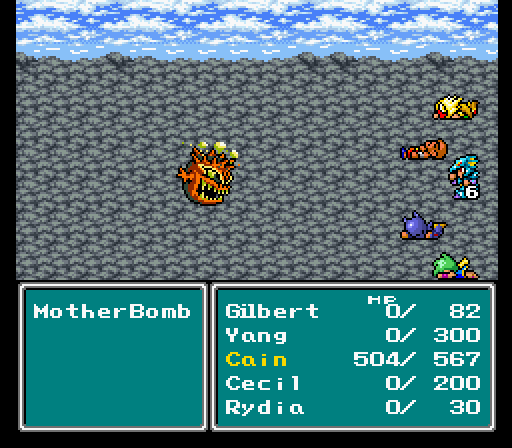
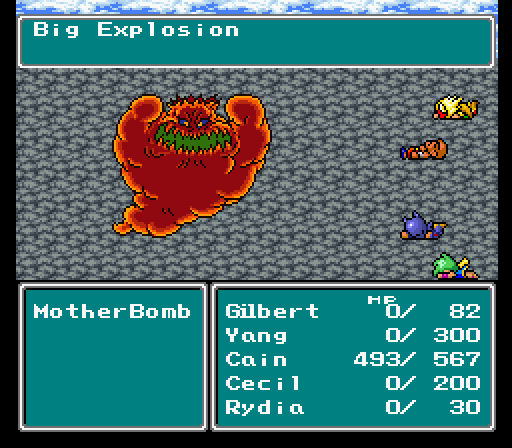
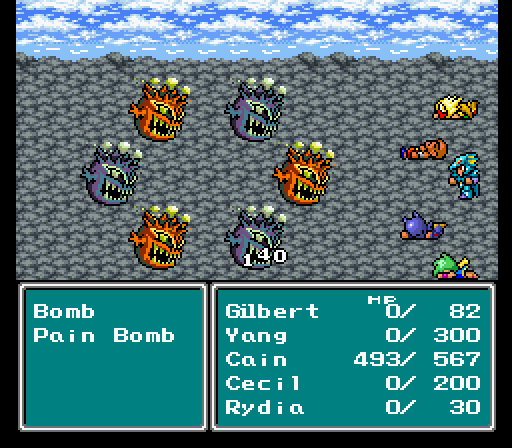
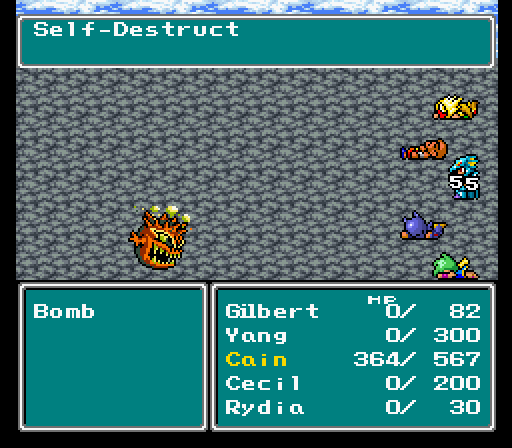
As you can see, the boss was actually capable of doing more than one damage to Cain! Still hardly threatening though. I was lucky enough to jump above the big bomb's explosion on the first try, and Kain had enough HP to survive the smaller bombs with no trouble.
Note that out of battle cutscenes do not care about party composition at all: Rosa is not in the party at this point, but there she is anyway.
Then we move on to Fabul castle, and the plot events there. Interstingly, the game seems to not mind that Rosa isn't in the party when she's supposed to leave it, and goes on without complaint. However, to be safe I swap her back in, if only to make sure she ends up in the right slot of the shadow party. Rosa is removed from the party immediately after the cutscene in the throne room. Rydia is never properly removed from the party during this sequence, instead the first byte of her character record is temporarily set to zero before each battle, making the battle loading code think that slot is empty.
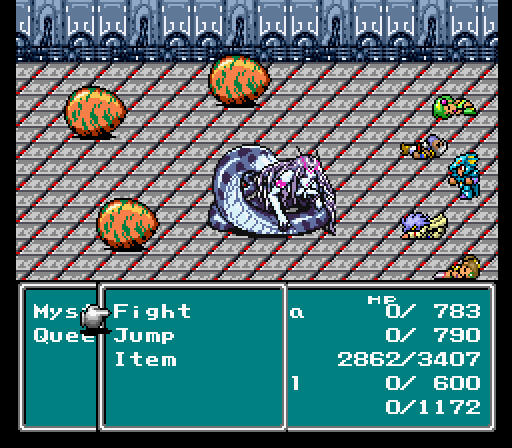
No Kain, you've been with us this whole time. Anyway, after Kain beats Cecil up (nothing new for this playthrough), it's on to Mysidia, where Kain receives random undeserved abuse from mages. I think they're just envious he can do damage without wasting precious MP.
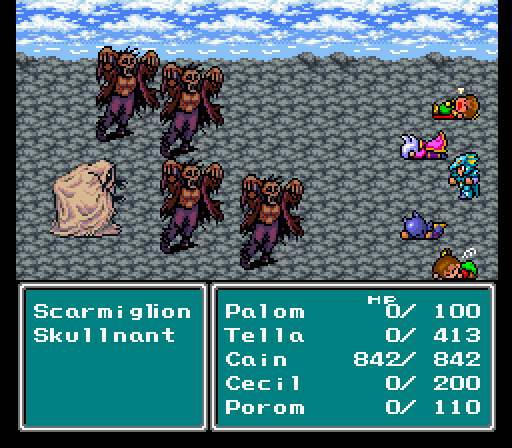
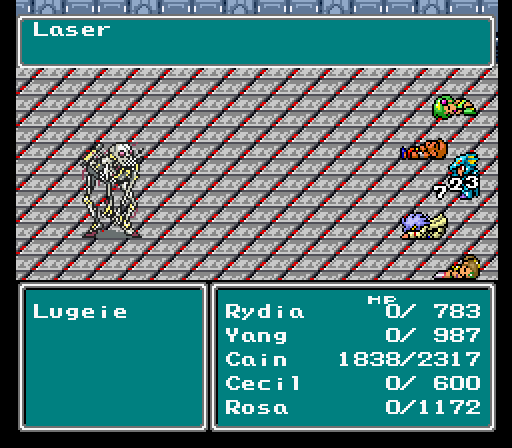
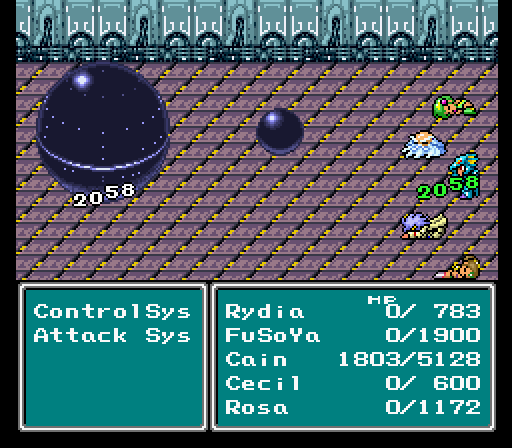
And here is the first battle that requires some actual strategy, yay. It's all magical damage in this battle, so I swap gear to maximize magic defense.
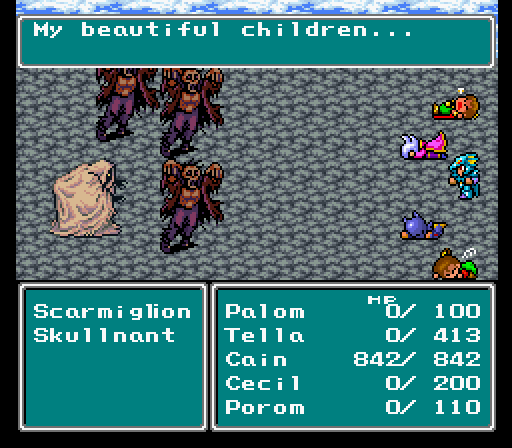
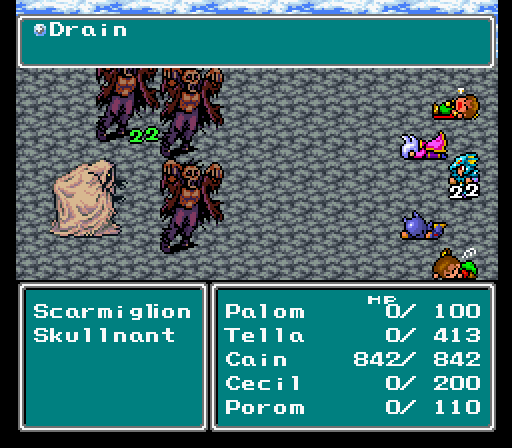
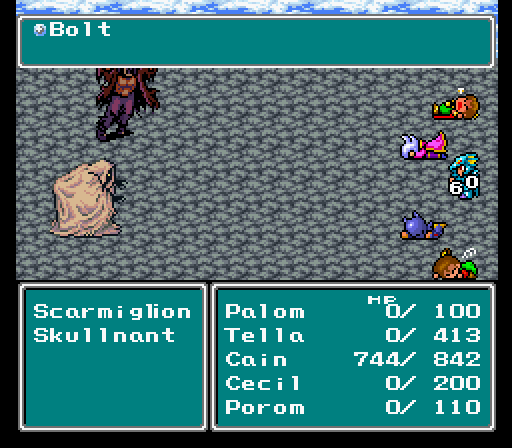
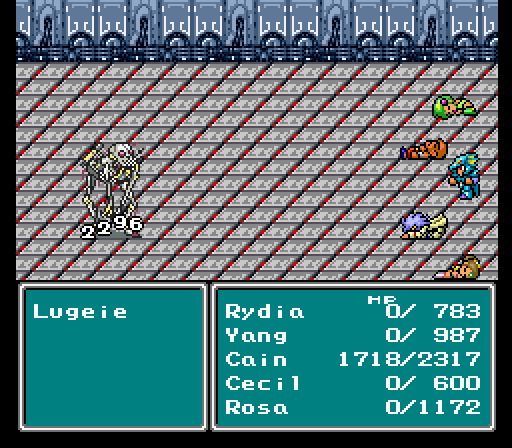
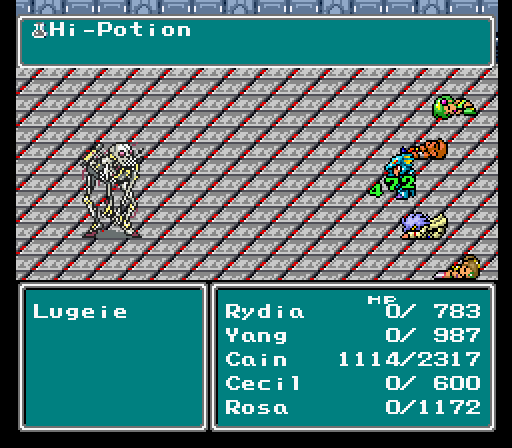
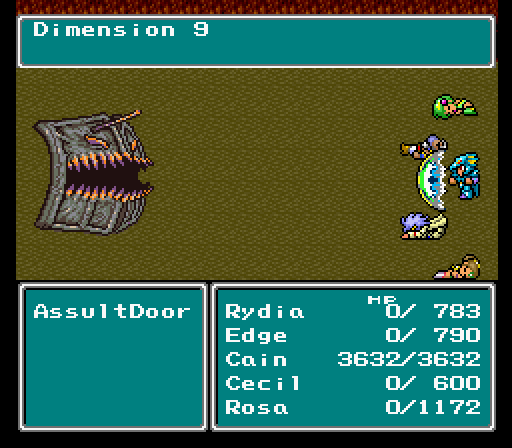
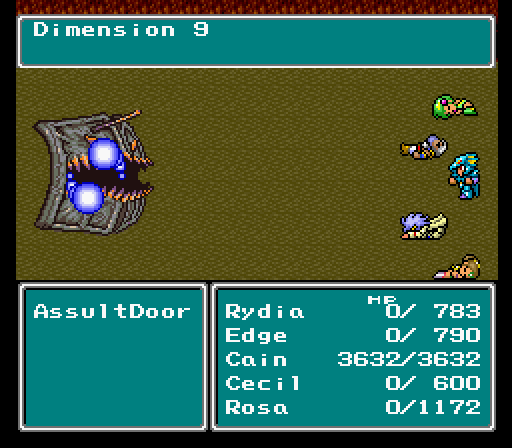
Scarmiglione's behaviour is pretty simple. Each time he gets to act, if there are any Skullnants alive, he will say "My beautiful children...", causing the Skullnants to cast Drain. If there are no Skullnants left, he will instead cast Bolt. Furthermore, he will counter with Bolt every time he takes damage. Since his Bolts do considerably more damage than the Drains, I kill all but one of the Skullnants, and then go after Scarmiglione. At that point I had enough HP to win the damage race without healing, though I could have healed with Potions if need be.
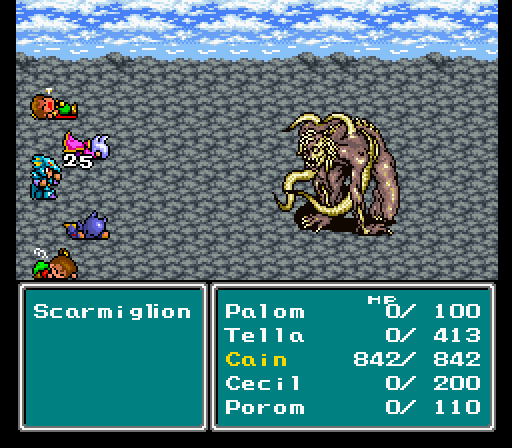
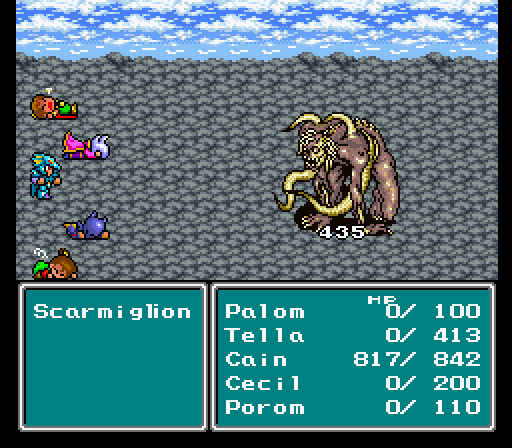
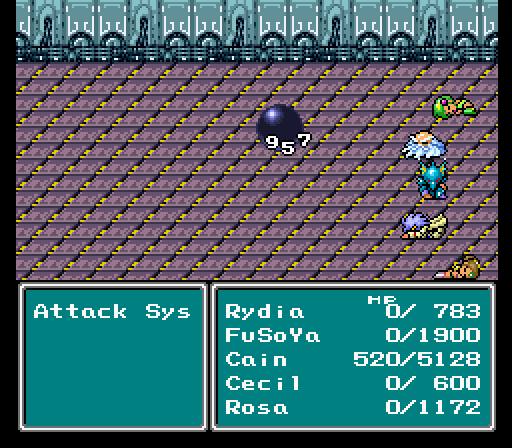
His second form, on the other hand, will only do physical attacks unless attacked with magic, and is as easy as the rest of the early bosses.
The fight with Yang in Baron is a bit tricky. He starts with 62000 hit points, but you're not expected to separate him from all of them. Normally the battle ends with a small cutscene, which is triggered by having Cecil attack him a few times. As it happens, you can end the battle by killing Yang, and the game will go on as usual. However, at this point in time I'd have to gain quite a few levels or be willing to drink several hundred potions in order to wear Yang down with just Kain, and for that sort of arbitrary scripting I'm willing to do neither so Cecil gets to temporarily leave the corpse pile.
Another thing to note is that this is another time Yang joins to make a full party, and this time he just disappears (from both the shadow party and the main party) if there is no room for him. Since this would probably lead to trouble later on, Tellah gets to take a break.
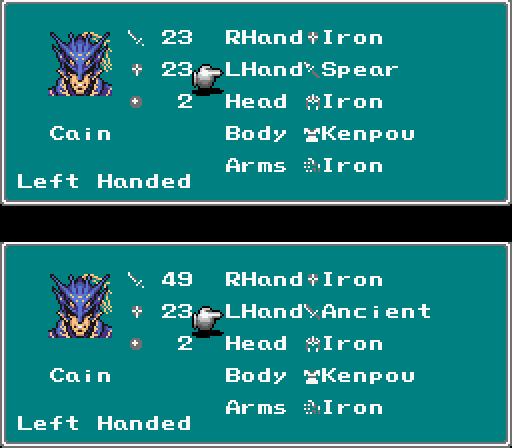
In the Ancient Waterway, there is something of particular interest, namely Kain's first weapon upgrade, the Ancient Sword. Very convenient: since Mount Ordeals there have been enemies that do not die to a single jump. Quite improper. But everything's fine now.
Oh yes: you may not be aware of this, but the requirement of wielding a spear for Jump to do extra damage first shows up in Final Fantasy 5. In FF4, Kain can use whatever and not worry about it.
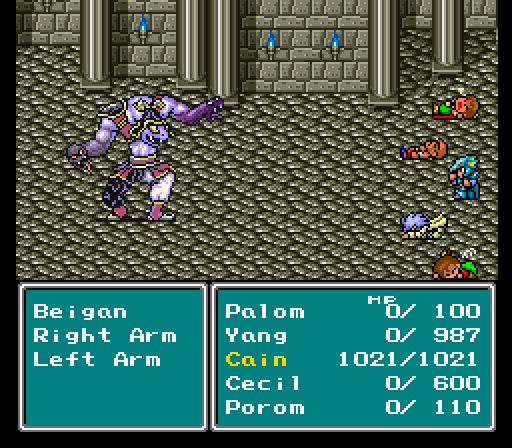
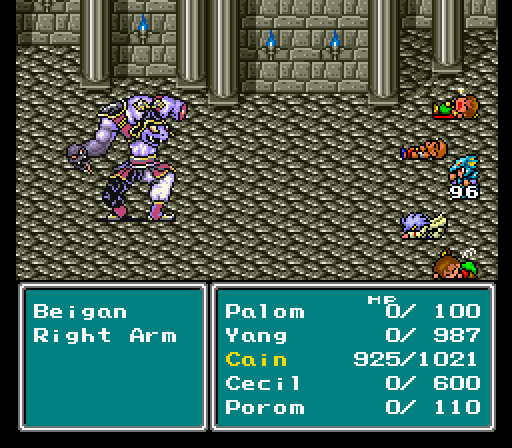
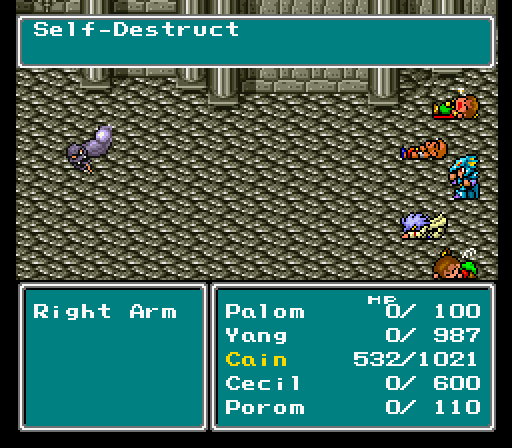
Baigan. He revives the arms if you kill both, so don't. The arms explode after he's dead, so do kill one. He didn't do terrifying damage, and missed a whole lot.
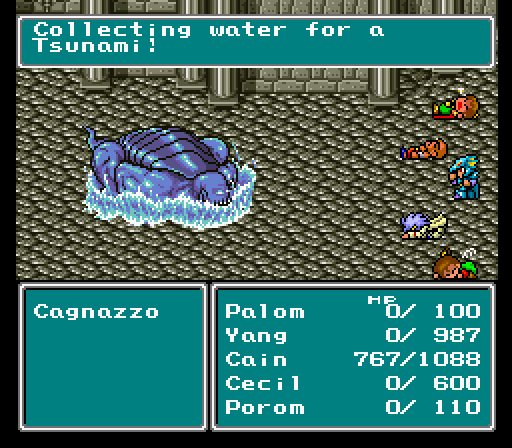

Now Cagnazzo, he's a slippery bastard. In the first phase of the battle, he will alternate between throwing Tsunamis at you, and casting Haste on himself. The timing worked out so that if I chose the Jump command when he was hasting, I'd be in the air when the tsunami hit, so no problem so far.
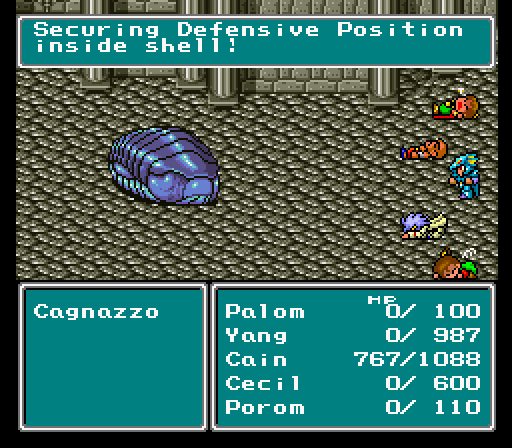
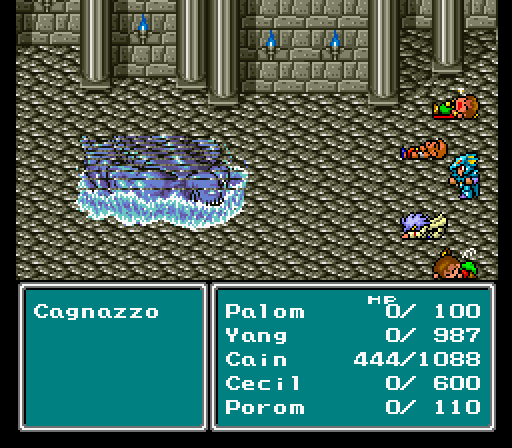
Once he gets below some HP threshold, he will start reacting to damage by going into his shell and healing before going back to attacking. He will start the defensive procedure over every time you hit him, so you can easily keep him from attacking, but with only one character there is not time enough to stop him from healing.

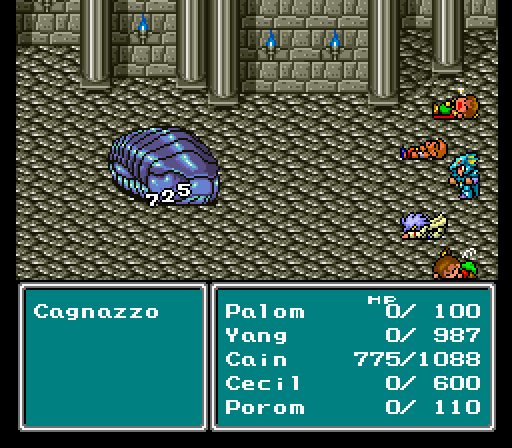
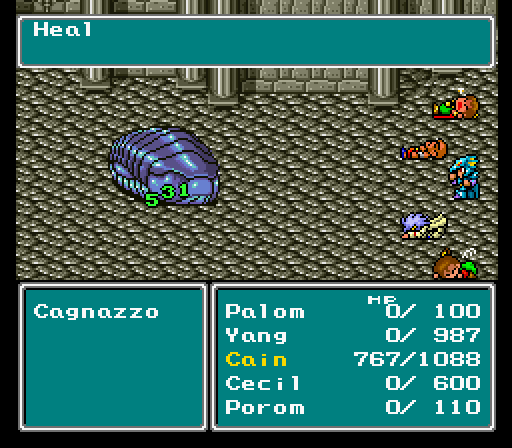
Cagnazzo healed for precisely 531 every time. I did damage between 400 to 700. This would have been great if the damage was evenly spread over this interval, but no such luck: I did less than 531 more often than not, and the battle was going nowhere. I tried waiting for Cagnazzo to come out of his shell on the theory that he would have lower defense in this form, but I noticed no change. I tried casting Haste via a consumable Hermes shoe to see if I could attack faster than he could heal, but not even close.
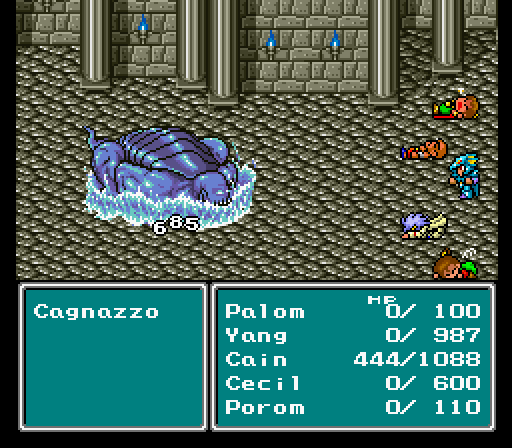
What Haste did seem to do was increase my damage. I'm not sure it was an actual effect or just luck, because the effect was subtle if real. The damage was still in the same interval, just apparently weighted towards the upper end now. I do have an idea how this could work: a character's speed is based on agility. Agility also affects the attack multiplier. If Haste works by increasing agility, it could also increase damage.
Regardless of whether Haste helped or I just got lucky, I was able to whittle down Cagnazzo's HP and end my epic battle with a particularly good hit one and a half hours after it started.
Remember, kids: "epic" is just a fancy word for "far too long".
After the twins leave and Cid joins I also let Tellah back into the party. I do like to keep things as close to normal as I can.
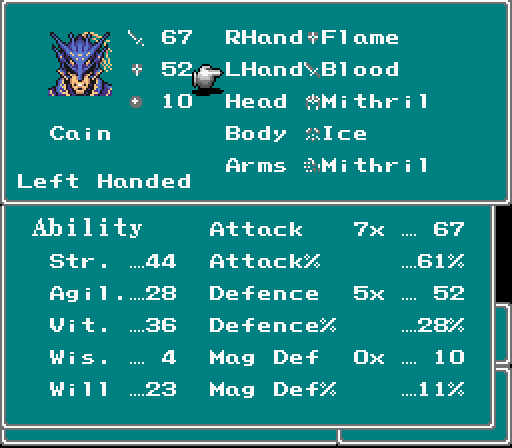
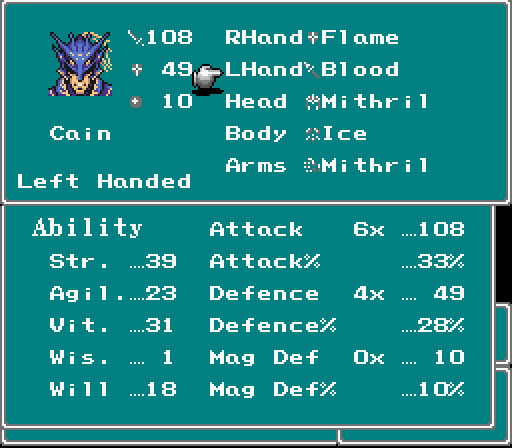
With the airship, it's equipment upgrade time for Kain. Mithril Town offers mithril armour, and Eblan castle has some interesting weapons:
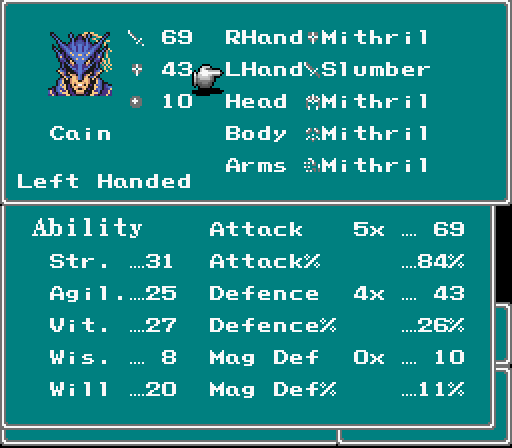

Looking at just the equipment screen might lead you to believe that the Blood Spear is the better weapon, what with its rather amazing attack value, but a look at the status screen reveals the truth: it lowers all stats by 10, and look at that hit percentage! The one thing it has going for it is that it drains life. But that's suffficient for it to be very useful. The Slumber Sword is fairly uncomplicated: good damage, and a large chance to inflict sleep onto the enemy.
Kain's shiny new toys have a problem, though: they're too shiny, what with being made of metal. Unfortunately, his old toys have the same problem. While Kain has some options for armour, he's going into the magnetic cave barehanded. Not really a problem. He'll just have to run a lot.
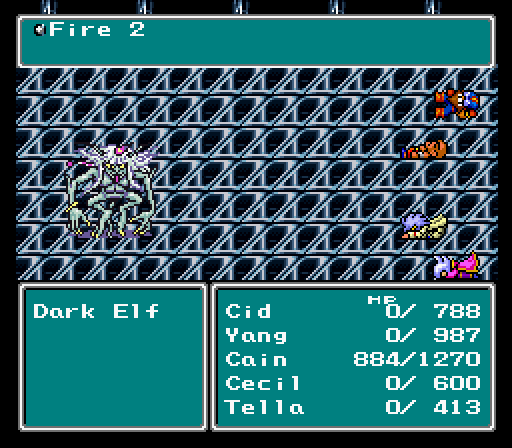
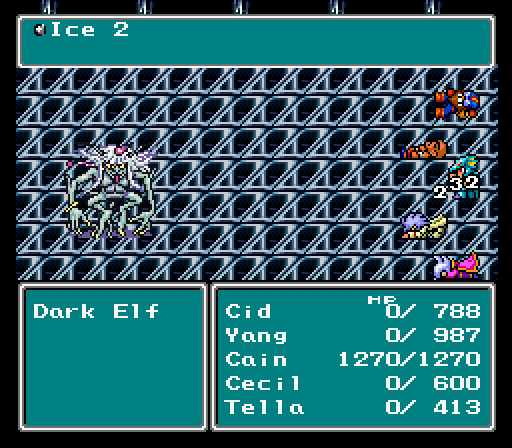
Unlike most characters, Kain can actually survive the Dark Elf's initial barrage of spells, not that it makes a difference of any kind.
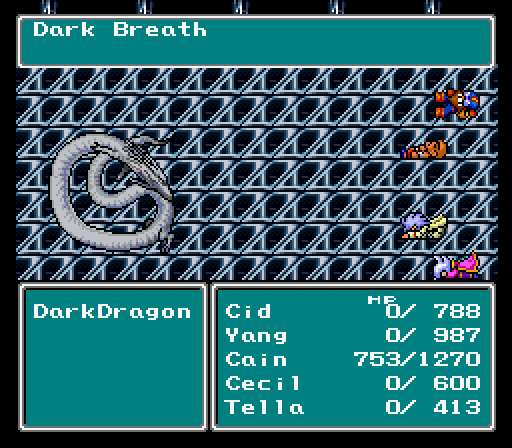
In the real fight his spells do much less damage, but his Tornados are still capable of setting HP to critical. He's too fast for it to be possible to avoid all of his spells, and I didn't quite manage to work out the timing of how to avoid every other spell, but with some luck I made it to the second phase on the second try. There the timing was easy: jump when he's doing a physical attack, and I'd consistently avoid the following Dark Breath. I don't even know how much damage it would have done, because it never hit.
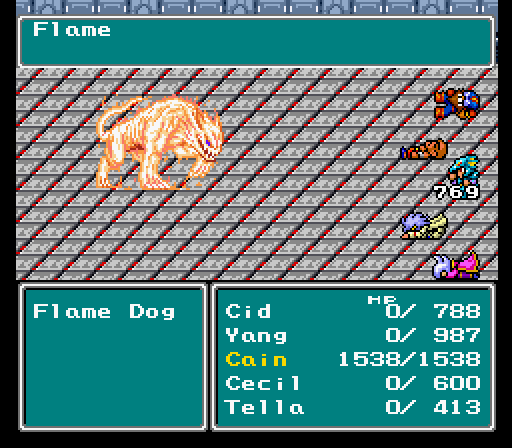
The Flame Dog guarding the Flame Sword in the Tower of Zot is kind of a mean trick, considering you've probably found and equipped the Flame Armour on the floor below. That armour makes you resistant to ice, but also weak to fire.
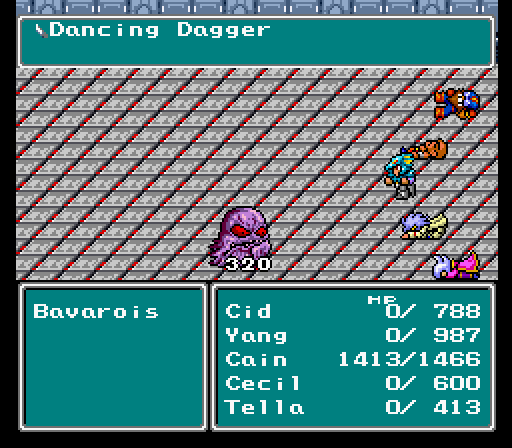
One thing I didn't mention earlier is that when I went on my Around the World Deluxe Airship Shopping Trip, I stopped by Mist and bought a Dancing Dagger. As a stabbing implement it's nothing special, but it can be used as an item to do magic damage. Take that, jelly type enemies!
(I realised later on that the Blood Spear also does well against them.)
For the Magus sisters, I managed to jump over the first Delta Attack. I didn't for the subsequent ones, but it did sufficiently small damage (after reequipping for magic defense and losing the Flame equipment: half damage against Ice is not worth double damage against Fire against enemies that use both) that I figured it was better to just pile on the damage than worry about dodging. After killing the middle sister (who can revive the other two) I switched to the Blood Spear for a bit of healing, which was fortunate as then the tall sister berserked me. My damage at that point was unimpressive (attacking from the back row), but plenty enough to keep me healed, so I just fastforwarded through the rest of the battle.

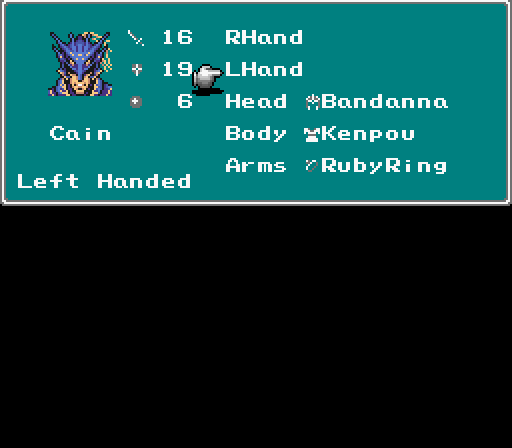
In this episode of Fun With Memory Editing, we see what happens if I don't return Kain to his spot in the shadow party before letting him rejoin. The zeroed out memory gets interpreted as a level 0 dark knight. It's mostly unsurprising stuff, but there is one interesting detail to be seen on the status screen.
You may recall that in FF4, characters may be right-handed, left-handed or ambidextrous. This is marked by two bits in the ID byte (first byte in the character data). If one bit is 1, the character is right-handed, if the other is 1 left-handed, and if both are 1 ambidextrous. But for the Kain that was created from a bunch of zeroes, both those bits are 0, making him unable to use either hand. And surprisingly, in the status screen this is not displayed as random gibberish or with just a blank, but as "learned", meaning this eventuality was planned for. Perhaps this is a remnant of a game mechanic where sagely characters like Tellah and FuSoYa would be unable to use weapons, but would maybe instead have a bonus to magic? The truth is probably lost in the mists of time.
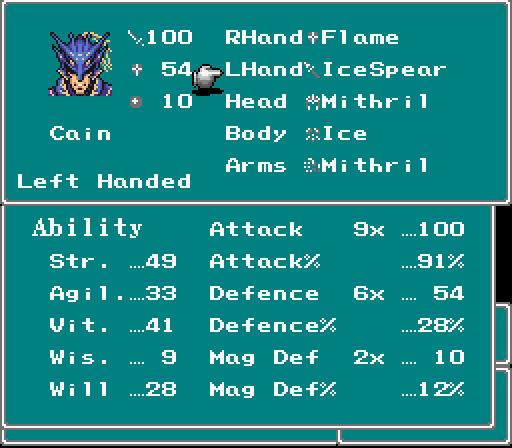
After reloading to a saner party composition I uneqipped Kain (equipment gets changed when a character rejoins), moved him out of the party, and let him rejoin the proper way. He brings a Wind Spear with him, but the Flame Sword is superior.
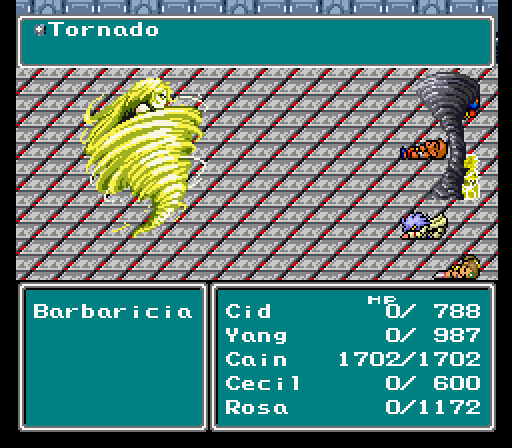
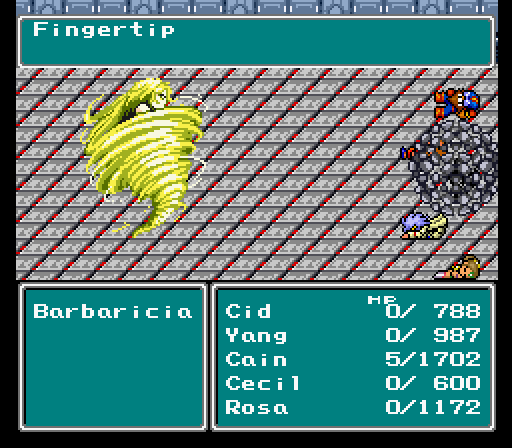
The battle with Barbariccia is very hard for everyone but Kain, and problematic even for him. She works like this: at the start of the battle she will turn into a whirlwind form where she has heightened defense. While in this form she will first cast Tornado (lowers HP to critical) and then without pause inflict gradual petrification. Her second action is a weak physical attack, and then she repeats. If hit with a Jump attack (even if it misses, as is often the case with the Blood Spear), she will turn back to her standard form, do two physical attacks, and then turn back into a tornado.
If Kain continuously jumps, she can be kept harmless. The problem is that she has time to weaken and partially petrify Kain before his first jump. What's worse, the petrification worsens over time, until it kills him. It can be healed with a Gold Needle, but pausing the jumping for that long gives her time to reinflict it. Because of the Tornado, he will also be at critical health. If he then misses his Blood Spear Jump, he will have to eat two attacks at critical health. This makes the odds of making it through the battle very slim.

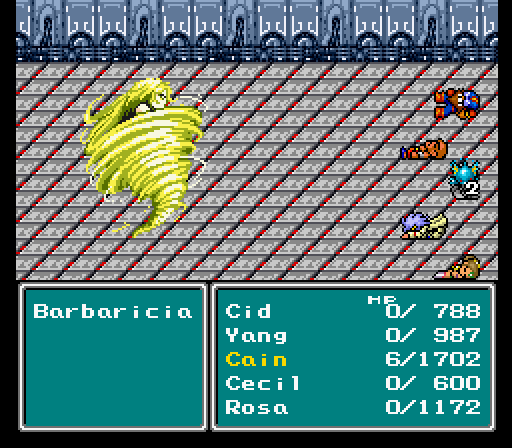
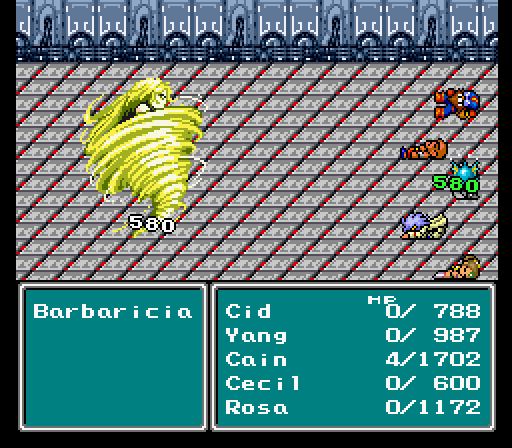
The solution: First, speed up via a Hermes Shoe. Second, Jump with the Blood Spear. Third, use a Gold Needle. Then jump again. The Hermes Shoe and the fact that it takes longer for her to retransform after being hit by a spear than it took for the first transformation is sufficient to hit her before she petrifies you again. Then keep jumping, but make sure to wait a few seconds after Barbariccia's second attack in her normal form, or you'll hit her before she transforms. Since there's just enough time to use an item and then jump, healing is also possible even if the Blood Spear keeps missing. It took a lot of tries and was a tense battle, as jumping too early meant very likely doom, but eventually Barbariccia was dead.
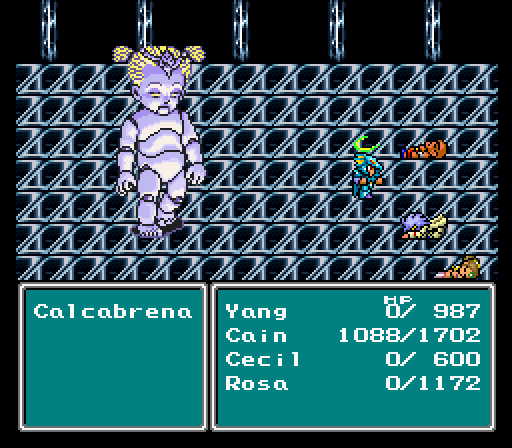
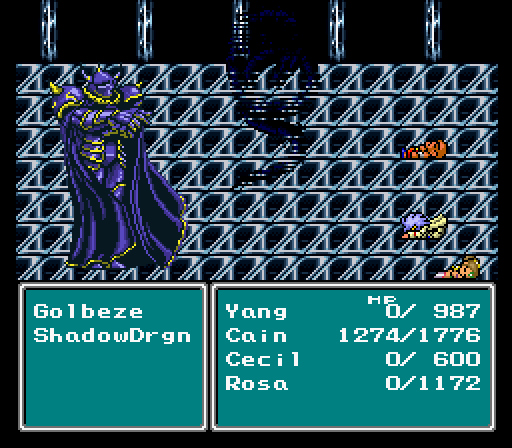
Calcabrina was no problem. It can confuse, but being in the back row makes that pretty unthreatening. In the Golbez fight I was able to jump before he paralyzed the party, which was convenient. He did damage faster than the Blood Spear was healing me, but not fast enough to kill me before I defeated him.
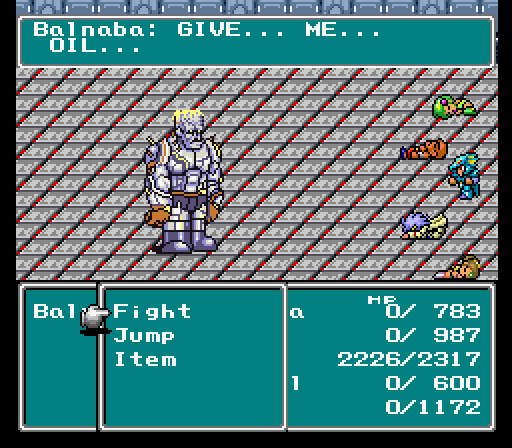
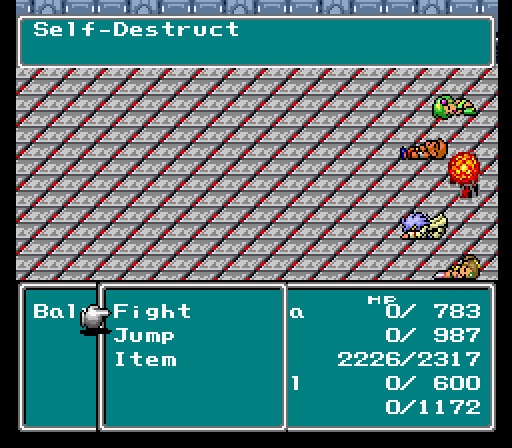

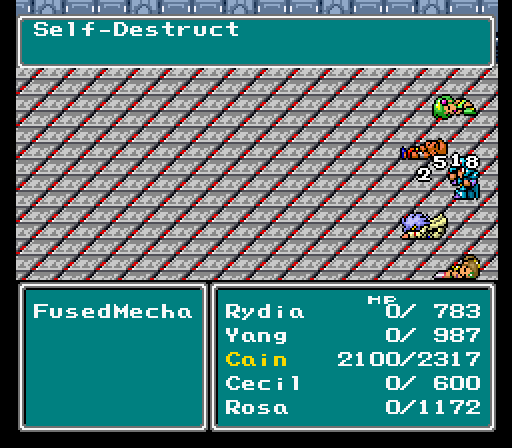
The only danger in the first part of the fight against Dr. Lugae is self destruction: If you kill Lugae, Barnabas explodes, and if you kill Barnabas, Lugae uses his remains as a mecha suit, which explodes. So one way or another, something's blowing up. Self destruction does damage equal to the caster's current hit points, so the solution was simply to lower Barnabas's HP to something suitably low, and then kill Lugae.
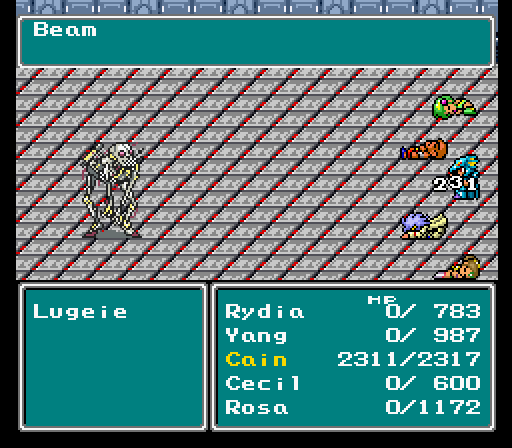

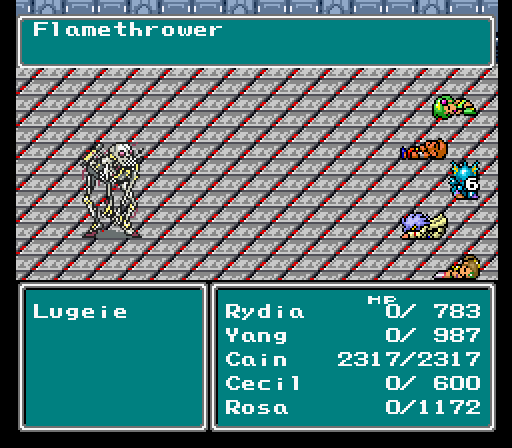
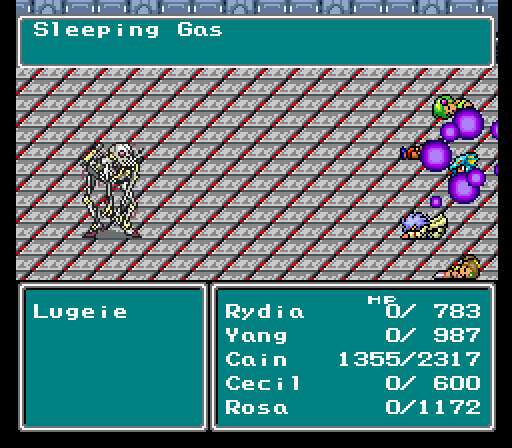
The second part is trickier. Lugae's AI script is, as far as I've managed to determine, this: he starts by using Poison Gas. Then he does a repeating cycle of Beam (minor damage), Laser (huge damage), Flamethrower (neglible damage) and Medic (cures your status). If that was all of it, it would be simple: just jump over the Lasers. However, he also has a counter attack: Sleeping Gas. If that hits, Kain stays asleep until the next time Medic comes up, and there is not enough time to jump over the next Laser attack at that point, not even with Haste.
Part of the solution to this puzzle is understanding how Laser works: its base damage is equal to 20% of Lugae's current hit points. So the more damage I inflict, the less he'll do to me. Additionally, if I only jump over his Laser attacks, I have significant waiting time in which to use HiPotions. They only heal about 350 to 500, but that's still helpful. With a little bit of luck in dodging the Sleeping Gas, this should be doable without using any hard to replace items.
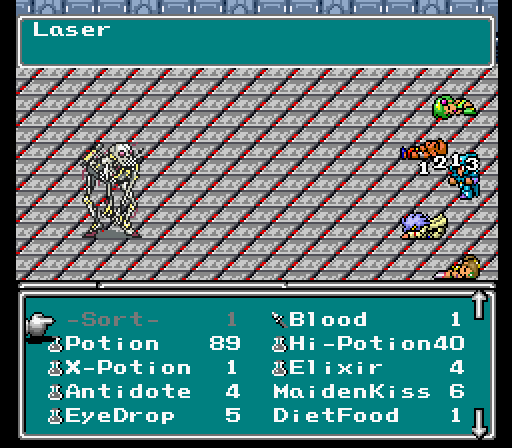
And indeed it was. The first Sleeping Gas missed, so I got two good hits in before the real damage started coming, and by that time Lugae's doom was already sealed. The last Laser before he died even missed, not that it would have mattered at that point.
On the way to the next point of interest, I pass the Cave of Eblana and get the chance to thank the Eblanans for giving me the opportunity to loot their nifty evil bloodsucking spear from the ruins of their home.
...on second thought, maybe I shouldn't mention that.
In the cave of Eblana is also the Blood Sword, a watered down version of the spear, above compared to my current main weapons. The stat penalties are halved and the hit rating isn't as bad, but the damage value is terrible for this point. I'll probably never use it.
Elemental weaknesses are a beautiful thing.

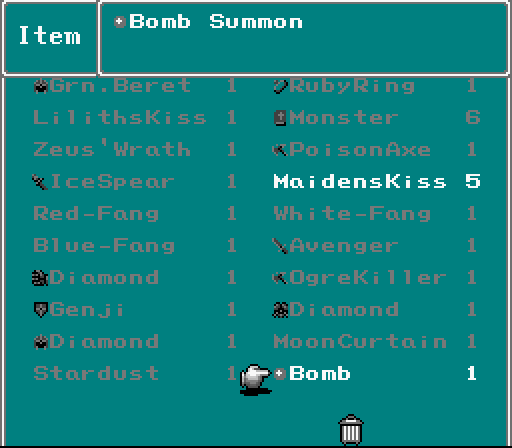
Before moving on to the Sealed Cave, I make sure to get the latest equipment. Diamond armour from Tomra, and the Defender Sword and an Aegis Shield from the Land of Summoned Monsters. I stay out of the Sylph Cave, though. That place is lethal, and has nothing terribly amazing to offer Kain. I might return later.
Those of you who have read Sullla's Solo Cecil run may recall that the Trap Doors in the Sealed Cave gave him a lot of trouble. But Kain with his jumping skills should have no trouble, right?
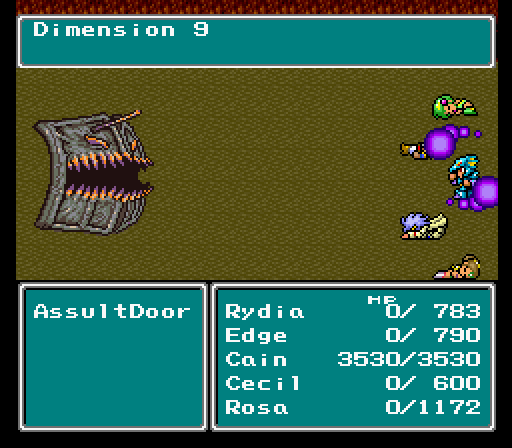
Only if he has time to get in the air before the Trap Door casts Dimension 9. Which he does not, even att 99 agility. Dang, I was hoping that would work. Looks like the situation is no better for Kain than for Cecil. If only I has some way of casting Wall!
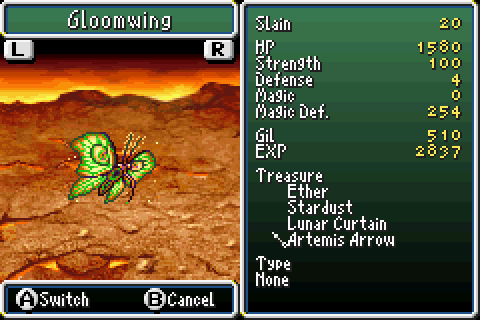
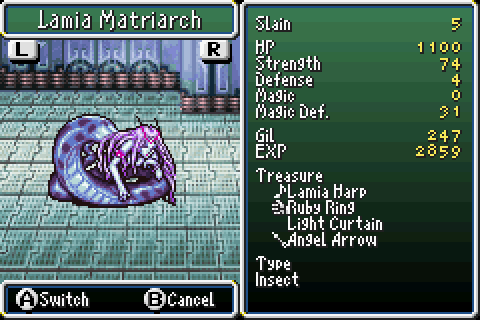
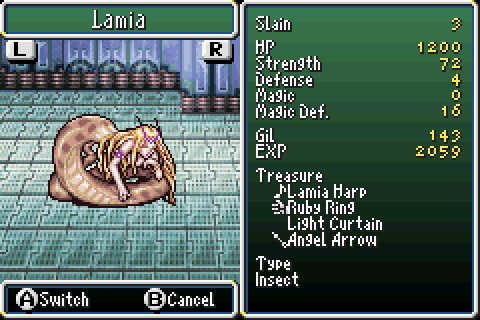
Oh, but I do, as these images from the GBA version's bestiary show. Both Lunar Curtains and Light Curtains will cast Wall on the entire party (the difference is that a Lunar Curtain lasts longer). I need but two of those to make it through the Sealed Cave. Now, at this point in the game I'm stuck in the underworld, and therefore only Gloomwings are available. They're kind of rare though, and I think I'll save time if I reload a save from earlier and look for Lamias in the Tower of Babel (revisited), where they are plentiful, especially in the area immediately after dropping down from the crystal room.
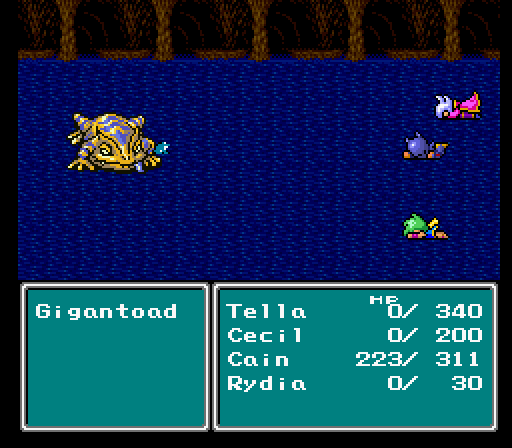
I mean, look at that encounter. Each of those eggs is a Lamia. I had my two curtains and was ready to redecorate the Sealed Cave in no time!
Those doors just have to go. I'm thinking curtains, are you thinking curtains?
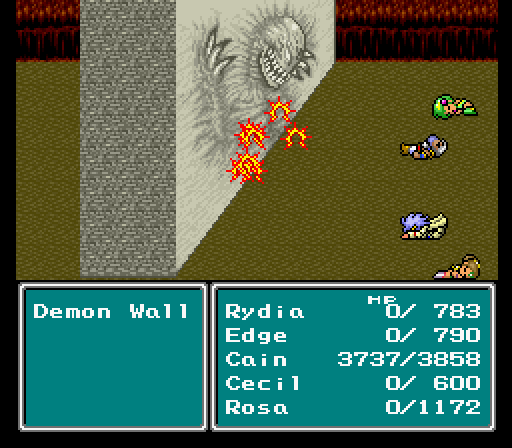
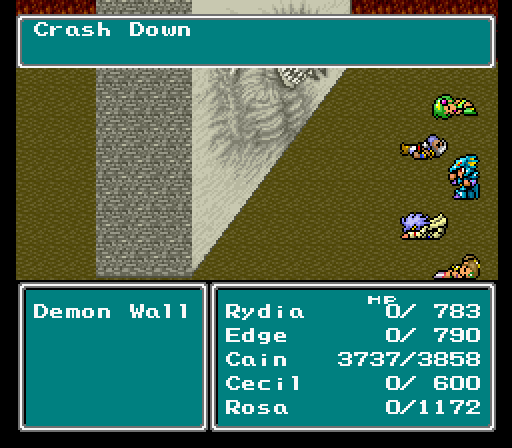
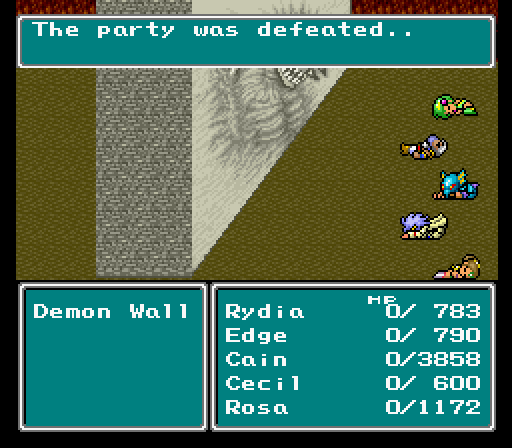
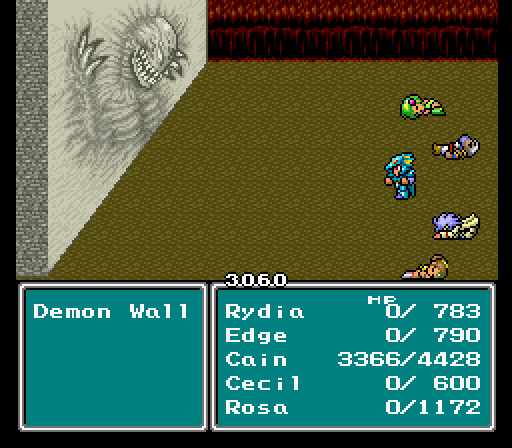
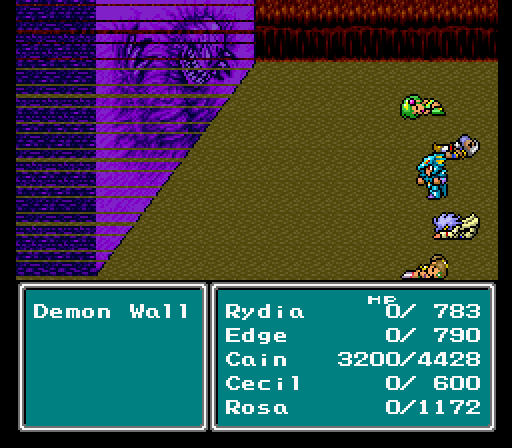
Which brings us to the boss of the Sealed Cave, the Demon Wall. There's an interesting bug that causes the wall to attack itself if there are no valid targets (such as when Kain is jumping). Unfortunately, this bug does not apply to the instant death attack the boss starts spamming if it makes it all the way to the right. And even with the boss helping, there is just no way Kain can do damage fast enough at level 57. So while procuring those Light Curtains was a nice manoeuvre for avoiding level grinding, it seems it may have been for naught. Is it really so? I'm afraid it is: the Light Curtains were a waste of time.
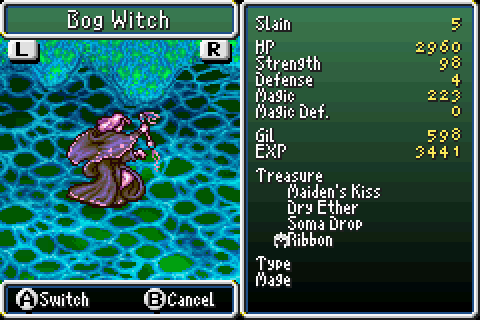
I should have gone and stolen a Ribbon from these dear little old ladies in the Sylph Cave to begin with, which would have protected me from the Trap Doors as well as the boss. Oh well, this sort of thing happens when you solve problems as they appear. So to the Sylph Cave I go... so much for there being nothing of interest there!
However, after som grinding and research, it turns out I am overselling this solution. By my estimation, there's about a 1 in 1200 chance of any given Bog Witch dropping a Ribbon. I am much more likely to become powerful enough to defeat the Demon Wall without it than I am to get one.
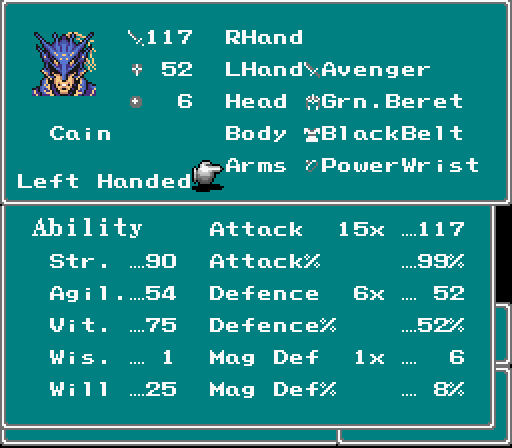
And indeed, at level 62 I got tired of grinding and went to try it out, using the Avenger Sword (which raises stats and causes Berserk)... and won without trouble, downing the wall in nine hits with plenty of time to spare. This surprised me; judging by Sullla's experiences, it should not have been possible. I considered that there was some Kain-specific factor that lets him attack faster, but if so I should have been able to defeat the Trap Doors as well, which I still could not. Makes me wonder if I could have defeated the wall (using Berserk) on my first visit to the cave. Clearly jumping was not the way to go in that battle!
Oh well, I guess this means getting those Light Curtains was not a waste after all, so hooray for that.
Upon leaving the cave Kain leaves of course, but that's dealt with as before. Then on to the moon, to pick up some nifty Genji armour, and one old man (I boot Edge to make room for FuSoYa).
Oh sure game, now you give me an ultra-rare drop. Thanks.
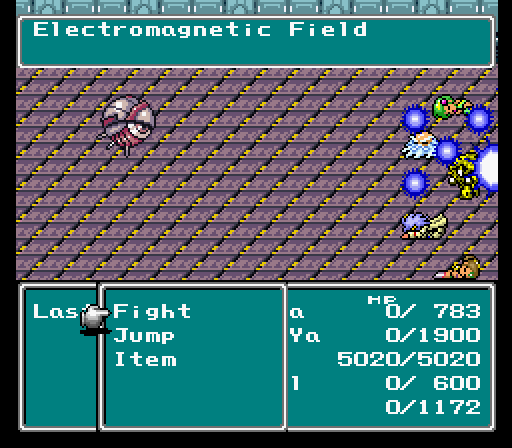
Behold, a most dangerous foe. It's found in a chest in the Giant of Babel, and playing as a single character, this thing will keep you stunlocked forever with its electromagnetic field. It can be disabled with a Wall-casting item, but you just get an Elixir for beating it, so it's best to leave it alone.
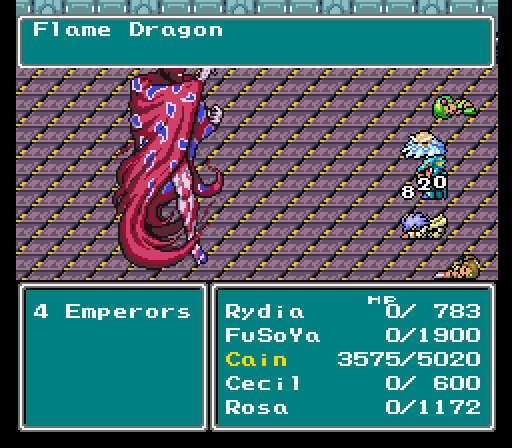
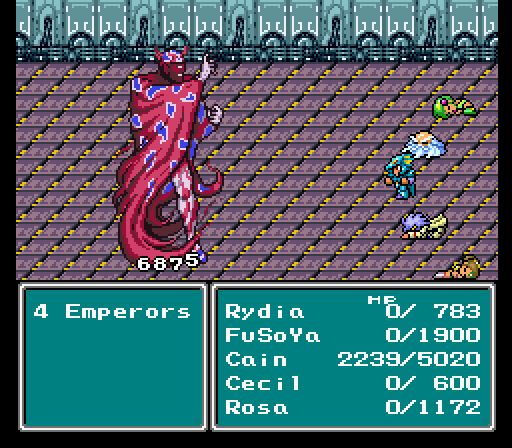
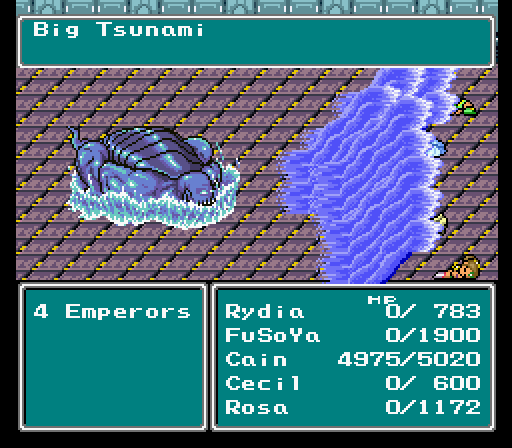
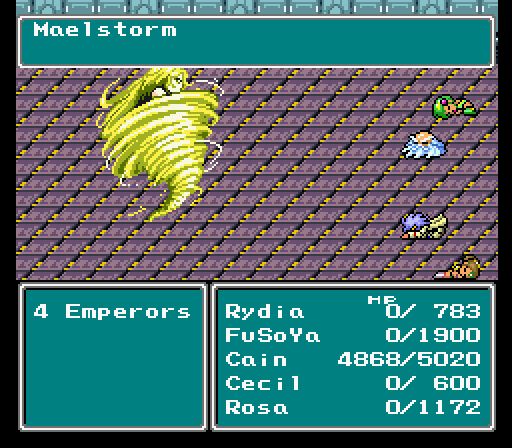
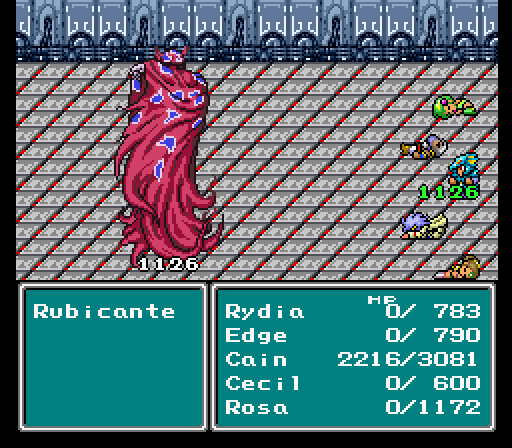
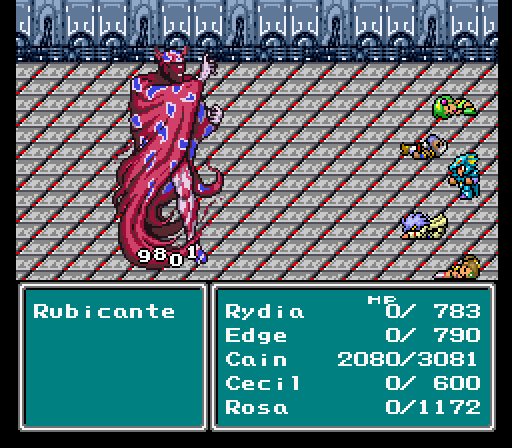
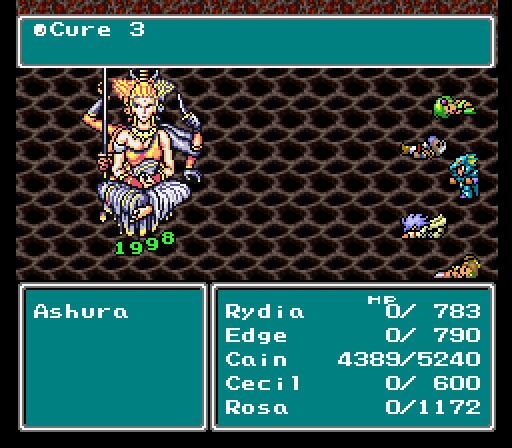
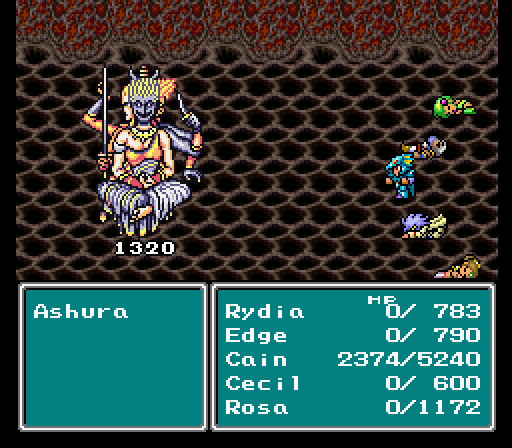
The four emperors is more four boss fights than one, just without the chance to heal or clear status between them. Scarmiglione does physical attacks and casts Curse. Jumping from the back row decreases his damage sufficently that I can make it through the battle without healing. Healing is nevertheless a good idea, because you don't want to start the battle against Rubicante on low health. He casts powerful fire spells rapidly, and nothing else. Equipping an Ice Shield is a must, but with Kain's terrible magic stats he still takes a lot of damage. Moving to the front row and attacking with the Ice Spear seems to be the way to go. Cagnazzo is resting time. He does a series of physical attacks and then throws a Big Tsunami at you, which Kain can of course jump over. The Blood Spear ensures good health at no cost going into Barbariccia's portion. She does petrification and weakness attacks, the first of which is blocked by the Aegis, and the latter being perfect for jumping over. So, in summary, switch shields Genji to Ice to Aegis, be ready to use the big healing items against Rubicante, and learn the proper jump timing. In the end I only needed to use a single Elixir.
The CPU and its nodes are very unthreatening. Their only attack is the 512 damage Laser (at least in the version I'm playing it has the same name as Lugae's attack, but it's different and not HP based) from the Attack Node, which is easily outhealed by the Blood Spear.
There is one complication, though: Kain rejoins immediately after the fight. I can easily rearrange the party during the cutscene, but I cannot deequip Kain, so it's important that I'm not wearing anything irreplacable at the end of the battle. Conveniently, Kain returns wearing Genji armour, so the only tricky part is the weapon. I killed the Defense Node, damaged the Attack Node until almost dead, killed the CPU, and finally finished off the Attack Node with unarmed Jump attacks.
Some clean up before the end game:
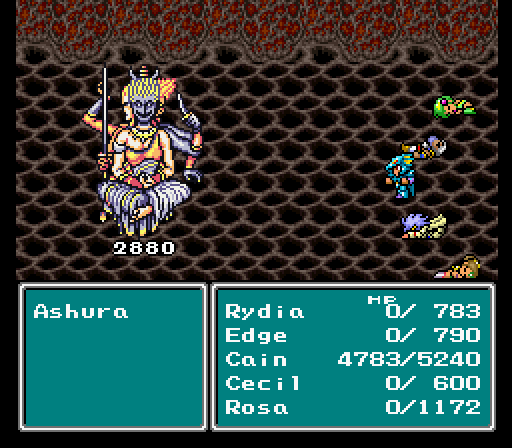
At this point (level 68) Asura was not much of a problem. I used the Avenger, as much for the attack speed as damage boost. Asura appears to only use her heals and buffs if she hasn't been attacked in a few seconds, so if you attack her rapidly she'll mostly just punch you back. My damage decreased towards the end of the battle due to the stacked Protect spells on Asura, but it was not enough to save her.
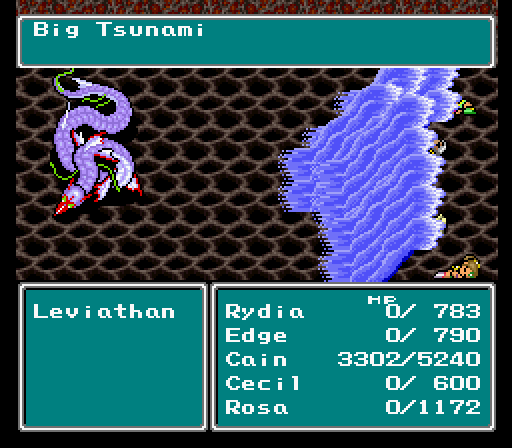
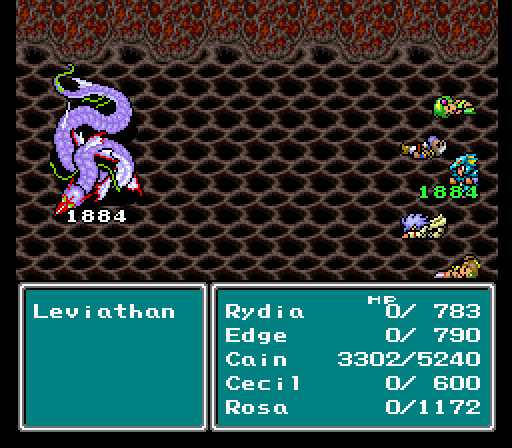
Leviathan was even easier. Flame Shield to weaken his Ice 2 spells, Blood Spear for healing, and then just keep jumping. One interesting little bug is that Leviathan does not turn around like he should if Kain is in the air. This appears to be purely cosmetic, though: he had no trouble sending those Tsunamis even with his back turned.
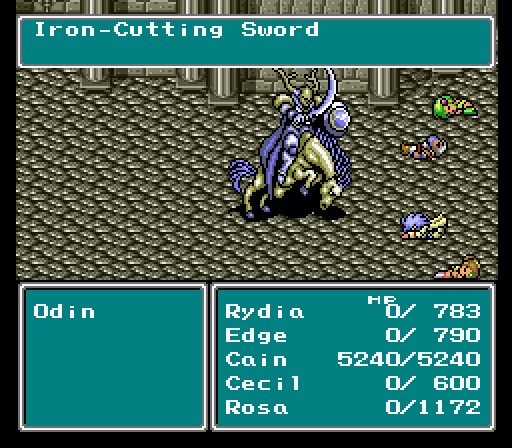
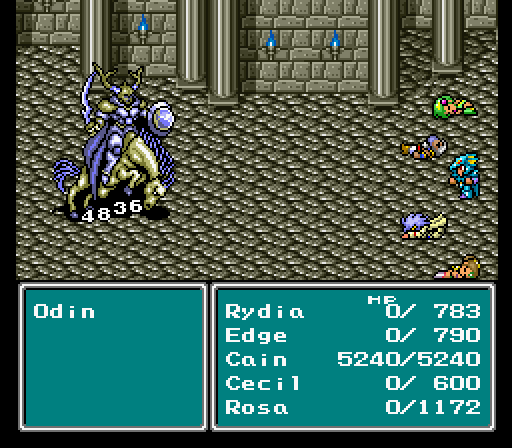
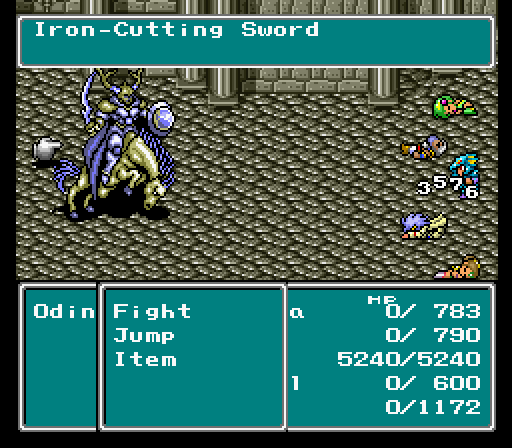
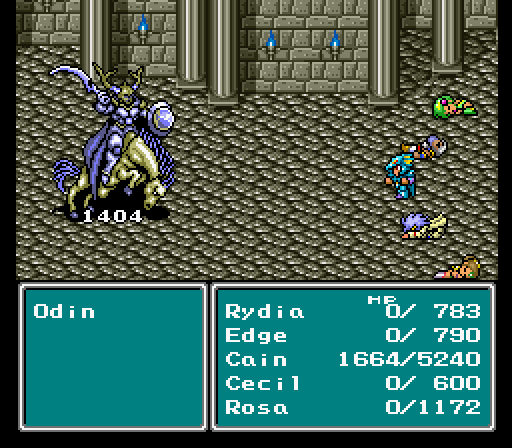
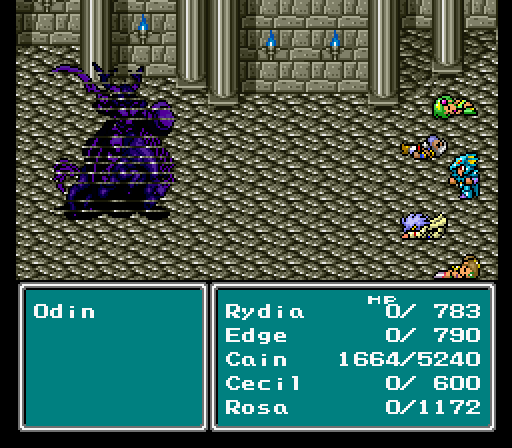
Odin was harder. He's fast enough that I could only dodge two out of every three Zantetsukens. Even with my damage-improving armour set, the five jumps I had time to do were not enough to kill him... but the one final ordinary attack I managed get off moments before he killed me was, and Odin went down with his sword raised. Dramatic!

Bahamut is a boss that has one well spaced out and clearly cued attack.
In the Lunar Subterrane I pick up some nice items. The Dragoon armour set gives resistance to the three major elements and is generally the best Kain is likely to get in a regular playthrough. Since Kain is going alone though, he gets a Protect Ring instead of the Dragoon Gauntlets, sine it gives better defense and raises Vitality by 15.
I skip most of the bosses, and only go for the ones guarding items I can use. Conveniently, they're both right next to a save point.
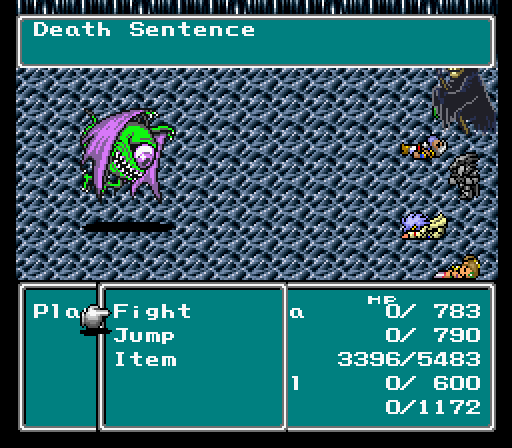
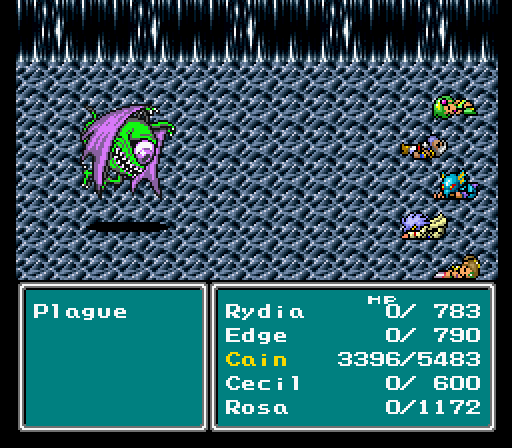
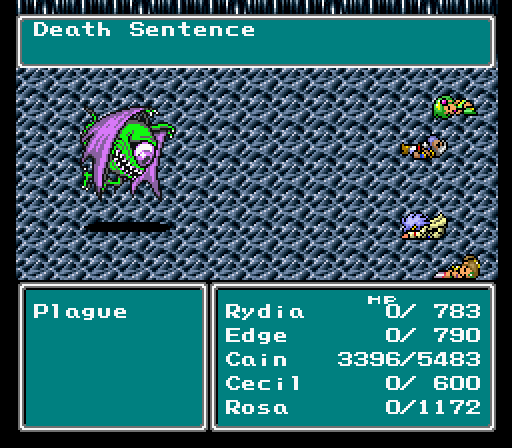
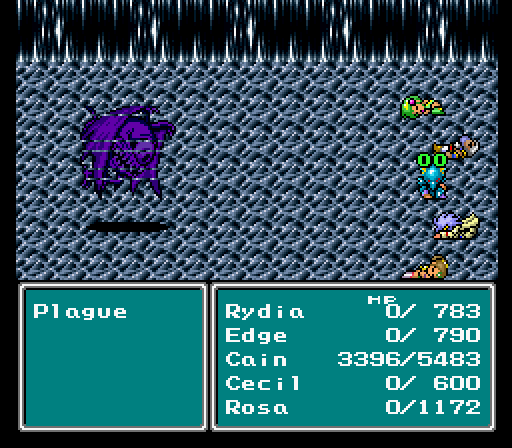
First up is Plague, guarding the Holy Lance. Plague's deal is simply a time limit: at the start of the battle he casts Doom on you, giving a short countdown to death (that bypasses Death immunity; Ribbons will not save you here). After that he just keeps casting Haste on you. The idea is that you have to kill him before the countdown finishes.
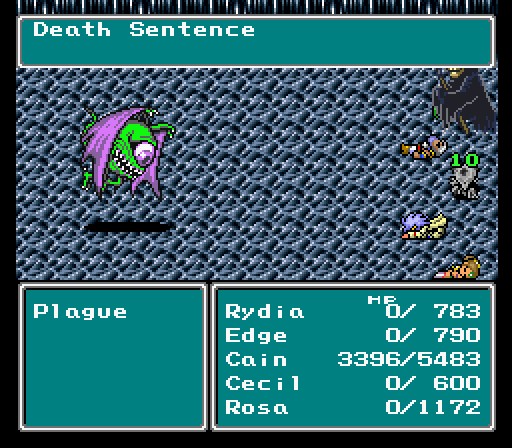
This may seem impossible with only a single damage dealer, but there are a few ways. The one I think is the neatest is this: if Kain is in the air and everyone else is dead, Plague will be triggered to recast Doom. If Kain jumps with just the right timing, Plague will have time to cast Doom twice while he's away, with the second one actually hitting after Kain lands, resetting his timer. This is very hard to time, especially since those of Plague's Haste spells that actually connect keep changing the correct timing, but I believe it to be possible. I think it's really cool that the one character that can use the weapon Plague guards also has a unique strategy to deal with him (though I suppose Edward's Hide command might have similar effects).
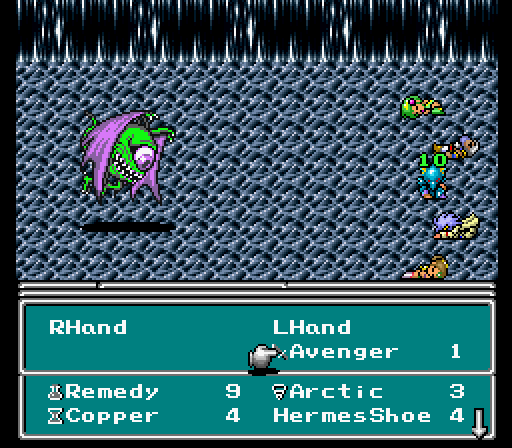
A much easier strategy rests on two facts. First, Plague is a flying enemy, the only such boss. All flying enemies are weak to an element variously called Wind or Throw in different versions of the game. As it happens, all spears except the Blood Spear have this element natively (as do bows and thrown weapons). Second, there's a bug associated with the Avenger Sword: if you change to it in battle, your weapon stats do not ever get changed to the Avenger's, and remain as whatever you had before. In fact, I think that in general equipment changes do not get committed until you choose a command (I've been petrified immediately after changing to the Aegis, for example), which you do not ever do once the Avenger's Berserk status takes hold. So by starting with the Gungnir Spear (a slightly worse version of the Defender Sword, and my best spear currently), and then switching to the Avenger, I can be quickly throwing berserked attacks against an elemental weakness, leading to rapid eradication of Plague. I call it the penicillin strategy.
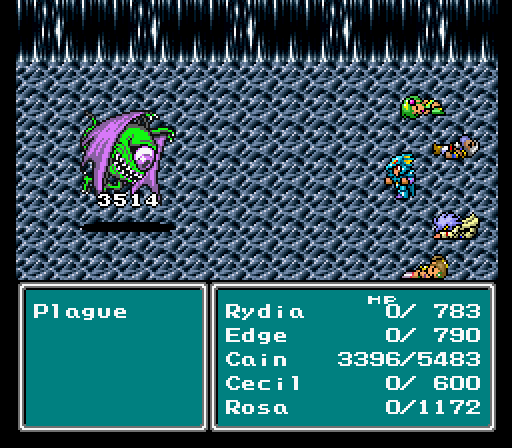
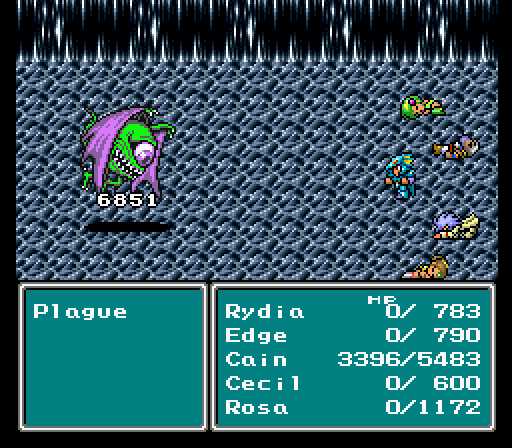
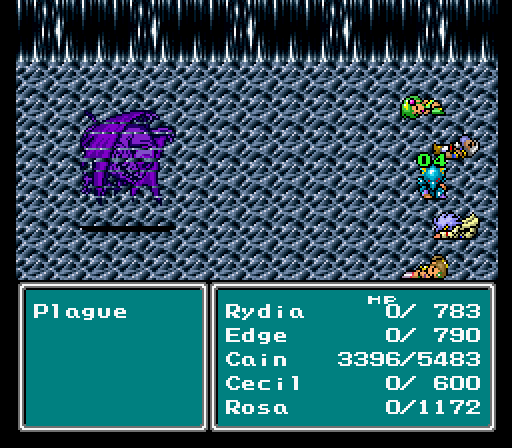
Unfortunately, it turns out that just equipping the Avenger and having it attack normally is enough, even without attack raising armour. Isn't it sad when your cunning plans turn out to be unnecessary?
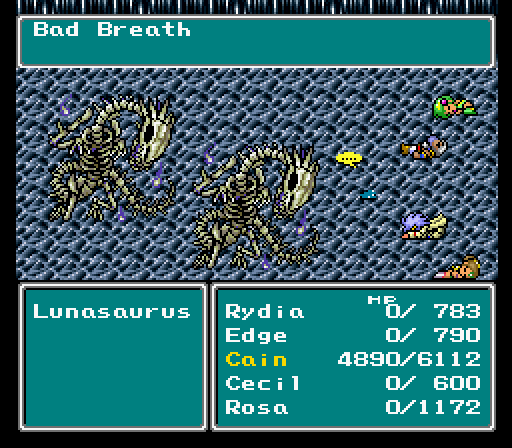
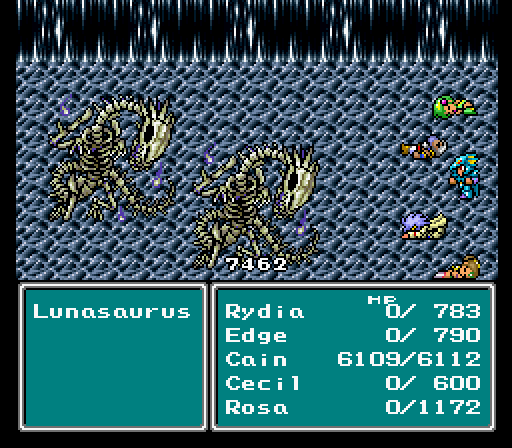
The Lunasaurs' main gimmick is how they react to the Fight command: they cast Wall and start a lethal barrage of Bio spells. This is not a one time counter, but apparently a lasting track switch in their battle script. Luckily Jump does not trigger it.
Otherwise, they have two attacks of note: Flame, which does about 500-600 damage, and Bad Breath, which (thematically appropriately) inflicts a bunch of status ailments a Ribbon would be very handy in preventing. These are spaced out by a bunch of irrelevant physical attacks. When one of them dies there is a very minor script change, in that the surviving one starts to counter damage with an additional Flame attack.
They are not weak to Holy, so the Flame Spear is the superior weapon in this fight. Jumping over the Bad Breath is the most important part, but getting hit from it can be recovered from. Not a terribly hard battle.
And with that Kain has his ascension kit. Well, probably.
You see, at some point (I think in the Giant of Babel) I picked up an Alarm item, which summons the rarest enemy encounter in whatever location you use it. Since I have no other use for it, I figured I might have a try for a Pink Tail, especially since the Blood Spear makes defeating them trivial.
They didn't drop any, of course, though they did give me 2.8 Elixirs' worth of Gil.

Annoyingly, only Cecil can use the Crystal against Zeromus. Okay, "one who follows the path of darkness cannot make the crystal shine" or however that went, so fair enough on Kain, but I really don't see why Rosa shouldn't be able to use it.

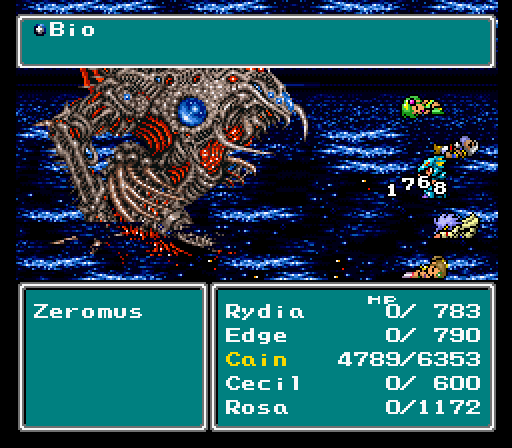
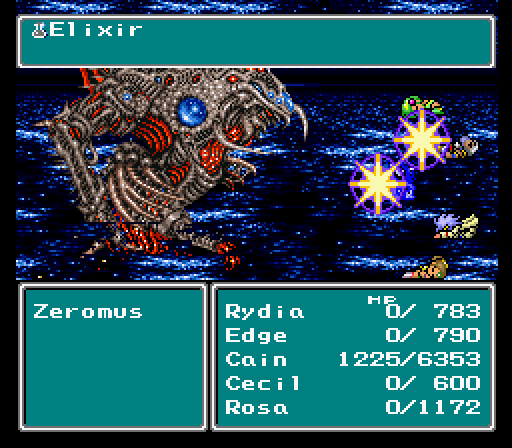
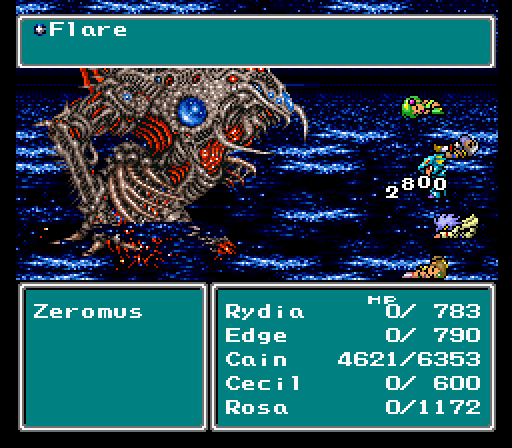
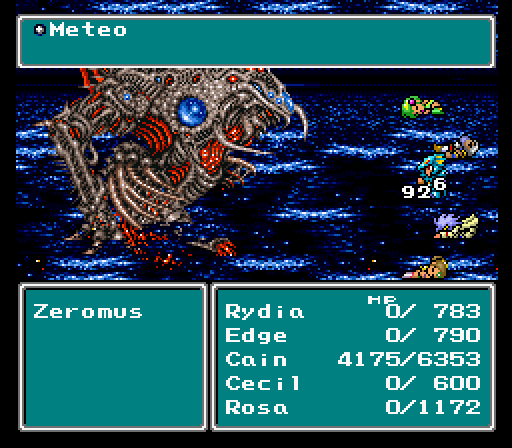
Other than that, it's an uncomplicated battle. Kain does damage, Zeromus does damage, Kain uses Elixirs, Zeromus doesn't. The only other thing that happened is that Zeromus dispels your buffs, but I wasn't using any. I was slightly worried when he started casting Meteos, but they actually did very little damage and missed about half the time, so his damage atually went down towards the end of the battle.
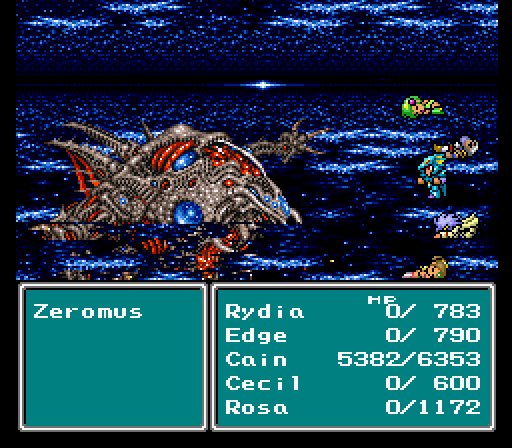
And thus it ends, and Kain finally shows Rosa that he's at least as good as Cecil, and now she will surely love him or something like that. Undoubtedly, if he stands around long enough on a mountain with his golden hair flowing in the wind, she'll fall into his arms any moment now.
A concluding thought: with the ability to edit memory directly, there are no real limitations on party composition at any point in the game. You can not only retain characters after they are supposed to leave, but also have them join well before they should. So for the sake of public knowledge, here are the data blocks of all the characters (except Cecil and Kain, as they are present at the beginning), in the state they are when they first join.
Rydia
83 02 01 00 00 00 00 1E 00 1E 00 0A 00 0A 00 03
04 02 08 05 03 04 02 08 05 00 00 01 28 03 00 00
00 00 00 04 04 00 00 00 00 19 06 00 00 01 28 0A
77 8E A7 07 01 00 00 00 00 00 00 10 00 00 00 00

Tellah
84 03 14 00 00 00 00 54 01 54 01 5A 00 5A 00 05
08 07 10 10 05 08 07 10 10 00 00 01 32 0A 00 00
00 00 01 05 01 00 00 00 01 1E 05 00 00 01 1E 0A
00 8E 00 0F 01 00 00 59 D6 00 00 10 00 59 D6 00

Edward
85 04 05 00 00 00 00 3C 00 3C 00 00 00 00 00 06
09 02 07 07 06 09 02 07 07 00 00 01 56 0A 00 10
00 00 00 06 07 00 00 00 01 1A 05 0C 00 02 1E 0A
78 97 A8 44 01 00 00 84 01 00 00 10 00 90 01 00

Rosa
86 25 0A 00 00 00 00 96 00 96 00 50 00 50 00 08
08 06 0A 12 08 08 06 0A 12 20 00 02 20 0C 00 00
00 00 00 06 04 00 00 00 01 19 08 00 00 00 00 0A
77 8E A7 54 32 4D 01 5B 08 00 00 10 00 5B 08 00

Yang
C7 06 0A 80 00 00 00 00 00 2C 01 00 00 00 00 0C
08 0F 02 03 0C 08 0F 02 03 01 00 02 52 19 00 00
00 00 00 01 01 00 00 00 01 1E 09 00 00 01 32 0A
00 8E 00 01 01 00 00 0D 08 00 00 10 00 0D 08 00

Palom
48 07 0A 00 00 00 00 64 00 64 00 32 00 32 00 07
08 05 0F 0A 07 08 05 0F 0A 00 00 01 2A 06 00 00
00 00 00 08 06 00 00 00 01 1A 08 00 00 01 1E 0A
78 8E A7 00 00 07 01 A5 07 00 00 10 00 A5 07 00

Porom
89 08 0A 00 00 00 00 6E 00 6E 00 32 00 32 00 08
07 06 0A 0F 08 07 06 0A 0F 00 00 02 2F 08 00 00
00 00 00 08 06 00 00 00 00 1A 09 00 00 01 1E 0A
78 8E A7 0F 01 00 00 A5 07 00 00 10 00 A5 07 00

Cid
8E 0A 14 00 00 00 00 14 03 14 03 00 00 00 00 15
09 18 05 05 15 09 18 05 05 00 02 03 50 37 00 00
00 00 00 01 01 00 00 00 01 1E 0D 00 10 05 23 14
00 96 00 4B 01 00 00 82 68 00 00 10 00 82 68 00

Edge
D2 0C 19 00 00 00 00 16 03 16 03 3C 00 3C 00 14
17 11 0C 0C 1E 17 1B 0C 0C 00 00 05 60 4C 00 00
00 00 00 08 06 00 00 08 02 2A 20 00 00 08 19 19
7E 99 A1 2B 01 2B 01 09 FD 00 00 10 00 09 FD 00

FuSoYa
93 0D 32 00 00 00 00 6C 07 6C 07 BE 00 BE 00 0A
14 0A 28 28 0A 14 0A 2D 3C 00 00 03 48 32 00 00
00 00 03 23 18 04 00 80 02 1C 1C 00 00 00 00 32
7A 92 AD 13 01 00 00 F9 60 0F 00 10 00 F9 60 0F