Preamble
Having read a number of Sullla's and T-hawk's reports on variant challenges of Final Fantasies one and five, and having played a few myself, I decided it was time to play one and actually write something about it this time.
So this is a variant playthrough of Final Fantasy V, the idea of which is to have three characters permanently in the Berserker job, with the remaining character guiding and aiding them, but not actually dealing damage emself. I will be assuming some familiarity with the mechanics of the game, since anyone reading this will almost certainly already have read Sullla's reports linked above. If you, O Random Internet Passer-by, have not, you probably should; they're good reads.
The specific rule set T-hawk (who is also playing this variant; I will be linking his report at the end of mine when he posts it) and I worked out is as follows:
- Choose three characters to always be Berserkers, using a code device to gain the job as soon as possible.
- For convenience, one of the Berserkers may become a Thief just long enough to learn Find Passages and equip that ability.
- The fourth character may not damage enemies (including by reflecting damage spells off a walled character) or inflict Stone, Dead, or Poison status on enemies, or the Berserk status on himself/herself.
- The fourth character may, in random fights and long as all three Berserkers are in good health, use the plain Fight command to damage enemies.
- All Berserkers must enter each battle in good health (alive and with HP full or close to full).
- The fourth character may not use the Monk or Berserker job. He or she may use any other jobs at any time after they are unlocked normally, and all abilities and items other than as listed in rule 2.
I'll be using the Gameboy Advance version for slight increase in prettiness and slight decrease in bugginess, but I am more used to the fan translation for the SNES version, so there may be some strange mixing of terminology ahead. I will try to use the GBA terms for things.
First thing to do is decide who will be the non-Berserker. The choice is really between Bartz and Faris, as the other two are out of the party during critical periods where you really don't want to have to rely on Berserkers only. Faris's advantage is in her stats: two more points of agility, and one more point of magic power, though one less point of vitality (strength being irrelevant). These are small differences though, and Bartz is present for one (admittedly easy) boss when Faris is missing. Moreover, there are a few non-gameplay advantages to Bartz: I can change his name, and I like his sprites for the relevant jobs more, and one additional reason I shall mention when it becomes relevant. So I chose Bartz to be the leader.
The second thing to consider is which jobs to master, giving stat gains and free intrinsic abilities to the Freelancer and Mimic jobs. Strength is worthless of course, and so is Magic Power, more or less: with damage spells out of the consideration, magic power is only useful for healing and MP. Moreover, equipping white magic gives perfectly adequate magic power by itself. This leaves agility and vitality.
The fastest job is Thief, and it seems like a good candidate. At 635 ABP it is not cheap, but not really terribly expensive either, and it has some useful abilities. And agility is always useful.
Things look less promising for vitality. The two healthiest jobs are out of bounds. The third down the line is Knight, which for 690 ABP would give a 30% HP boost to the Freelancer job (assuming I've mastered Thief). But the only Knight ability that might conceivably be useful is !Guard, and even that is being very optimistic. Doesn't seem worth it for something that will only be useful very late in the game. The samurai has one less point of vitality, but on the other hand a nice evade-boosting intrinsic. But at 820 ABP? No thanks. We have to go all the way down to Beastmaster before we get something notably cheaper than Knight, and at that point we're only looking at a 10% HP gain. Conclusion: I don't see myself mastering anything for Vitality, though if I get all the command abilities I want relatively early, I may reevaluate that.
Intrinsic abilities look much the same: some are useful, but none look worth hundreds of ability points.
Things look rosier for command abilities. The last ability of each job is always the most expensive, but seldom the most useful. Actually, they tend to be utter crap, with few exceptions. So the useful ones tend to be reasonably priced. The abilities I am looking to get (with job and required ABP) are:
- White Magic Lv6 (White Mage, 280 ABP)
- Time Magic Lv5 or Lv6 (Time Mage, 180 or 280 ABP)
- Mix (Chemist, 45 ABP)
- Blue Magic (Blue Mage, 100 ABP)
- Control (Trainer, 60 ABP)
- Sing (Bard, 175 ABP)
(I didn't include Steal since I am planning to master Thief.)
World one
Enough planning, let's get started. I quickly realise that the second part of rule 2 isn't just for convenience, but also necessary if I want to use Bartz (or ??? as he is also known) as the main character:
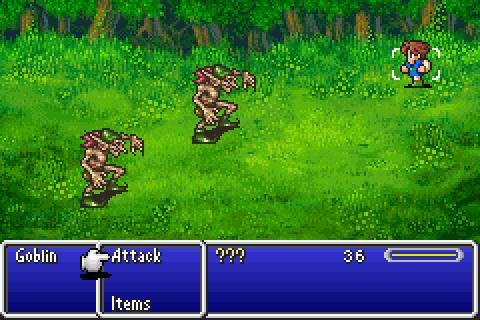
Though it strikes me that these aren't actually random battles... Damn goblins. Let's pretend this didn't happen, using Faris would completely mess up my naming theme.
Anyway, I get that battle over with and get to the naming screen. What shall I call our dashing hero? I shall call him George.
 Me Lenna! Me princess!
 That's nice Lenna. I'm George. That's what inbreeding gets you, I guess.
It does not take many seconds before George encounters his next befuddled companion, of course.
 Urrh... me Galuf. Me no remember anything.
Well, I guess the concussion's an excuse.
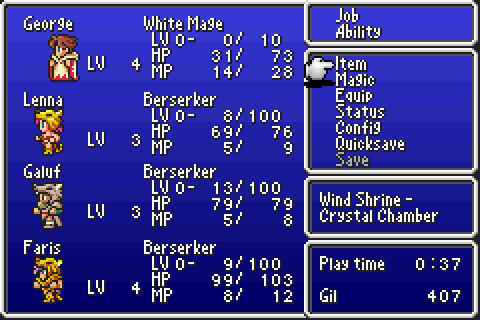
I get through the rest of the intro battles and equip Lenna and Galuf with their permanent job.
George remains in the front line on account of being the only one with a decent weapon right now. Making our way through the cave to the pirate base is unproblematic, and then...
 Arr! I be Faris! I be a pirate!
Oh God, not another one.
Avast!
They could practically be siblings.
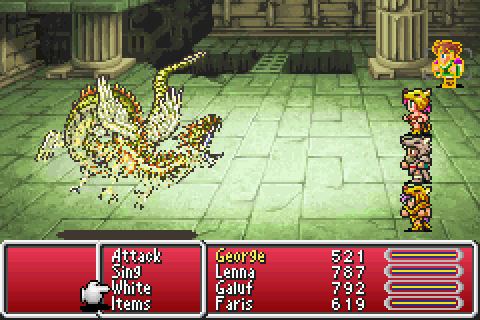
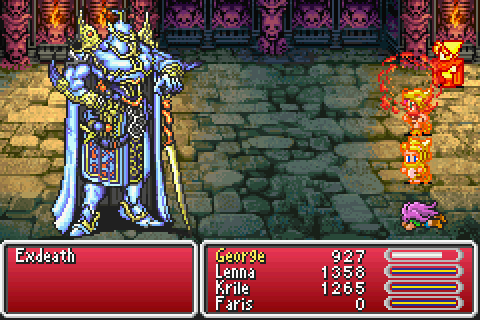
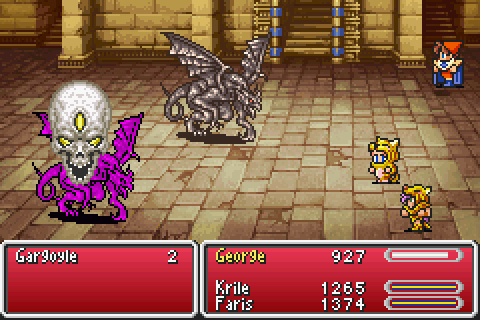
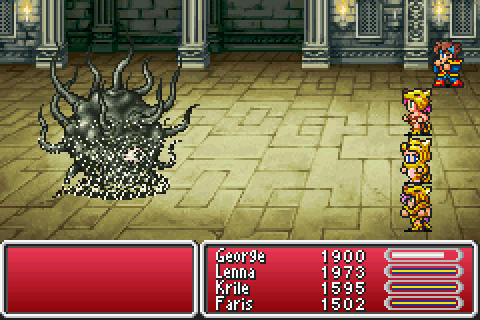
Which brings us to the first boss battle, which basically looks like this:
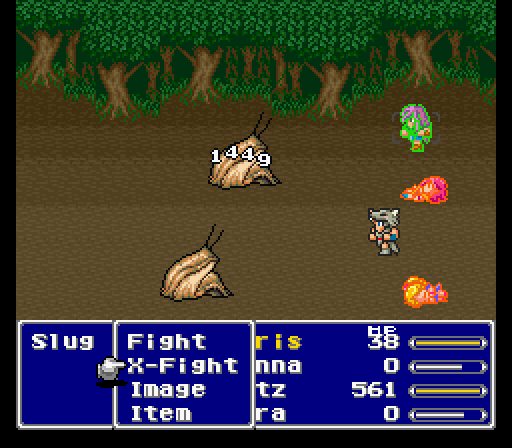
I should probably have been standing ready to throw a potion instead of defending, due to the boss's counterattacks, but a victory is a victory:
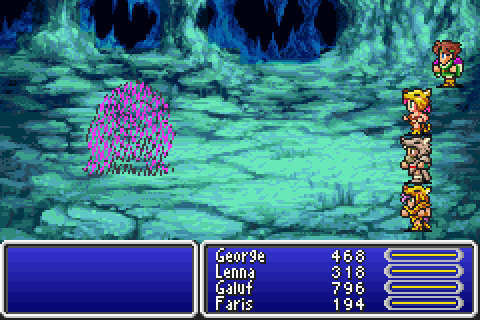
Lenna going down means I had to use a Phoenix Down after the battle, per rule 3. Hmm. It also strikes me that I hadn't paid any attention to the "in good health" part of the rule up until now. Oh well, I think I'll consider the part up to the first crystal a training session. I feed the Berserkers a few potions, and continue.
And thus, the game could truly begin:
I don't stay a White Mage very long, however. Making my way through the pirate cave and back (to get the treasure cache in there) gives George the ABP he need to master White Magic Lv1, and so I switch to Thief to get started on learning how to steal. The other alternative would have been to switch to Blue Mage and get started on learning how to learn, which does have a certain poetic beauty to it, but I was more looking for practical benefit...
Karlabos and Siren were as uncomplicated as one would expect early bosses tackled by auto-attack and healing to be, though Siren would have been harder had I not gotten a lucky Dagger from one of the Skeletons in the ship graveyard. It rather dramatically increased my damage output, especially against her undead form (Lenna's Knife was too weak to even damage her most of the time).
Magissa and Forza is a battle where the uncontrollability of the Berserkers is a problem (in a very mild way; much worse is coming), in that, with two enemies, it would be better to concentrate attacks on one of them, rather than randomly spreading them across the two. However, I foresaw no problems: most of the early bosses have some fatal weakness that can be exploited for an easy win (unless you're doing some crazy variant that forbids it, that is). Forza's weakness is that he is not immune to sleep, which I could exploit if I turned George into a Black Mage. Sure, the Berserkers would continually wake him up, but since a Black Mage is faster than a Berserker, I could just put him back to sleep immediately afterwards. However, that would mean putting ABP into Black Mage, which is a bit of a waste. Magissa also has a weakness, and hers is the one I intend to exploit: she's a magic based enemy who is not immune to Silence. So my plan is to turn George into a White Mage, silence Magissa, and put Protect buffs on everyone, healing as necessary. I expect no problems.
Results: mixed success.
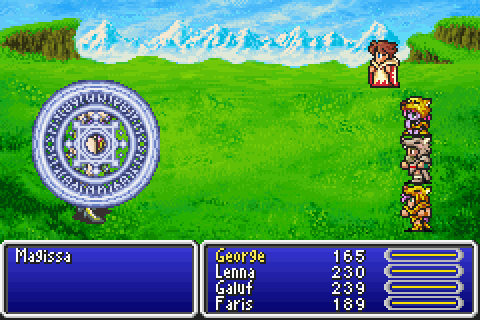
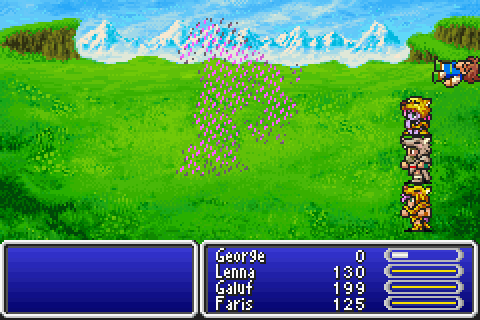
The silence wore off and Magissa killed George with a Drain spell. However, the Berserkers were capable of handling the rest of the battle on their own.
To be honest, I decided to do the battle over, for the Phoenix Down as much as the Ability Points. It went better on the second try.
And then there were two castles to loot, and one town's worth of shops to visit, the shops containing the first examples of a very relevant weapon category:
Yes, axes. Also pictured: me attempting to learn Pond's Chorus (aka FrogSong), a process enthusiastically "aided" by the Berserkers.
Garula is a bigger problem for Berserkers (though still not even close to the worst), because he counterattacks. I have a plan, however.
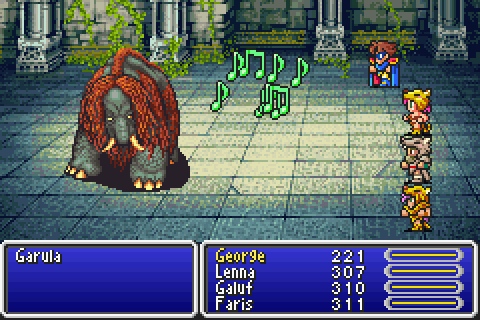
That plan is, as you may have guessed, Pond's Chorus. Sure, he'll turn himself back once he gets a turn, but he won't get many of those. It was probably unnecessary, but humiliating bosses is more fun than just hacking at them.
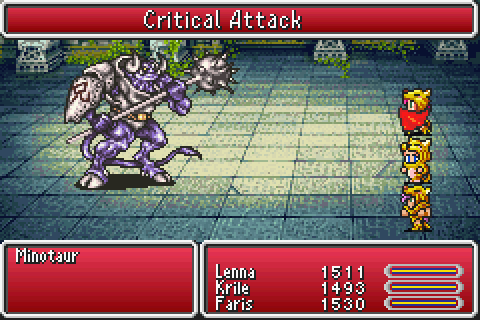
The water crystal only gives one useful job, but I can't say I am dissatisfied with getting Time Mage! Moving on to Karnak brings us some nice magic and equipment upgrades, and a problematic boss. The Liquid Flame is seemingly the first big stumbling block of the variant. The boss has some nasty counterattacks, and I don't think I'd be able to heal the damage from both the boss's ordinary attacks and three Berserkers' worth of counterattacks fast enough to stay alive. So, what can we do to slow down the rate of counterattacks? There are two things we can do. First, the rules say the Berserkers have to be in good health when entering battle. They don't say anything about good eyesight.
Second, remember what I wrote about fatal weaknesses?
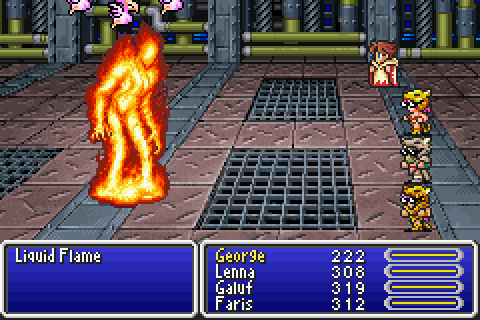
Confusion bypasses the monster AI, so the Liquid Flame will not counterattack when hit while confused. And, what's more, confusion bypasses the hit calculations for physical attacks: the Berserkers will always hit when it is safe to do so, even though they're blind.
This was not enough to make the battle completely trivial, as the boss is faster than George as a White Mage, and the Berserkers could still occasionally hit when they shouldn't, but it was enough to win the battle without ever coming close to losing.
A Thief and three strong attackers is close to a perfect party for Karnak castle. I not only emptied every chest of relevance (all the Elixirs, the Ribbon, the Main Gauche, the Elven Mantle and Esuna), I also stole five Mage Mashers from the Sorcerers (admittedly slightly more than I need, but more money is always nice), and one Elixir from each Gigas I met, ending up with eighteen in total after the castle. Afterwards I immediately switch George to a Beastmaster, since I want to learn !Control. There are some Blue Magic spells that can only learned if you have some way of confusing or controlling the enemy, and some that can be learned without it, but which can be learned considerably earlier than normal with !Control. In fact, there is one such in the Library of the Ancients, so I'd best get started on learning. And since my current level was 15... now was clearly a good time to wander the woods outside the library.
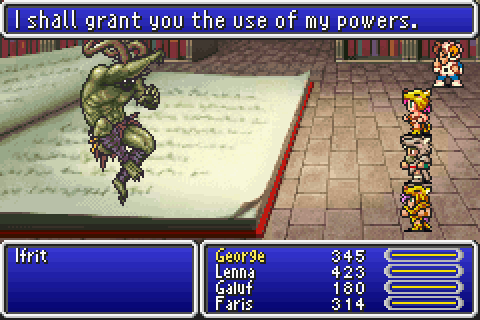
I didn't do anything special against Ifrit, other than cast Protect and Cura, though having Lenna and Galuf equipped with Mage Mashers did prevent him from getting off a spell on one occasion.
Byblos is another boss with counterattacks. To start with he has a 1/3 chance to respond with Protect when physically attacked, and when low on HP he switches to a 2/3 chance of Drain. To begin with, I thought the battle would be easy, as Byblos is not immune to Berserk. Thus, all I had to do was cast Moon Flute on him! Right? And Moon Flute can be easily gotten from Page 256 right here in the Library of the Ancients.
Well, as it turns out, enemies may cast Moon Flute on all of their opponents, while player characters may cast Moon Flute on themselves and all their allies. Doesn't seem entirely fair... and more to the point, I believe this is the only spell in the game that functions this way.
At any rate, that turned out to be a dead end idea. No, Blue Magic is not the key to this battle (though Flash would be somewhat useful, as he is weak to Darkness). No, the key weakness here is Byblos's lack of immunity to Slow. Time to bring out the Time Mage.
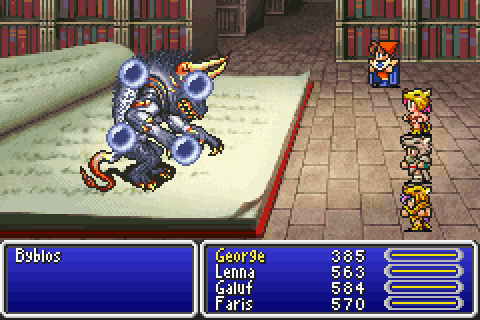
The Slow took on the second try, and Byblos responded by turning Lenna into a toad. Fortunately, I had a Maiden's Kiss on hand (but just the one!). And then it was just a question of buffing and healing and watching the Berserkers do what they do best: mindlessly attack. A problem became apparent when Byblos neared death, however: a Drain spell would heal him by about 200, while each attack did about 110 to 180, with Byblos Protected. Troublesome. And what was the clever solution to this, then?
Honestly, the solution was a lucky streak. I kept healing, until the Berserkers got enough hits in a row that didn't provoke a Drain in response to kill him.

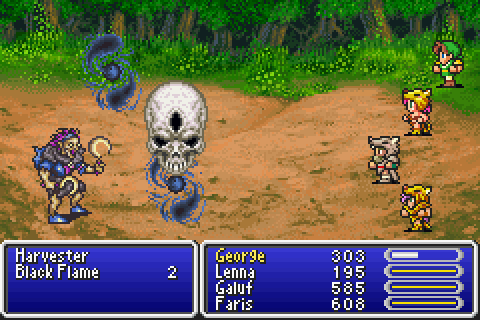
On to Crescent isle, whose enemies hold many treasures. Most importantly, the Harvesters may drop Death Sickles, powerful axes that sometimes cast Death on the enemy. While harvesting these, it is also wise to steal Silver Bows, which can be sold for 750 gil apiece. Finally, the Black Flames may teach the Blue Magic spell Dark Spark, which halves an enemy's level.
In addition to this, I was also lucky enough to steal a War Hammer from a Bio Soldier while doing all this. It is a rare steal (and rare steals are annoyingly hard to get) and it is weaker than the Death Sickle, so these are definitely not worth trying to get, but it'll be nice to have in case I have to fight something undead (which are healed by the Death effect of the Death Sickle).
Oh, and I also got the Bard job, which is nice, but I have no immediate use for it.
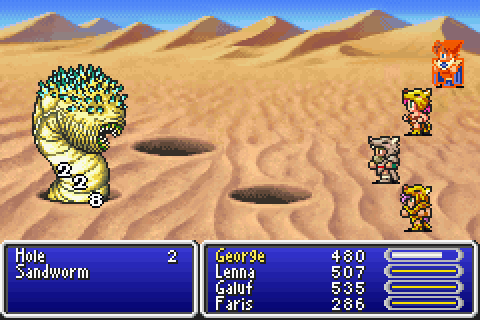
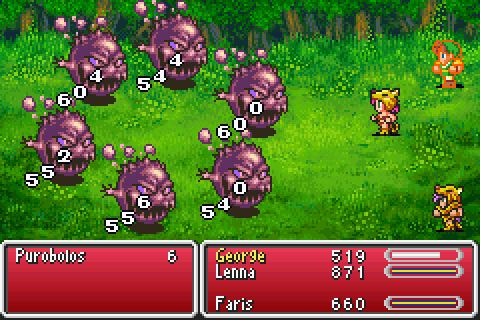
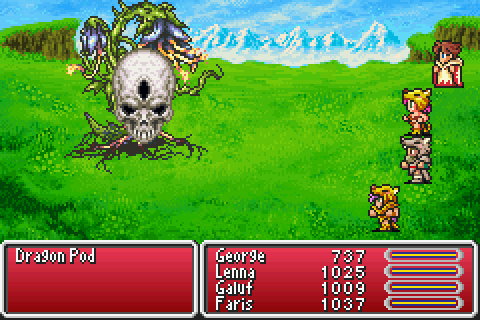
So, will I ever encounter a boss that really gives me trouble? I certainly will. The next one, in fact, is quite horrible for this variant: the Sandworm.
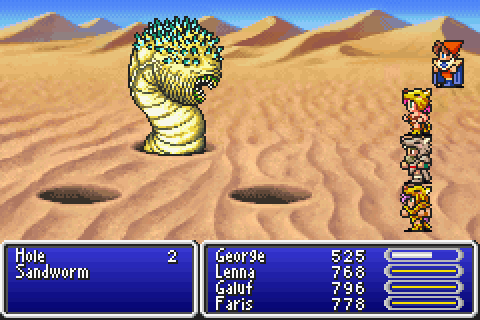
The general idea of the Sandworm fight is that the Sandworm will randomly move between three holes in the ground. If you hit the Sandworm, it gets damaged (shocking, I know). If you hit a hole, it casts Gravity on one random character, halving their current HP. Just from the description of this game of Whack-A-Shai-Hulud, you can surely tell that it's not a good match for the Berserker way of life. Oh, but it gets worse. First, you would expect that the Berserkers would hit the Sandworm on one third of their attacks, on average. They do not. Not even close. I ran one battle for over fifty attacks to test and make sure it wasn't just observation error: they hit it only eight times (that's less than one in six). Second, the Sandworm takes less damage than it should. Take a look at these screenshots:
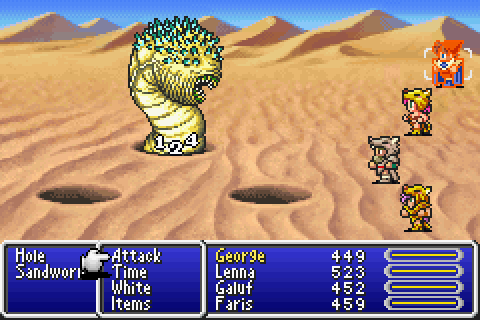
That's the same character with the same weapon at the same level and wearing the same everything at the same time of day and phase of the moon. The difference is exaggerated due to the random damage of axes and hammers (their actual attack value is randomly chosen from 50% to 150% of their displayed attack value); the difference generally seems to be about a halving of damage. And the weird thing is, I can't figure out why. It's not due to the Sandworm having a higher defense value, as axes and hammers quarter defense (and the Sandworm is listed as having 0 defense in J.L. Tseng's guide, which is generally reliable). It's not due to it being in the back row, because the left-most position is in the back row, and there damage is halved again. It's not due to the Sandworm starting with Protect status, because if I cast Protect on it, damage gets, yes you guessed it, halved again. It... just takes less damage. Apparently because it feels like it.
Okay, so the Sandworm is a bitch. Is it a showstopper, or even a cause for grinding? No, not really. The good news is that the Sandworm can't do much damage, just a weak fight that barely makes it through the Berserkers' armour (though George is slightly squishier, but he's in the back row), and Quicksand, which does 60 damage to everyone and inflicts HP Leak. If someone gets hit by an unlucky sequence of Gravity spells, they might die, but probably not otherwise. The keys to the battle are:
- Unequip all weapons that cast spells on impact, since they will provoke an extra counterattack. That means no Death Sickles, alas. The weapons I'm using are a Main Gauche, a War Hammer and an Ogre Killer.
- George casts Haste on himself (but not the others).
- George heals using mainly the Healing Staff, but with the occasional target-all Cura as appropriate, and perhaps a Regen or four if everyone looks healthy.
- Wait. A long time.
About 35 minutes, to be precise. Due to a misaimed heal at a critical moment, Galuf spent some time dead (not for tax purposes) but he made a comeback and threw the final blow.
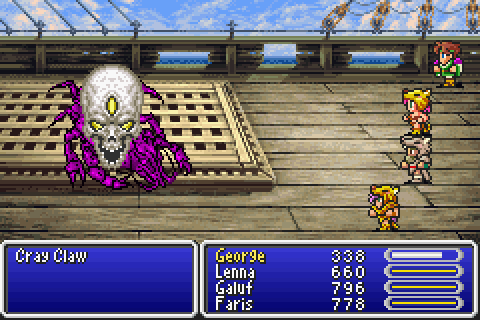
Cray Claw was, uh, unthreatening. The Adamantoise is supposedly also vulnerable to instant death, but the effect never triggered. It died quickly by being hacked to pieces (the defense piercing ability of axes was helpful, as the Adamantoise has a high defense value).
Before facing the Soul Cannon and its accompanying minibosses, I decided that now was a good time to learn some Blue Magic. As you may recall, I mentioned a spell that can be learned by controlling an enemy in the Library of the Ancients (Page 256, to be specific). Learning this was somewhat complicated, as a controlled enemy will break free if attacked, just as if it was confused. And the Berserkers have no sense of restraint. Fortunately, provoking a Crew Dust into Flashing us helped with that matter; unlike confusion, being controlled does not bypass hit calculation.
Unfortunately, the level of my party was currently at 20. Gah. Why is it always like that? I didn't want to go grind, so I tried to ward of the Death by controlling the Page 64s, which worked reasonably well. I managed to get Off-Guard from the first Page 256 I encountered, and by chance learned Aera from the same battle. I can't use it, but I guess that's nice.
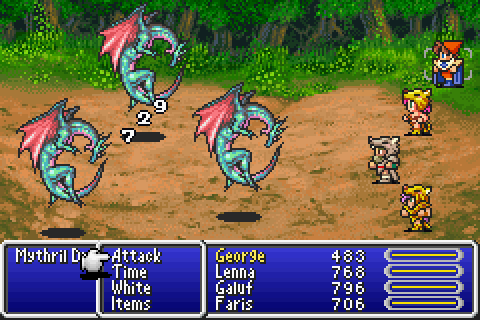
Since I had !Control equipped on a Blue Mage and was at the Library of the Ancients, I picked up Transfusion from a Mythril Dragon while I was at it. It's a worthless spell, but I'm allowed to use it, so I want it.
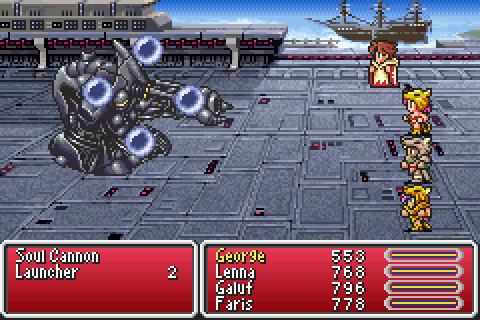
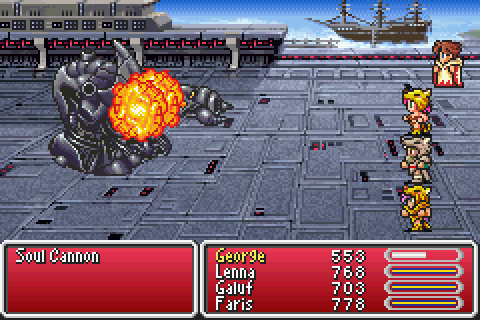
The pre-Soul Cannon minibosses were laughable, as they are all vulnerable to Stop, and Berserkers are immune to confusion anyway (one of their few advantages). I used them as an opportunity to put some ABP into the Bard job, and George immobilised them all with his song. The Soul Cannon itself I took a bit more seriously, making George a White Mage with Time Magic equipped. I actually only had Lv1 Time Magic, so I could not Haste myself, but I could Slow the Soul Cannon! This gave the Berserkers time to kill the Launchers and George time to Esuna the Aging away, and heal everyone before the cannon fired. It didn't get a chance to fire again.
Oh, and you probably noticed that I switched window colours. I thought red was a more Berserker-like colour.
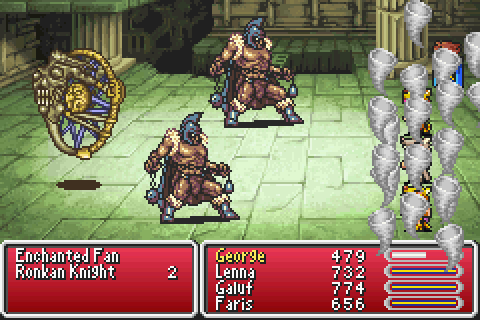
The first order of business in the Ronka ruins is of course to get White Wind. I am glad I'll only have to do the Control-in-order-to-get-Blue-Magic thing one more time.
As for the boss, the small amount of hitpoints for each part makes it seem unlikely that it will have time to do much of anything before my Berserkers slaughter it. Consequently, I bring a Bard with White Magic to the fight.
Never bring a Bard to a gunfight. Er, that is, it was slightly harder than I expected it to be, partly because the boss was faster than the Berserkers, but George was able to keep up with the healing without too much trouble, and inspired by the ferocity of the boss he learned how to hide.
With the last jobs gained (other than Mime), and Galuf gone, it was time for me to do something very difficult. I use Control one more time (with surprisingly little trouble) to get Float status from a Gaelicat, make my way to the Karnak Meteorite, and save. I mentally prepare myself for the challenge like for many an attack against an unrelentless brick wall. To my surprise, I succeed on the fourth try.
What? No, not at defeating Titan. Good grief, Lenna and Faris could do that on their own, and I think the Float was completely unnecessary.
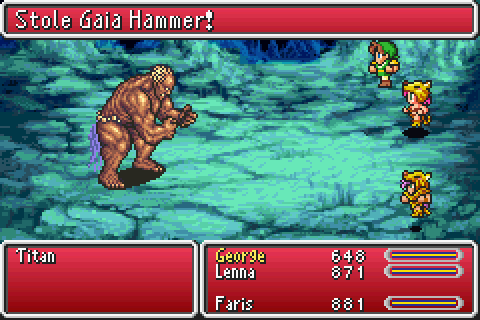
No, I am talking about stealing Titan's hammer. You can buy these things late in the game, but I wanted it now. It's a rare steal, so it's a 4% chance to get it if you try (the other 96% of the time it's a Potion). In addition to being a nice upgrade in terms of attack value, it will also cast Quake on 25% of all attacks, which is a quite powerful spell. With the horrible Magic stat of the Berserkers, it has to be powerful to be at all relevant; as it is, it does about 600 damage to each non-flying enemy. Annoyingly the Quake replaces the standard attack rather than get cast in addition to it, which is unfortunate against single enemies.
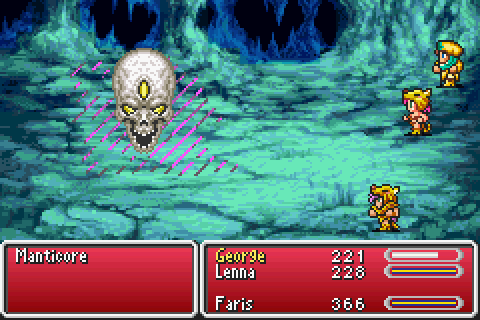
The Manticore was also not much of a problem, though on my first try I forgot to equip White Magic. Whoops. The second try went better.
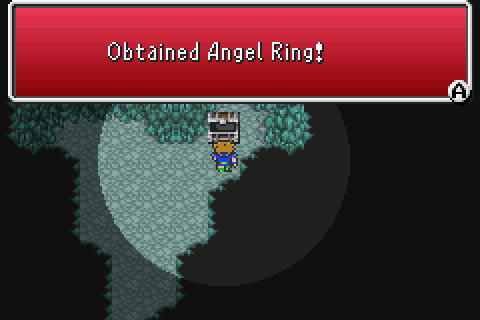
The third boss is actually difficult. I do some finishing up type stuff before facing it (defeating Shiva and Ramuh, looting Jachol cave, farming some Turtle Shells, bought a Flame Ring and an Angel Ring). Just delaying the inevitable, really. Well, that, and learning !Mix, a very key skill.
So let's take a look at my setup for this battle. Speed is of the essence, so George is a Thief equipped with Ninja Suit, Green Beret, and Thief's Gloves for a total Agility of 44. His secondary ability is, as you might have guessed, !Mix. He'll be a bit too busy to heal effectively, so Faris and Lenna are in the back row, and wearing the rather expensive jewelry I just bought. Their most potent attacks are magical anyway, if you can believe that.
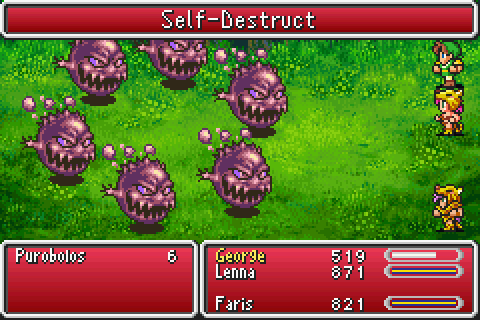
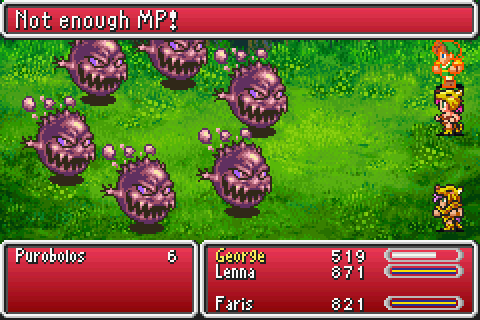
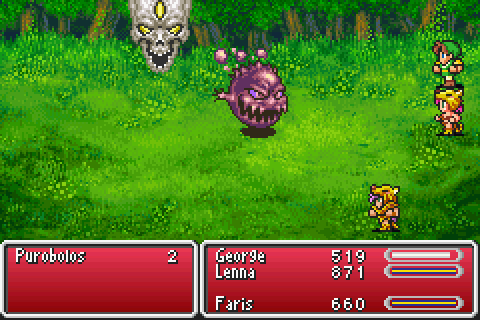
As for the actual battle... Step 1: Mix Turtle Shell and Eye Drops:
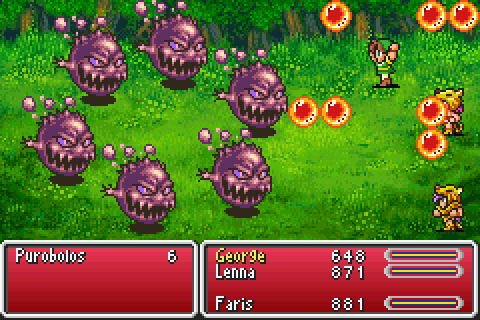
Step 2: Mix Ether and Maiden's Kiss:
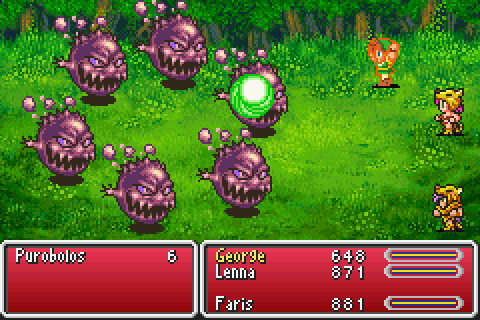
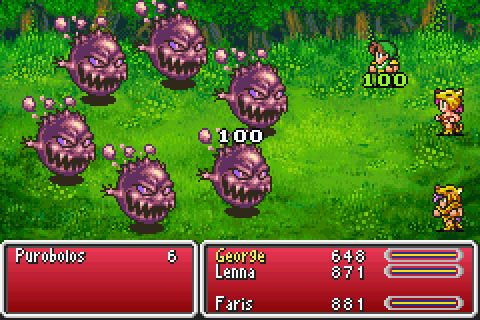
Oh, not so very threatening without all your MP, are you Mr. Purobolos? The rest of the battle was simple, and healing turned out to be completely unnecessary. Some highlights:
Before leaving for the next world I farmed up a supply of 50 Turtle Shells from the Grass Tortoises near the Karnak meteorite, as I may be needing those later, and I'll never have as convenient a source of them again. I should probably have done that before Galuf left, but oh well, he'll catch up soon enough.
World two
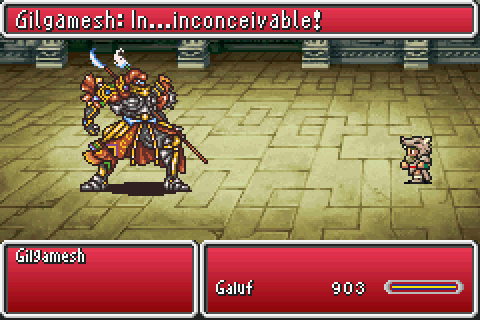
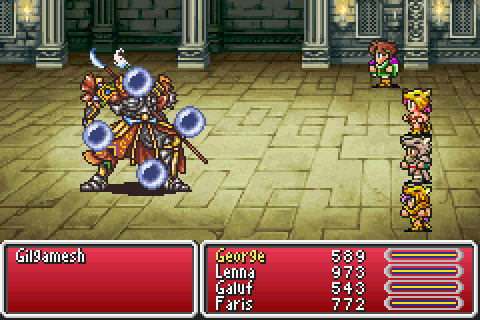
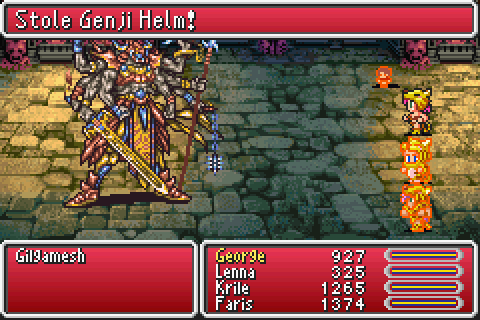
Galuf had no trouble beating Gilgamesh on his own, and in fact took no damage from the fight at all:
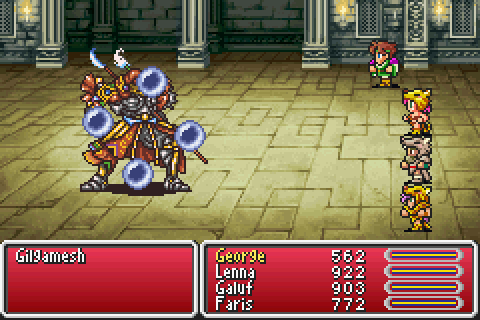
Frankly, he wasn't much more impressive on the second go round either. I slowed him (twice), and hasted my characters, and went without healing other than Regen from a Might March, and he ran away.
Regole is full of weapon, armour and magic upgrades, most of which I can not afford, so I buy the magic and some new armour for George.
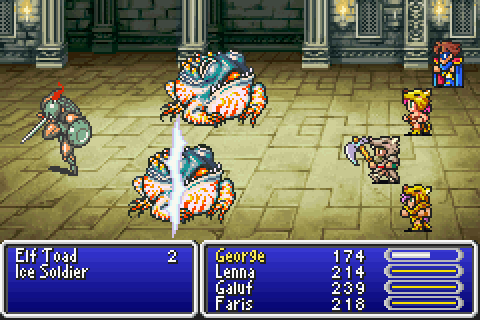
The main things to note about the Tyrannosaur are that it is undead (and therefore Death Sickles are a bad idea) and that it counterattacks. The possible counterattacks are a physical attack, a slightly stronger physical attack, and the Blue Magic spell ????. The latter does damage equal to the HP the caster has lost, which tends to make it an instant kill when coming from bosses. Fortunately it only used it twice (both times against Galuf, the poor sot). Other than that, it went down to brute force with minimal trouble.

And afterwards, we get a nice scene with a moogle.
 Soft...
Be careful with that moogle, Lenna!
I didn't mean no harm, George. Honest I didn't. I jus' wanted to pet 'um a little.
(At this point, my naming choice should have become clear, or at least googlable.)
After some shopping, it's on to Dragon Vale. Lots of undead here, so the Death Sickles come off, to be replaced by an Orichalcum Dirk and a Dancing Dagger. I also equip Learning on George, hoping to pick up Magic Hammer, which I do get. I almost got the Golem as well, except the Zombie Dragon got off a Vampire when it was nearly dead, killing the Golem, and healing itself back to full. Grrr. Not that I expect to be using Summoner, but if I do, that's obviously the spell to use. I also pick up the Bone Mail, of course.
The Sickles come back out when it's time for the boss. My plan was to have George haste himself, and then defend against the status effects of the Dragon Flowers by use of Blink. He executed step one of this plan, and then...
The battle is over after the next two attacks. I wasn't expecting it to go quite that quickly... Don't worry, the bosses vulnerable to Death will run out eventually.
On the way out I get another shot at Golem, and this time the Dragon Zombie uses its Vampire spell early enough that the Golem survives it, and through frantic Protecting and Blinking and healing, Golem is finally the last one standing:
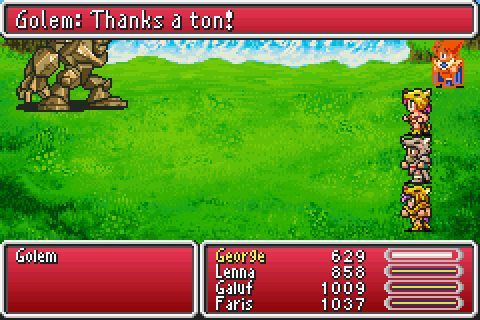
There was a brief scare as Galuf managed to confuse the Golem with a Tempting Tango before it could turn into its second, grateful, form, but a Healing Staff to the head fixed that right up.
After sinking Ghido's island by landing on it (someone clearly needs to lose weight), it is time for a favourite activity of the Berserkers: castle looting. Surgate castle, like many before it, trembles at George's barbarian horde. However, when it comes to buying new weapons, the Barbarians wait in line like everyone else; they respect anyone who can make a good axe.
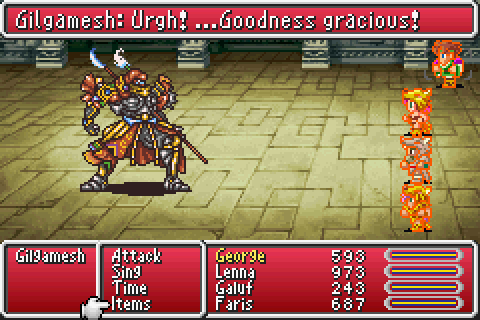
The battle with Gilgamesh on the ship goes about as you would expect:
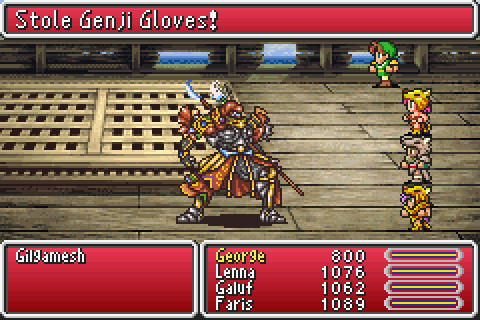
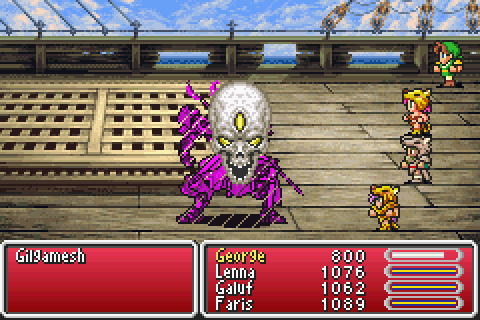
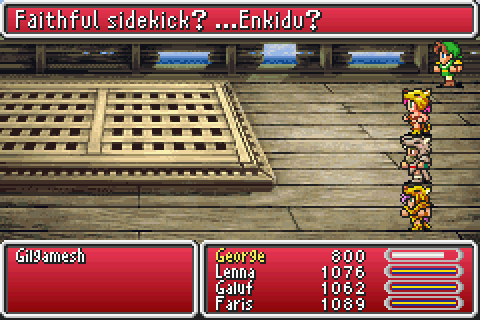
I especially liked how Gilgamesh's ghost called out to his missing friend, who never actually arrived on the scene.
In the Barrier Tower there is a relevant Blue Magic spell to be gained: Time Slip. In fact, I was lucky enough to gain it from the very first battle I fought in the tower.
There are two trapped chests in the tower, which typically contain a battle with a Red Dragon, but sometimes two Yellow Dragons. They can be fairly dangerous, but as random enemies (from later in the game) they are vulnerable to !Control:
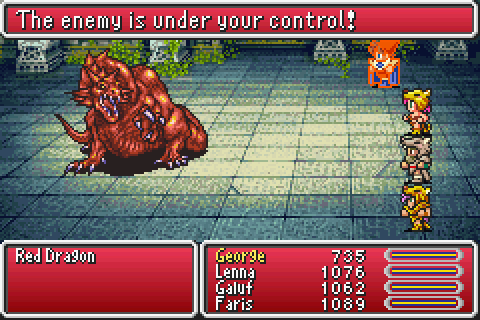
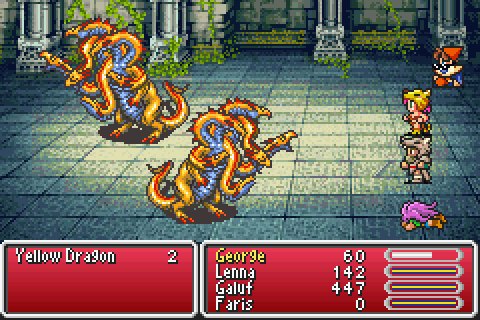
(It also helps if you make sure the character wearing the Bone Mail is also the character wearing the Flame Ring, as I found out on the first try).
The boss of the Barrier Tower is a tricky one. Atomos. Starts hasted, peppers the party with powerful spells, and is only distracted by the presence of a tasty, tasty corpse. Has a major weakness: vulnerable to Sleep. However, there are two problems with that approach. The lesser problem is that that would require me to make George a Black Mage, which would be a waste of 12 ability points. I can probably spare that, but still. The larger problem is the tendency of the Berserkers to wake things up, and quite rudely too.
So is there some other way Atomos can be prevented from annihilating us? Well, the means of annihilation is, in this case, Comet. Comet is a spell. Spells require MP, of which Atomos has 10000. Quite a lot, surely too much to get rid of. Unless... we have the power of division on our side!
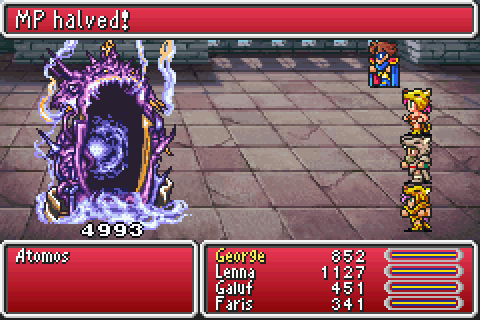

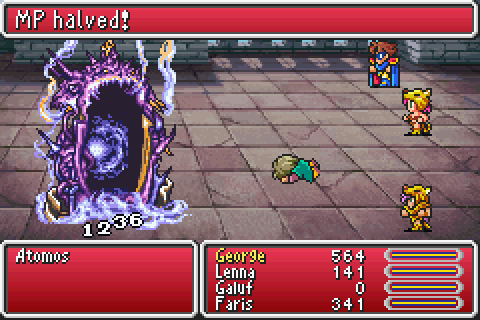
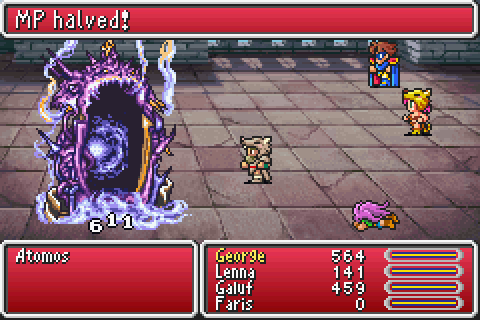

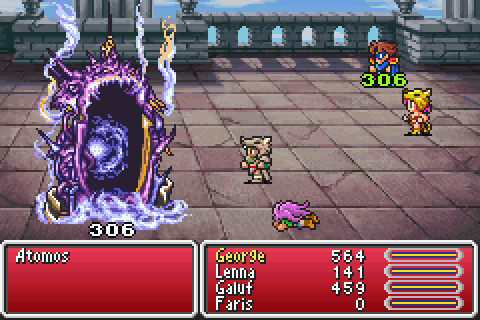
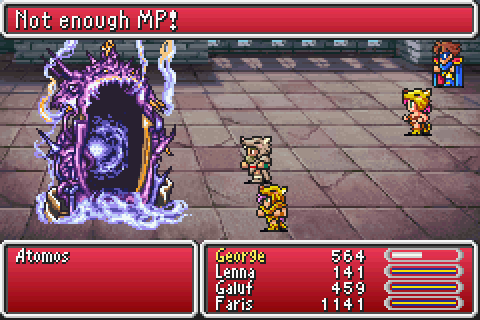
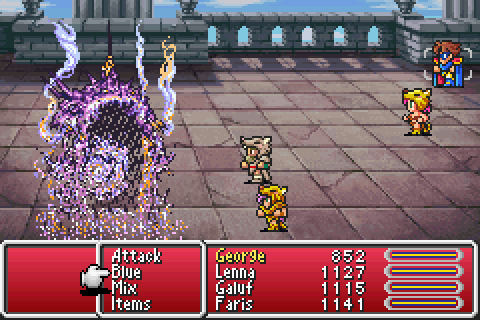
A few attempts were needed, as Atomos seemed to like aiming for George, and Magic Hammer is not terribly accurate. The last hit was a Lillith's Kiss by means of !Mix, and then it was just a question of clean-up.
Over the course of Ghido's cavern and the early parts of the Great Forest of Moore I gained enough ABP to learn both !Blue Magic and !Sing, leaving only white magic and time magic left as far as ability projects go. I might have time to master something with high vitality, after all...
I made sure to keep Learning equipped as I wandered through the forest and eventually picked up Lilliputian Lyric from an obliging Mini Magician.
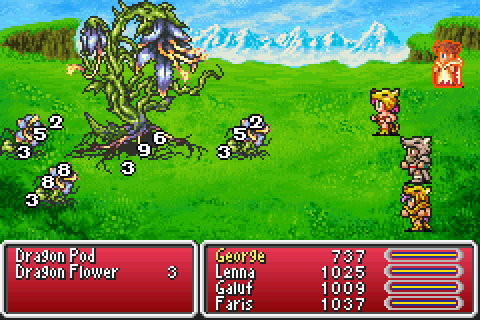
So, the deal with the next boss, the Seal Guardians, is that you have four enemies, that all get significantly more dangerous when they drop below a certain health threshold. So you want to concentrate your attacks on one at a time, to make sure there's only one dangerous foe in play at any given time. This is of course the precise opposite of what the Berserkers will do: they attack randomly, and will consequently spread the damage approximately evenly. Sounds like a real problem, doesn't it?
Ah, Death Sickles, I love you so. However, their time is pretty much over now. The Seal Guardians have very high levels, so the success rate of Death is very low; only two of them were defeated that way, and one of those was almost dead at the time. Moreover, from here on out, it's STATUS IMMUNITY: Dead for pretty much every boss.
In order to support the not that effective Death Sickles, George hasted everyone, slowed all but one of the Seal Guardians, and cast Shell and Float on everyone. Add healing to this, and it was not a very hard battle.
So, Galuf goes berserk...
 I am become Death, the destroyer of trees.
...and dies, and now George was truly herding cats.
Huh?
 Me no get it.
Arrr?
Seriously, that one was kind of a stretch.
Yes, that joke was the other reason I wanted to use George for the main character.
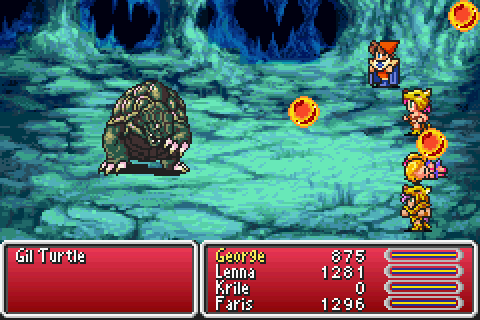
Before moving on to Exdeath's castle, I considered the local superboss: the Gil Turtle. It hits hard, mercilessly counterattacks, has high defence, high evade, absorbs most elements, vulnerable to few status effects... it's just generally an efficient and hard to destroy killing machine. Looking over its traits, there didn't seem to be an obvious magic button to win the fight, so maybe it'd be better to just leave it and its hoard be. Oh, except. All its attacks (other than the death attack of Quake, which is unthreatening for a Time Mage) are melee attacks. And they can't hurt you if they can't hit you...
Plan: equip all the Berserkers with shields and Elven Mantles, while George uses a Main Gauche. The Berserkers use Poison Axes (Gaia Hammer would be bad since the turtle absorbs Earth), for the armour piercing.
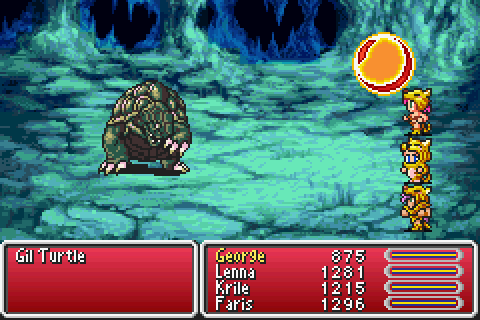
George starts with the standard opening of hasting himself and slowing the enemy. Then, add defensive buffs to the soup:
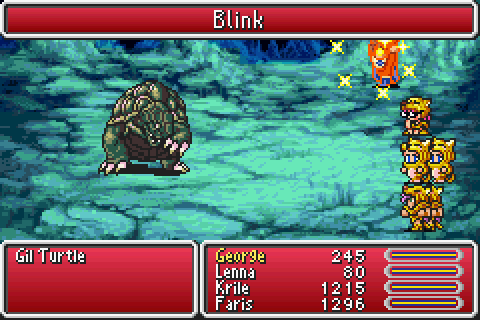
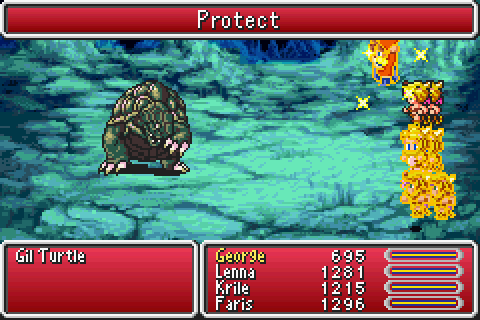
And then, wait a LONG time, until:

After the battle, George had 35 MP left. He started at full (225), and he was wearing a Gold Hairpin, for half MP cost! One turtle was definitely enough.
I make sure to pick up L2 Old from the Magic Dragons in Exdeath's castle, and I picked up Aeroga while I was at it (it's a buy one, get one free kind of deal, I think). I have no plans to use Geomancer much in the future, but it comes in handy for crossing the damage floors and avoiding pit traps.
The battle with Carbuncle is somewhat complicated by the fact that it has something I want. Two things I want, actually. Though they're both the same thing. What I'm getting at is that I want to steal a Reflect Ring from each of its forms. As it happens, I already have a Reflect Ring, from a lucky drop in the Barrier Tower, which helps things somewhat. By bouncing a Slow off the Reflect Ring, Carbuncle is more manageable:
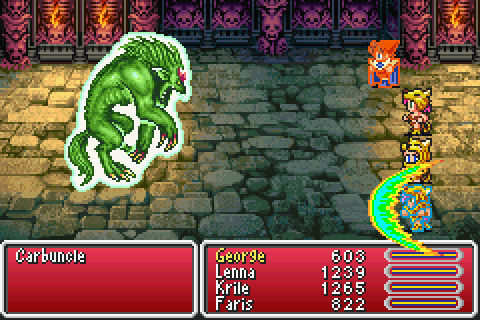
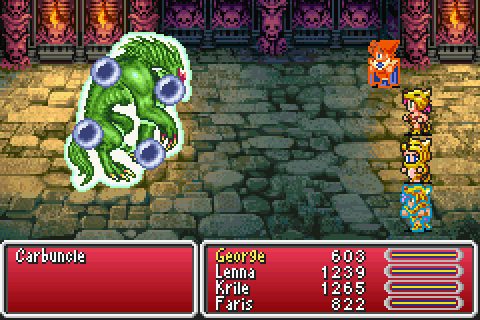
However, after that is when things started to go wrong. I did manage to steal the ring off of the first form, but failed to steal it when the second form showed up. And then...
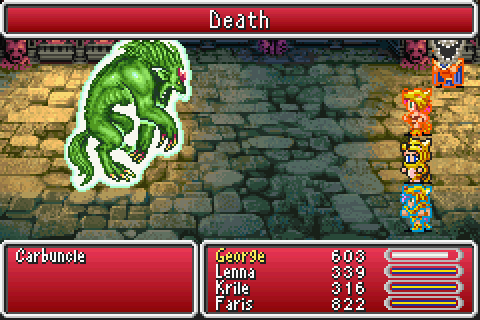
Fortunately, Carbuncle was almost dead at that point, and the Berserkers were able to bring it down before it could even attack again, but that was a waste of twelve ability points.
The battle against Gilgamesh was straightforward: Haste, Slow, rock out to the music. The only complication was the need to equip !Steal, so Regen was my only healing magic.
Two down, two to go.
Exdeath is generally a pretty hard boss. As many hit points as the Gil Turtle (though thankfully with worse defense and evade), and with stronger attacks. He is, like many bosses still, vulnerable to Slow, but he will counter it by hasting himself, leaving you worse off than you started. You could potentially get around this with Reflect-trickery, but then you still have to contend with his 85% magic evade. Probably better to just buff and heal. Of course, there's a problem with that too. Exdeath tends to counter damage with Dispels, so buffs don't last terribly long. His defense is high enough that axes are probably the way to go. Furthermore, the Berserkers do damage slowly enough that he will get two attempts to cast Doom, and if that hits George, the battle is over. In fact, that is exactly what happened on my first two attempts. The Berserkers bravely fought on, but could not survive without healing.
The slow damage issue is partly due to Exdeath's tendency to use Dynamo early in the battle, switching everyone's row, a very effective way to counter Berserkers in particular. Hey, here's a thought: why don't I switch rows before the battle?
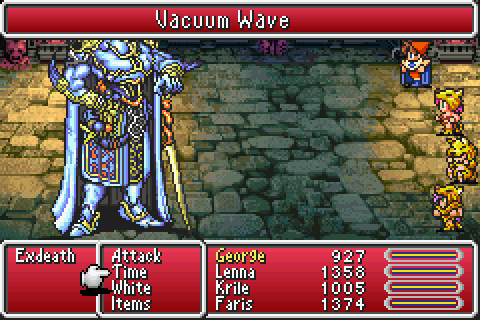
Because he'll decide to attack with Vacuum Wave instead, for once. Obviously. I swear, the AI in this game is sentient (and malicious). The next try went better in that regard:
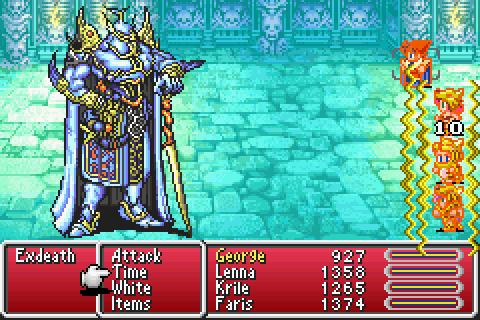
Unfortunately, this still wasn't enough to prevent Exdeath from making it all the way through his script and back to the Doom-casting, but fortunately he aimed for Faris this time, so OK, no problem. A few more hits and he goes into the next part of his script, where he attacks twice in a row every time it's his turn. The first pair of attacks:
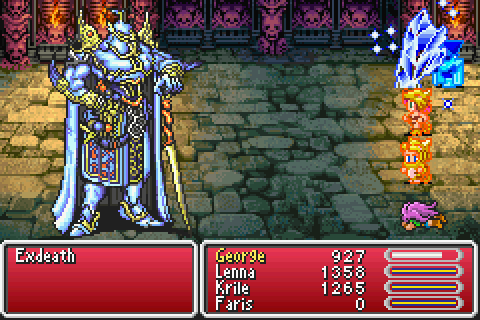
Sigh. Okay, a new try, and this time George gets to wear the Flame Ring.
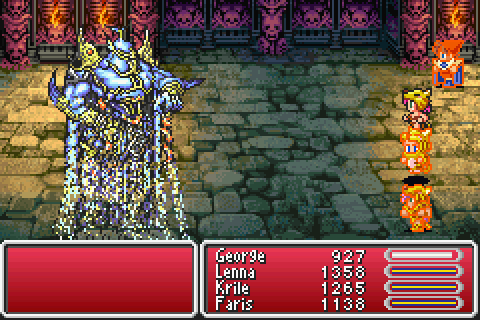
And on this try, everything basically worked out. Exdeath didn't use Doom, but he did use Dynamo to put everyone in the front row. The Berserkers did damage quickly enough that he didn't get another try at Doom. And when he entered the third part of his script, he chose to fight instead of casting Meteo, and before I knew it, the battle was over:
World three
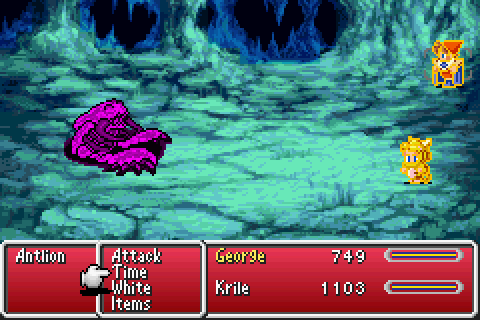
And so on to the third world, where the first boss battle is quite a step down in difficulty. The only things to say about the battle with the Antlion are that casting Shell protects you against Dischord, and that the creature is immune to Earth, which is annoying if you have Krile equipped with the Gaia Hammer.
I said that the time of the Death Sickles was "pretty much" over, not completely over. They still get to come out and play occasionally.
I hurry through the pyramid to get Lenna back as soon as possible.

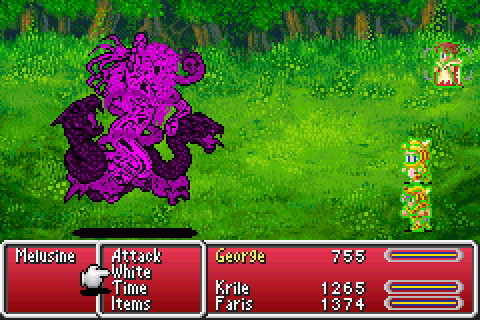
Not much to say about Melusine: Haste, Slow, Shell, stab.
Then, it's looting time. I pick up a number of new and powerful weapons:
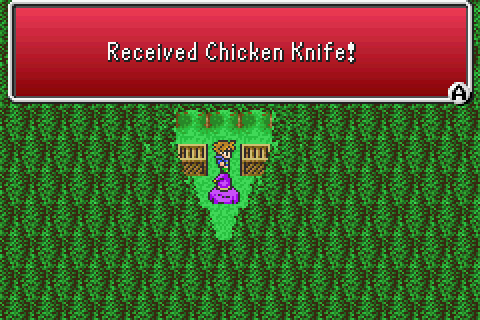
Some of these may require explanation, though hopefully the Chicken Knife (which I actually picked up before the pyramid) is not one of those: you stab things, they die, or you run away.
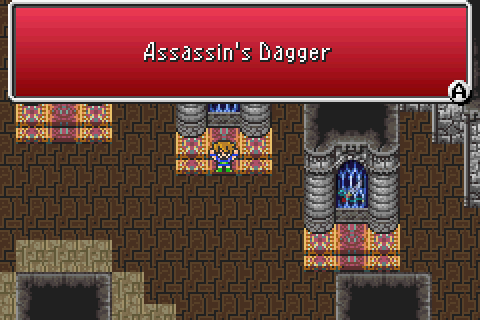
The Assassin's Dagger is a knife with good attack value and a chance to cast Death on the target. It doesn't do much the Death Sickles can't do, and the utility of casting Death on bosses is, as mentioned, mostly past.
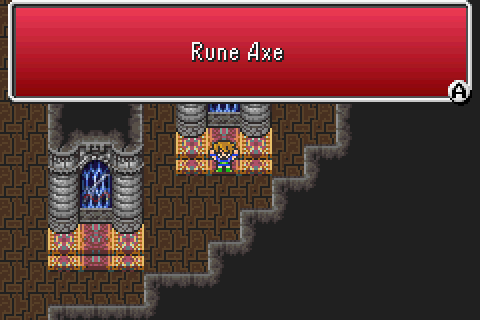
The Rune Axe is one of only three rune weapons in the game, and as such it might be a good idea to explain how those work.
As you may be aware, every time you make a physical attack, three values are calculated: attack (which depends on your weapon, plus a small or large random component), defense (which depends on the target, but may be modified by the weapon) and multiplier (which depends on your level and strength (and sometimes agility, but mostly strength)). The defense value is subtracted from the attack value (but at least zero) and then multiplied by the multiplier, and that's the damage.
If you don't have any MP, the Rune Axe functions just like a normal axe (peculiarly, the other two rune weapons, a sword and a bell, also function just like a normal axe). But at the cost of some MP (5 in the case of the axe), the attack value and multiplier is increased. The attack increase is a constant value (10 for the axe), but the multiplier increase is calculated just like the usual multiplier, but using magic power instead of strength. So this can be a huge increase in damage... if you have good magic power. If, like a Berserker, your magic power is absolutely terrible, it doesn't add up to much. So the Rune Axe is not that impressive, though it does have a high attack value, and is certainly one of the best weapons I have right now.
If I'd been playing the SNES version of the game, there would have been an additional picture above:
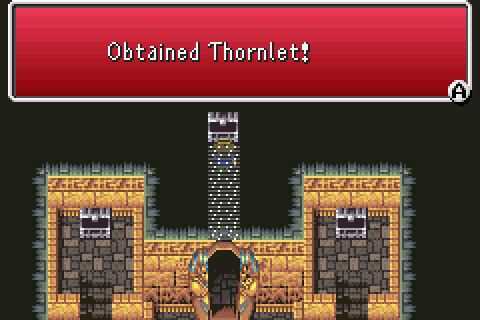
You may be wondering how a helmet is a powerful weapon. Before I answer that question, how about you answer this question: what is three minus five?
Yes, that's right: 254.
You see, the Thornlet decreases magic power by five. If your magic power is less than five to start with, it wraps around to a high number, making magical attacks very powerful. Of course, the Berserkers are quite limited in terms of magical attacks, but they do have access to a few:
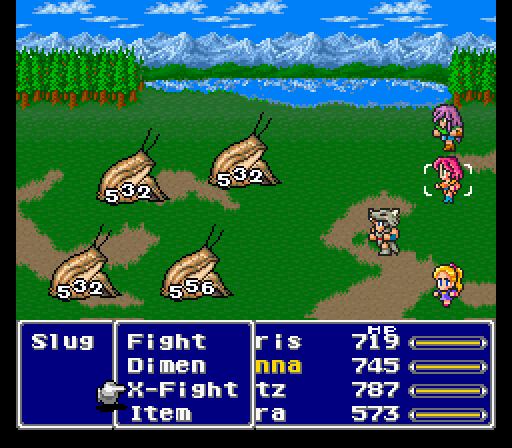
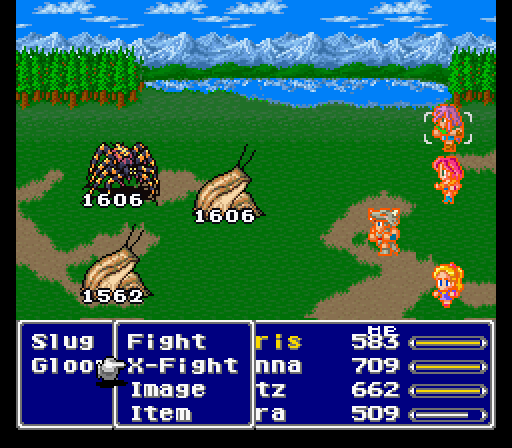
These pictures from the SNES version both show Butz (at level 20, a very low level for this stage in the game) casting Quake via the Earth Hammer. In the left one he is not wearing the Thornlet, in the right he is. Quite a difference, eh?
Now, you may be thinking, couldn't this bug be applied to the Rune Axe as well? Yes indeed you can, except... the Rune Axe, in a weak attempt to be useful, gives a plus three bonus to magic power, which means that the overall penalty is only minus two. In order to get the underflow bug, you must then have a magic power stat of only one, which only Galuf can achieve, and he is of course long gone when you get the Rune Axe. Now, as it happens, there are two ways around this: one is to get the Rune Edge (a sword), which does not have this magic power bonus, and put it on a Berserker with the aid of the Knight's Equip Swords ability. This is of course outside the scope of this variant, even if I were playing on the SNES version. The other way is to get ahold of the Giant's Glove, an accessory that also decreases magic power by five. It is one of the hardest to get items in the game: it is only possible to get as a rare steal from the late game boss Apocalypse (Azulmagia in the GBA version). Very inconvenient to set up, but if you do:
Same setup as above: SNES version, Butz is level 20. In the left image he is attacking with the Rune Axe normally, in the right he is wearing the Thornlet and Giant Glove while attacking. Without, he was doing about 800-1400 damage, and with he was dealing out 2000-4000 a hit! For comparison, the Chicken Knife was doing 2000 damage per hit.
Alright, returning from the alternate SNES universe, I go pick up my final blue magic spell from a Stingray, and go shop in Phantom Village. I don't buy anything other than some spells, because that stuff is expensive! You don't have that type of money problems in a single character variant... then the Island Shrine:
Haste, slow, heal. Wendigo is not dangerous.
The Fork Tower is more interesting. It's all about dividing the group into physical attackers and mages, and I should think the division of labour is obvious in this case. The more interesting question is, how well will the Berserkers do without support, and how well will George do without someone to do damage?
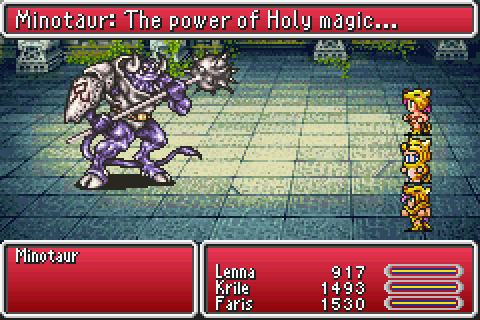
For the berserkers, the key was evasion. If the Minotaur can't hit them, they won't die. Equipped with Ice/Flame Shields and Elven Mantles, he only managed a single hit. No problem.
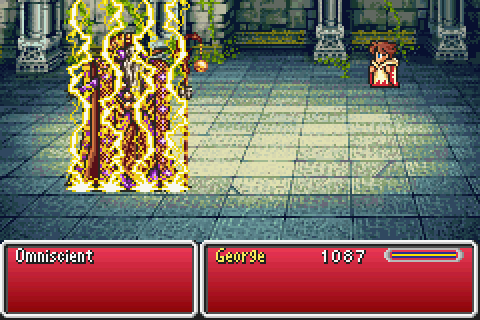
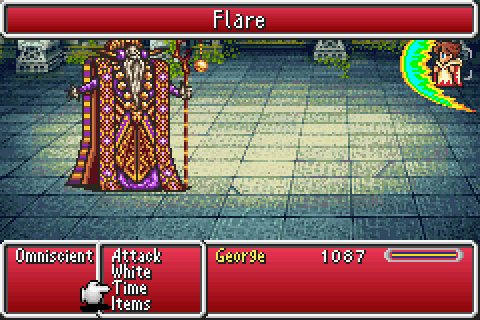
Omniscient was trickier. The need to wear a Reflect Ring was obvious, but that still wasn't enough: he regained HP faster than he was losing it. The problem was that Omniscient starts the battle with Shell and Regen status (and Protect, but who cares?). Well, as it happens I have a recently acquired means of dealing with that: Dispel. After that it was just a question of re-dispelling Regen when he cast it, and hasting him when he managed to slow himself, and healing from his Drain spells whenever he casts Reflect.
Next, the Rift! What? Yes, really! I'm not planning to beat it, mind you, but there are some rather expensive treasures in there that I'd like to get rather than buy (and, of course, some treasures that can't be bought). I won't fight any of the actually hard bosses.
Of course, when the normal enemies are a significant threat on their own, that doesn't help much. On the first try I nearly died in the desert section (a group of Ankhegs cast two Earthquakes at me, killing George - only Krile managed to survive that battle), and the Death Dealers in the Lonka Ruins section made me use up my MP at an alarming rate to revive everyone. I only made it through the first screen of that section before I had to Teleport out. On the second attempt, I made sure to apply Float before the desert, and to have George wear the bone mail while in the ruins part (and past, actually). I made sure to pick up all the treasures up to and in the forest section (nothing particularly interesting) and then it is time for Calofisteri.
For a single character challenge, the rule for winning against Calofisteri is simple: wear the Bone Mail. That's it, she can't actually harm you. Well, I suppose she could still inflict HP Leak by casting Bio on you. Threatening, that. With more than one character, things aren't quite that easy, but very close.
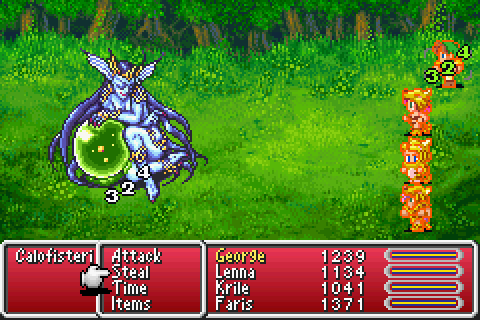
I didn't even need to heal, and she inflicted the final blow by casting Drain on George.
Another boss I didn't need to heal against was Apanda, which was fortunate since I had forgotten to change equipment before the battle, and so George was wearing the Bone Mail. I used white magic to cast Shell and then Protect on everyone, and then spent the rest of the battle dispelling Apanda's own Protect status.
I fled from all the other enemies, and reached the Dimensional Castle and the first two treasures therein. Now, what is my haul here?
The first three items are the expensive treasures I mentioned: each would have cost me 50000 gil. The last item can't be bought for love nor money. It has the same attack value as the Rune Axe, but without the MP cost, and can be used from the back row. Not a huge upgrade, but still nice.
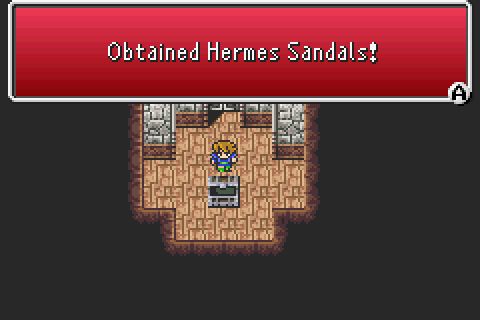
After picking up some extra pairs of Hermes Sandals (if you let one of the kids get a new pair of shoes, you've got to get all of them new shoes, or they'll start whining) I go kill Bahamut, just because I can. The key lines of Bahamut's monster data are
STATUS IMMUNITY: the part where Stop isn't mentioned
and
CAN'T EVADE: Aerial, Song
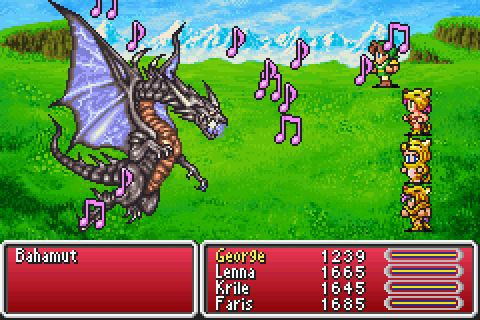
It was literally a hold down the button and fast forward kind of battle. He got in one attack, and then died.
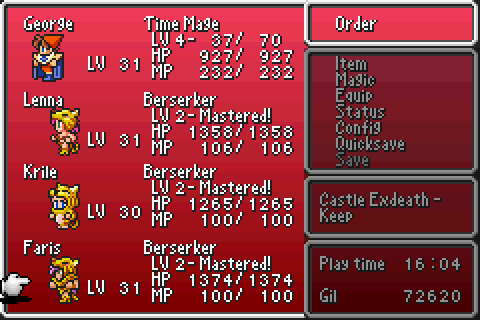
More looting followed: of the Phoenix Tower (for money and Reflect Rings, though I'm not sure I'll have a use for a full set) and of the Istory Falls cave, where I finally mastered Thief, and thus had all the skills and masteries I had planned for at the start of this adventure. I'm not sure I'll have time for it, but I figured I might as well try to master Knight.
The most important item to be found in Istory Falls is the Titan's Axe:
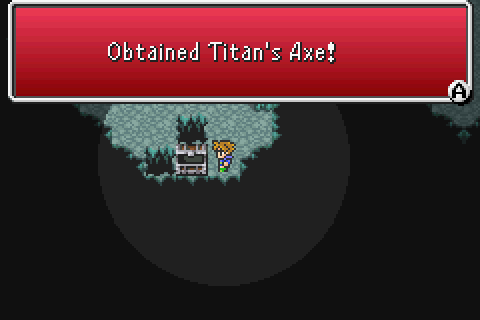
The most powerful axe/hammer. As end game weapons go, its attack power is somewhat low, but together with the Berserkers' damage boost and the axe's ability to pierce defense, this thing can do a nice bit of damage.
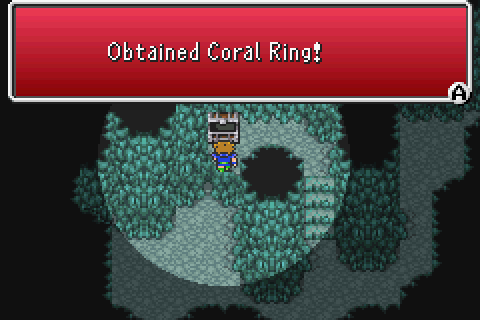
In the first visit to the cave I actually skipped the boss, as I did not yet have a full complement of Coral Rings, but the loot from the cave made enough money to rectify that, and soon:
Leviathan was annoying due to him countering with Entangle, but in no way a threat.
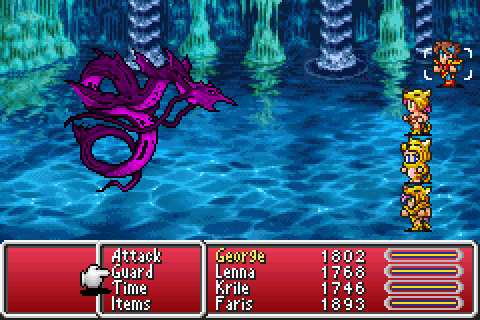
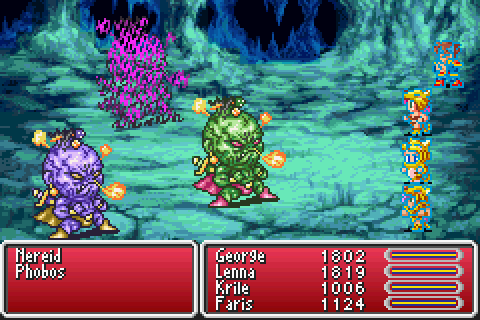
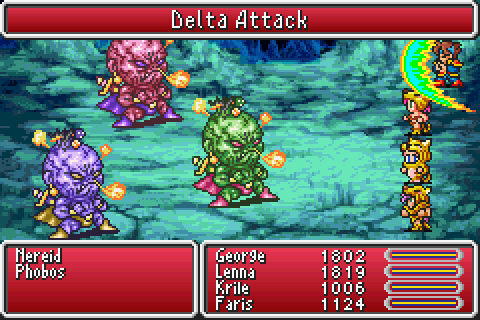
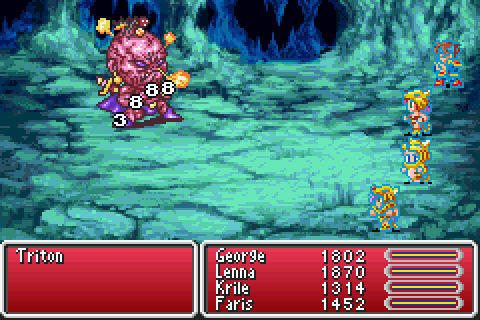
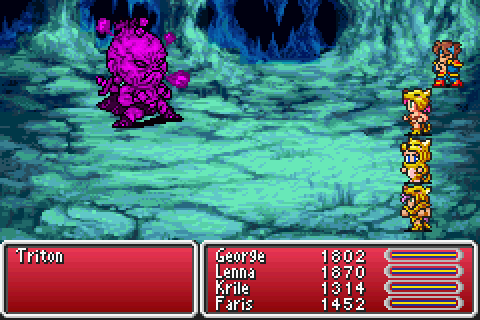
The boss encounter of the Great Sea Trench is a problematic one. Hooray! It's been getting kind of boring with all these bosses that just die when you hit them enough. The problem with Triton, Nereid and Phobos is found in this snippet, that is part of the AI script of each:
Condition:Status:Enemy:Dead{

  Unhide Monster:

  Delta Attack

}
Any time one of them dies, it is revived. I am unclear on whether this is with full HP or some smaller amount, but either way it is a problem. Since there are three of them, just hoping they get killed at about the same time is unlikely to work. Adding to the problem, they counter the death with the powerful Delta Attack, which inflicts petrification.
Well, actually, no, I lied. The Delta Attack does not add to the problem, it is part of the solution to the problem. The most important thing to note about the attack is that it can be reflected. And the trio is not immune to petrification! They are actually not immune to a whole lot of things, just Toad, Mini, Berserk and Slow. They are, however, protected against instant death attacks by being undead, and protected against most other harmful statuses by having a high magic evade. Delta Attack always hits, though.
So the plan is for everyone to wear Reflect Rings. Once one of the trio is dead, they will be caught in a revive->Delta Attack->die->revive loop, keeping one of them dead. And, as a bonus, the rings will protect us from the elemental spells they like to cast. With the three effectively reduced to two, it'll hopefully be possible for the Berserkers to kill both the remaining ones at the same time. George will meanwhile be singing to increase their damage output, hopefully helping with that.
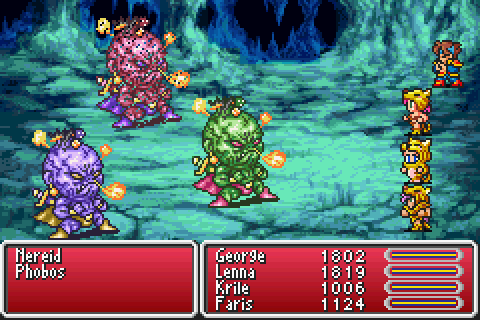
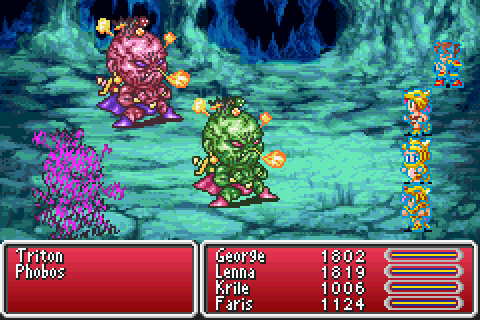
The first part of the plan went off perfectly. As a side benefit, the constant killing and reviving made the enemies repeatedly restart their AI scripts, so they never used their dangerous non-reflectable spells, and instead only attacked with weak physical attacks and Bio. Surviving was no problem, but could I kill them?
Yes, I could. I do not think they revived at full health... or maybe they revived at full health if they died from 0 HP, but not if they died from petrification? I don't know, but it didn't take long until everyone's turns lined up in the right way for the Berserkers to do enough damage quickly enough.
I finished up my business in the overworld - climbed to the top of Phoenix Tower, bought some Flame Rings, killed Odin (with 38 seconds to spare) - and then it was time to enter the Rift again.
I left off just before Azulmagia last time. Azulmagia uses a set of rather dangerous attacks; several instant death attacks, several attacks that can set HP to critical, several problematic debuffs, and some attacks that just plain do a lot of damage. Bad stuff. However, his AI script can be manipulated by casting the right Blue Magic spells. As it happens, most of these spells are damaging attacks, and therefore may not be used. But that's okay, because the one spell I may use on him is clearly the right choice: Magic Hammer. As long as I keep casting Magic Hammer on him, he will not use any attack that can kill.
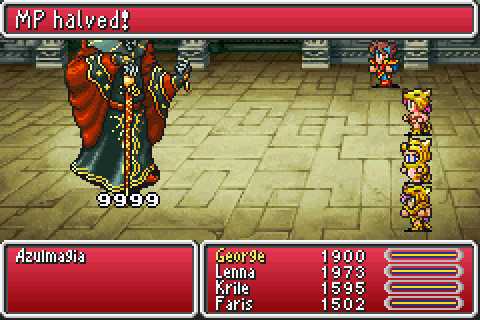
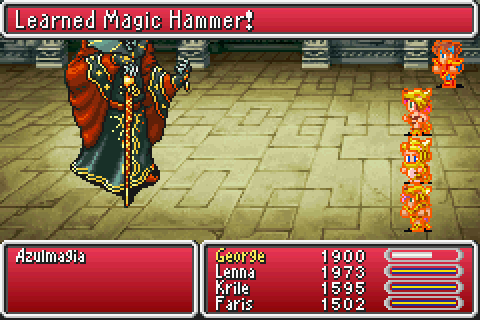
So that's what I did, and Azulmagia died without inflicting any damage.
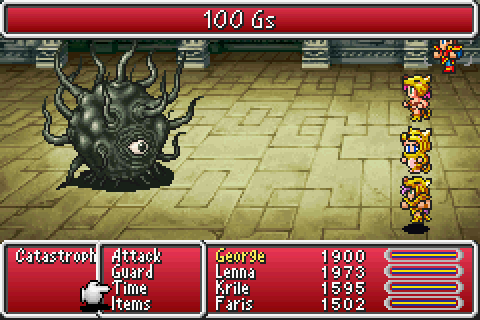
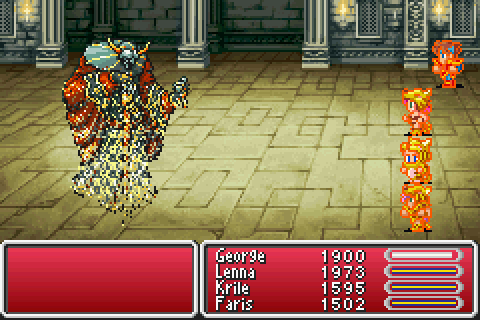
Due to Catastrophe's pathological hate for the Float status, he was even easier.
Halicarnassus opens the battle by turning everyone into a toad:
This is quite annoying, since there is no way for George to cure more than one at a time. I made sure to equip Faris with the Genji Gloves to protect her, though. Once he was done curing, George spent the rest of the battle unsuccessfully trying to cast Slow on Halicarnassus.
It didn't matter; even at full speed, she never got around to doing anything but physical attacks.
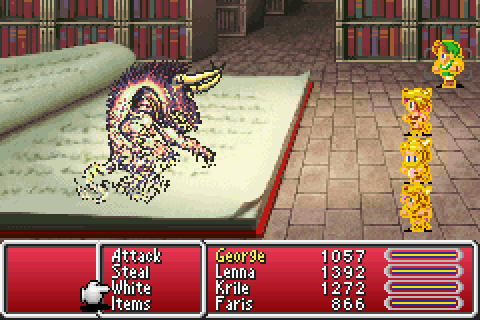
The next foe is Twintania. Killing Twintania is not difficult, due to its second form, which has all the defensive capabilities of a paper tissue. A paper tissue with a lot of hit points, admittedly, but that hardly matters when it can't resist Death. There are some slight complications to the battle, however. The first problem is surviving to the second form: Twintania has a lot of powerful attacks. They are mainly elemental though, and can be protected against: Coral Rings on everyone to deal with the counter Tidal Wave, and Flame Shields (of which I have two, due to a lucky steal from a Grenade) will help against Atomic Ray. Some luck should be sufficient to take us the rest of the way. However, a secondary goal is to steal a certain item the second form has (the common item, thank Bahamut). Thirdly, I'd like to get some ABP onto Knight (less than 200 until I master it - I think I can make it before Exdeath). This would mean that I'd be without both White and Time magic. Can I do that? Maybe. I have a few alternate ideas if it doesn't work, but that's how my first attempt will go.
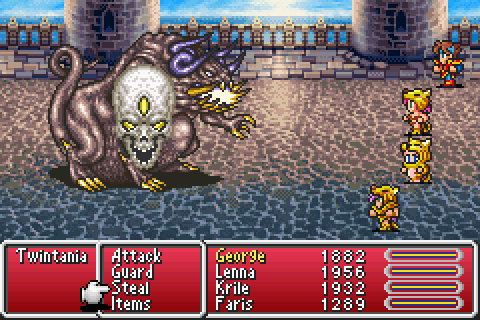
The first attempt went a little too well. Twintania does not immediately mark when it changes form, and it died before I realised it was time to start stealing! Oh well: proof of concept. Let's try that again...
The second attempt went similarly, except I did notice the form change by George's action bar pausing, but he muffed up the steal.
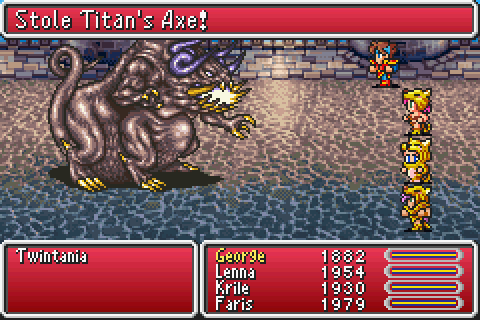
But fourth time's the charm!
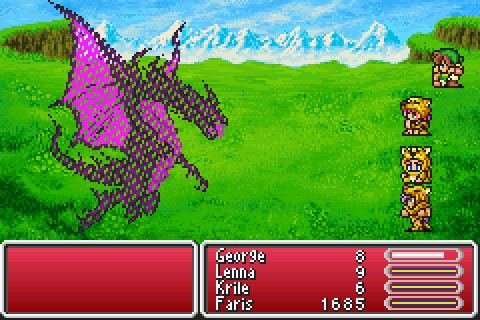
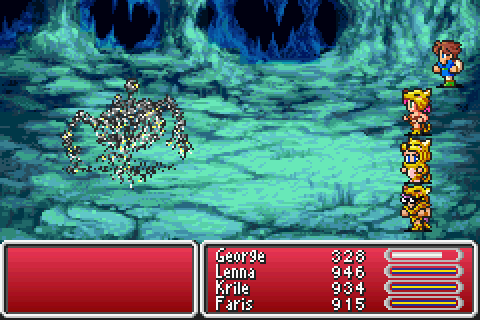
Now that we have a second copy of the best axe in the game, let's backtrack a little and revisit a certain mechanical monstrosity. Yes, Omega. Quite difficult to kill: ludicrous defense, ridiculous evade, superfluous HP, a passel of attacks that can wipe the party, doubled up counter attacks... quite difficult. How could I defeat it with this severely restricted variant? Well, it has a few weaknesses. Most notably Stop: indeed, it starts the battle with Stop status. Moreover, it also has the same love of song that Bahamut does: every performance of Romeo's Ballad will stop it, guaranteed. That's wonderful! Stopping Omega deals not only with its attacks, but also that 95% evade. And attacking with axes reduces that problematic 190 defense to a much more manageable 47. Surely I cannot lose!
Well, if you recall, Bahamut did get in an attack. That's because Heavy type monsters like these recover from status effects very quickly. Fast enough that it gets a small bit of time to advance its action bar in between stoppings. And Omega is a lot faster and a lot more durable than Bahamut: it'll get in more than one attack. Still, such is the plan.
Equipment choice is important. That is as fast as I can make George. The others are wearing Hermes Sandals, two Titan's Axes, and the Rune Axe. The rest of the equipment doesn't matter much.
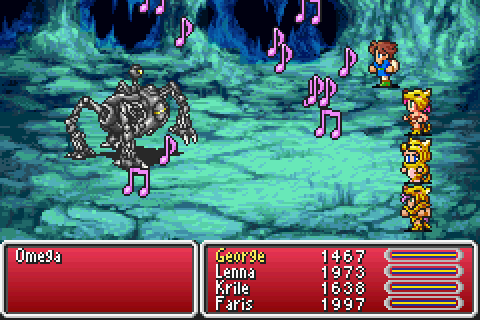
Then... it's really a question of luck. The second and fourth steps in Omega's battle script are Surge Beam: each will take of half of max HP, and since I have no time for healing, the second is guaranteed to kill everyone. The first and third steps also each have large chance of killing one or more of the party (and I can't really spare anyone). Due to George's song, the Berserkers each get in about six attacks for each of Omega's, the damage ranging from about 300 to 2500. It was really a question of repeating the battle until I got sufficiently lucky with both Omega's and our attacks.
It took about five tries, once I hit on the right plan (I tried a number of variants, with Reflect Rings and Time magic and whatnot, before concluding that the above was what would work).
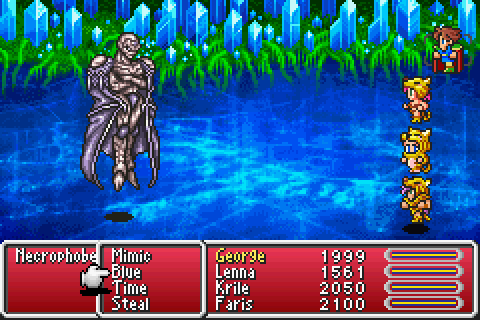
The very last battle before Necrophobe's save point let George master Knight, so that worked out quite well. Now, preferably I'd like to beat Necrophobe on the first try... I don't want to make that trek twice. But I also want to steal the final piece of Genji equipment, which will take up one ability slot, leaving only one other... if I use Freelancer. But if I use Mime, I get one extra, at the cost of the item command. The only downside is that I can't wear a Ribbon, but that's a worthwhile sacrifice.
I should probably mention at this point that I picked up Mime earlier: I picked up Mime earlier. Gogo wasn't a major problem, as he only goes into the kill everything that moves part of his script once he receives enough damage, so I just had to put my crappiest weapons on the Berserkers. He still counterattacked, but only until the Berserkers were all dead.
My choices for abilities are !Blue, !Time and !Steal. Since I'm bringing Time Magic, I will not be using Hermes Sandals, for once. Everyone except Krile will be using a Protect Ring (she'll have to make do with a Flame Ring).
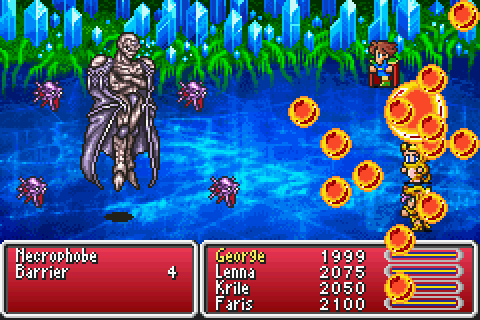
First step was to cast Hastega and then Mighty Guard, just in time for the first barrage of spells....
...which I healed with White Wind, but only after casting L2 Old, which reflected off the Barriers (fortunately the party was at level 39 at this point), but afflicted Necrophobe, invincibility or no.
It was at this point I realised a few weaknesses in my plan. For starters, I had no way of regaining MP, and White Wind is not exactly cheap. But I wasn't too worried about that: I believed I had enough MP to last the battle out, as long as I didn't go crazy with the Wind. More worryingly, I had no way of resurrecting anyone, nor any way of healing if George were to be seriously injured (and Necrophobe does have Hurricane). Oopsie. Oh well, let's hope for luck!
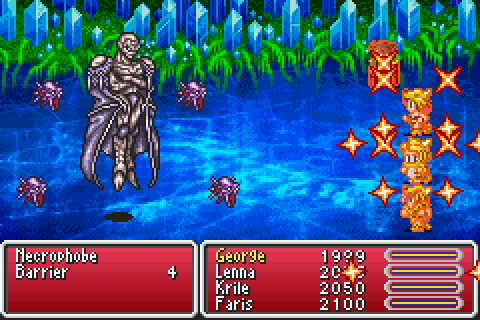
The barriers made another few go-rounds of its spell barrage before falling, but with Shell status from the Mighty Guard, no one came even close to dying.
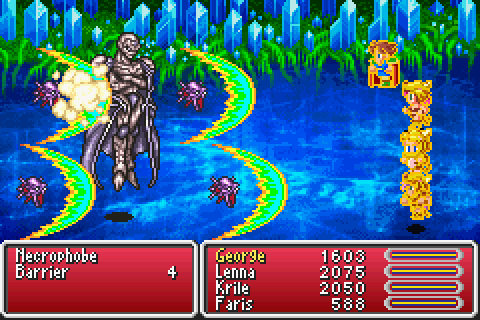
Soon Necrophobe was alone, and started attacking... at a rather sedate pace, as one would expect from an aged man (heh heh). Protect took the edge off the attacks, and I was lucky enough that he didn't use Hurricane.
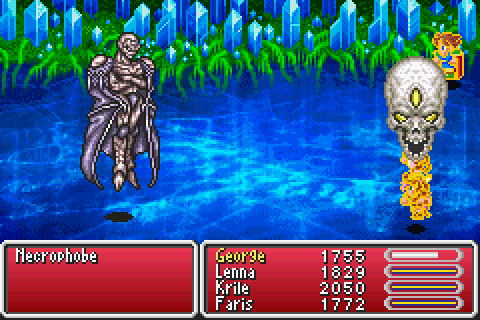

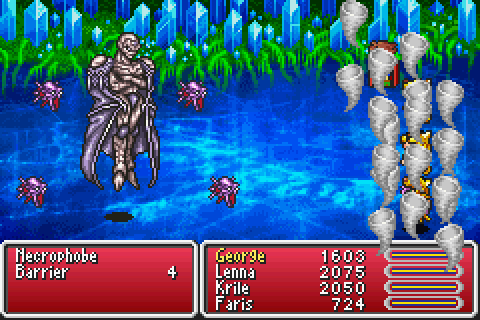
I was not lucky enough that he didn't cast Death, however. But I got my revenge by managing to Slow him afterwards, plunging his already atrocious speed straight into the Great Sea Trench.
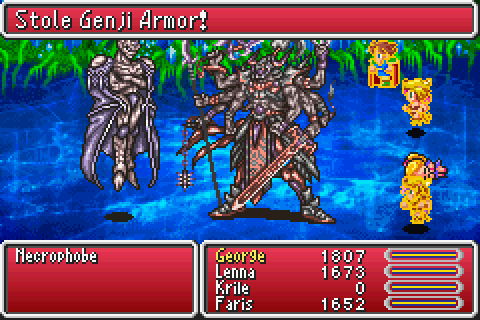
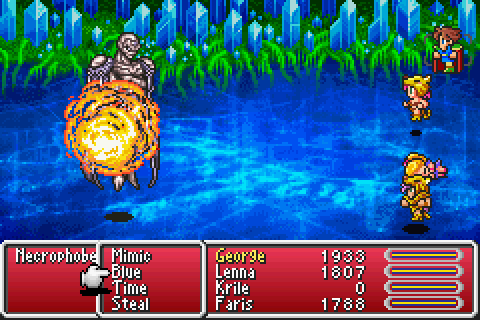
Soon Gilgamesh arrived, and it was all over.
Before moving on to Exdeath, I backtrack a little bit again, to face down the Death Dragon, Shinryu. Who is actually a much easier fight than Omega, because Shinryu, that very most supery of the superbosses, has a glaring weakness, just like the early bosses we fought way back in world one:
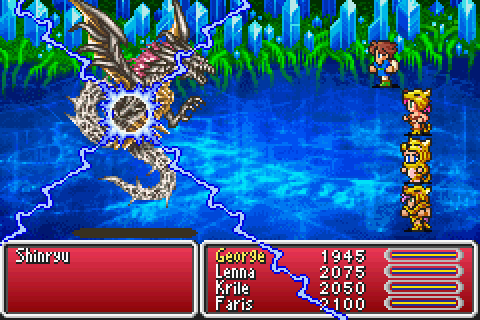
Yes, it is weak to Berserk! And since Berserk, unlike most status affecting spells, is an always hits kind of spell, Shinryu's 95% magic evade doesn't even matter.
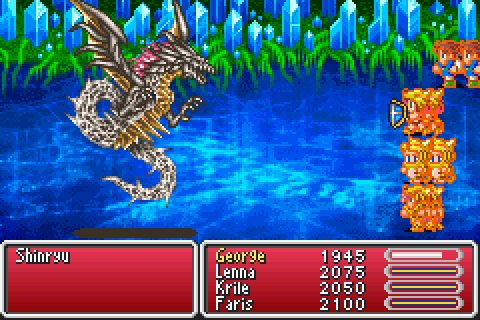
Those berserked hits from Shinryu do about 9500 damage, but if they never hit...
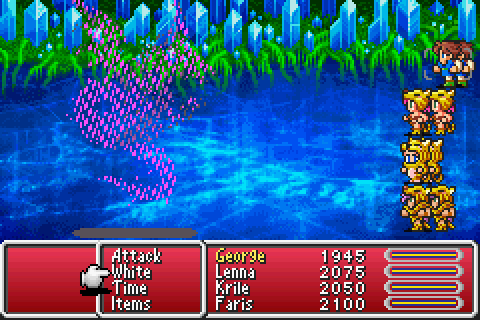
For Exdeath, I intend to use !Blue and !Mix, at least for a first attempt. I'm not actually planning very much on the first go round: let's see how free form buffing and healing will do against him. I've got to use all this stuff I've accumulated at some point, right?
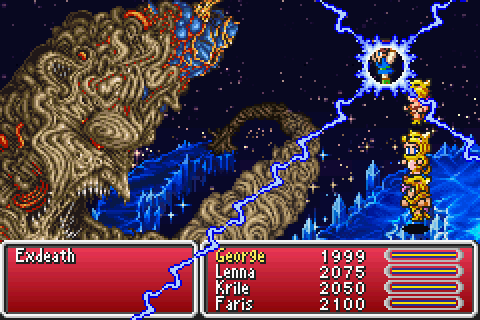
I started the obvious way: with casting Mighty Guard. I followed this by mixing up Dragon Kiss, Goliath Tonic and Life Shield for everyone (adding up to protection against most instant death attacks, and double HP).
Exdeath wasn't just sitting quietly and politely waiting to be chopped into firewood, but the only thing he did that was reasonably affective was hitting Krile with White Hole. !Mix offers a resurrection with full HP for the low cost of a Phoenix Down and an Ether, and after following up with a Gold Needle she was as good as new.
Just after putting the final buff in place, Exdeath died.
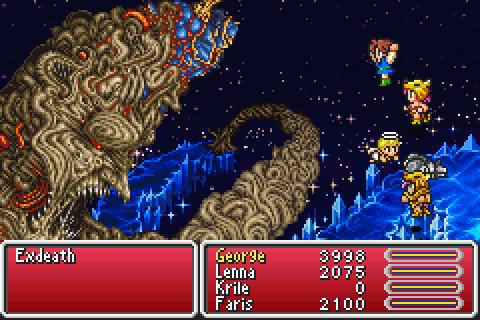
I figured I might as well heal, and then started filling the dead time by mixing up Dragon Power (which increases level by 20) for everyone.
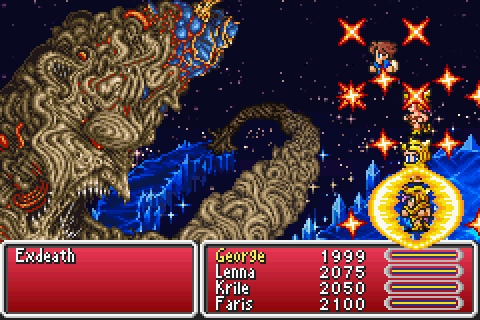
Meanwhile, Exdeath worked itself up to a Grand Cross, with less than terrifying results: only Lenna was affected. The others were presumably hit by one of the numerous status effects they were immune to.
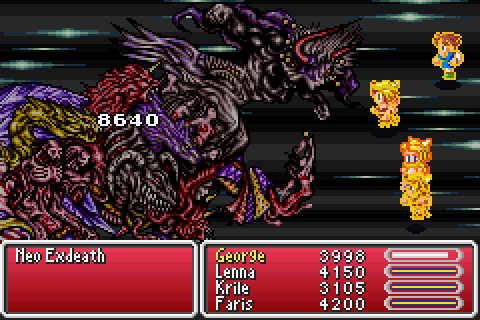
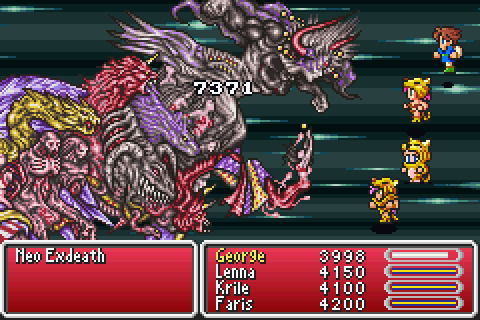
After a few Dragon Power mixes, Lenna was doing some pretty frightening amounts of damage. Frightening to Exdeath, that is. That's as high as it went, though: the bug from the SNES version that allowed you to have up to level 255 in battle was fixed, and 99 is the maximum. The others were doing about 5000 damage per hit (on average) with their Titan's Axes.
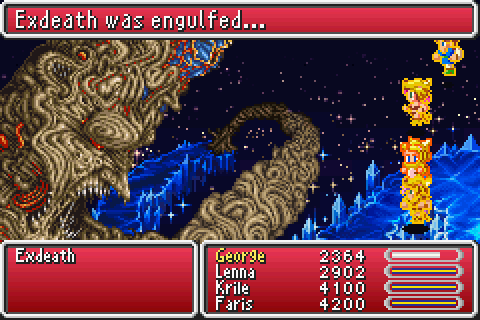
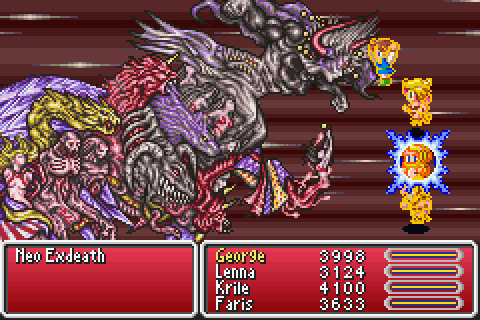
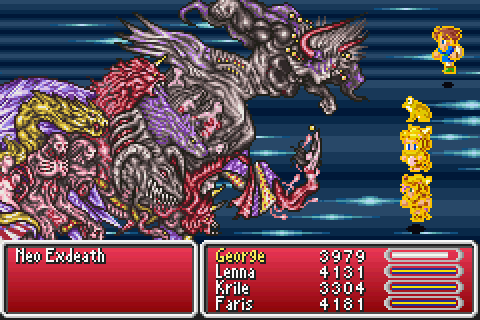
That hit is the one that killed the Grand Cross casting part of Neo Exdeath, by the way.

It was soon followed by the physically attacking part, and then almost immediately after the Almagest-casting part.
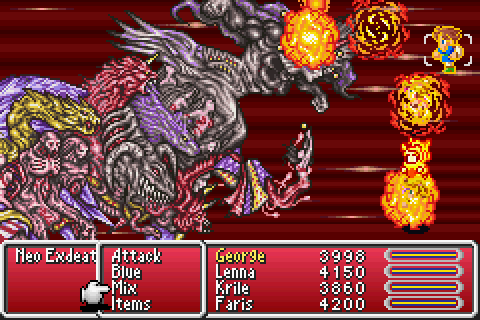

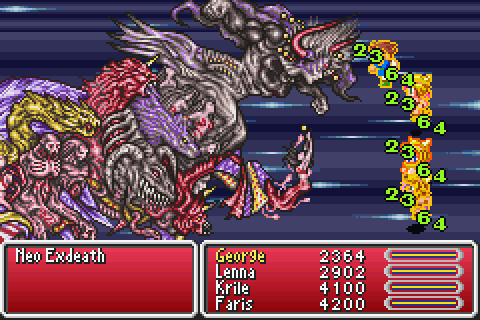
The last part, being in the back row, was still in reasonable health, and therefore got to cast Meteo and Comet. Damaging, but nothing a White Wind can't handle. Due to some design trickery, the part remains in the back row even with the others defeated, so it took a little while to kill it, and it got the opportunity to cast Meteo again.
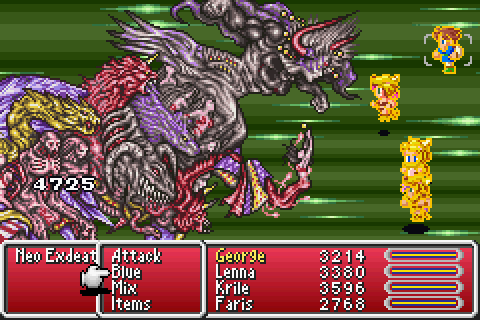
Before I had time to even heal afterwards, Lenna finished it all.

And that was the end of that. This variant was occasionally tedious, but overall, I enjoyed rampaging with the Berserkers. They deserve the title of being the worst class in the game, but they can hold up their end of a battle when leveraged correctly.
Now, if you're not tired of reading about this, head on over to T-hawk's report on the same variant, where he solves some of the problems presented by the challenge in a different way (or so I assume; I have not read it at the time of writing).
The end.
Back to writings about games.