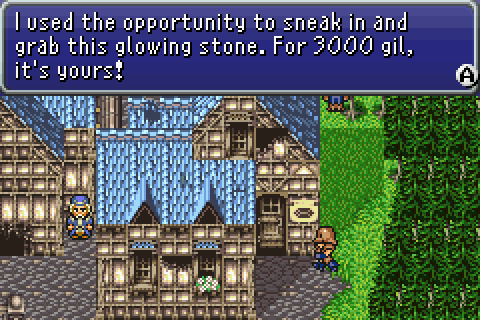
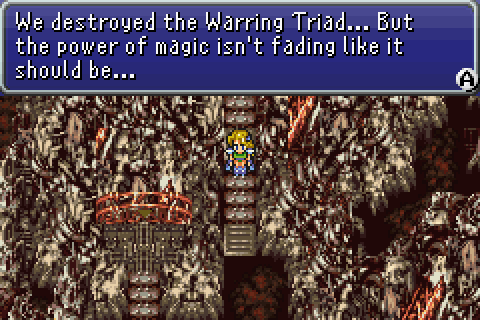
A while ago I did a Kain only playthrough of Final Fantasy IV, in which I used memory editing to keep Kain in my party during the entire game. During it I considered that the same could successfully be done for Final Fantasy VI, and now I've gotten around to doing it.
I won't go into the technical details during the play report itself, leaving that to the final section of this page, for the sake of those of you who go cross-eyed at that sort of thing. If, on the other hand, you find playing classical games the unnecessarily hard way pointless but are all about analysing data structures and bit patterns, feel free to skip ahead, that's what the table of contents is for.
I have elected to play using the Gameboy Advance version of the game, primarily because it fixes a certain bug that makes the Evade attribute useless (as well as some other, less relevant bugs).
Some restrictions: solo means solo. Equipping useful relics such as the Alarm Earring on one of the dead characters is forbidden. Doing so with Sprint Shoes is probably fine, but since the GBA version has B-button sprinting (which can even be set to be permanently on), I don't actually want to use them, so I might as well go purist.
All characters can become very powerful by using magic, especially if using the infamous Gem Box/Economizer combo (Soul of Thamasa/Celestriad in the version I'm using). I will not formalise any restrictions at this point, but I will try to keep the playing true to the unique abilities of the character I'm using, instead of going full generic magic slinger.
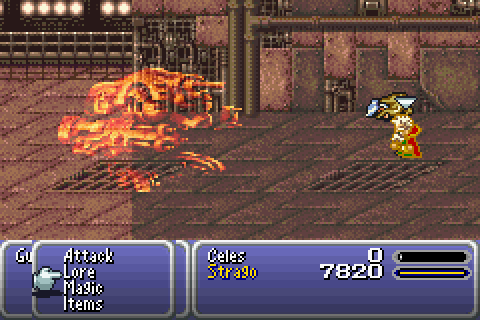
Which leads us to the obvious question: which character am I playing? Some options are easy to discard. Umaro, Gau and Mog have their loss of control issues. Some characters have annoying and weak specials (Relm and Cyan), some have annoying and ludicrously overpowered specials (Setzer). Gogo has all the abilities, and so would be missing a lot of the point of exploring a specific character. Celes's special is less useful in a solo setting, and Terra's is "magic, but stronger".
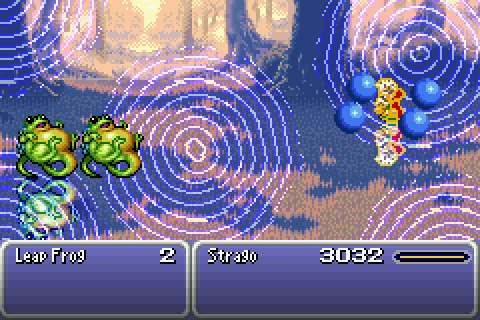
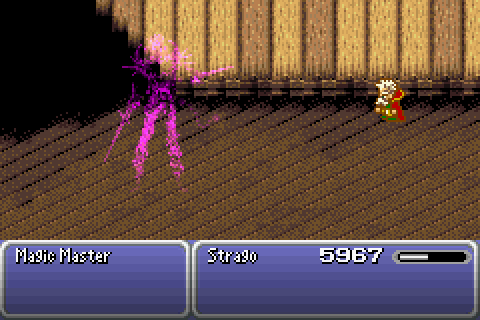
I don't really have any strong arguments against Locke, Shadow, Edgar or Sabin, but I went with Strago, because blue magic is interesting, and gives you a nicely varied tool kit.
Let's get started.
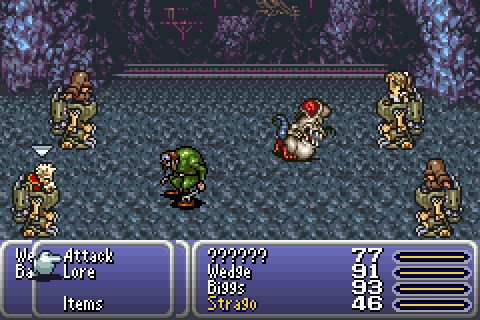
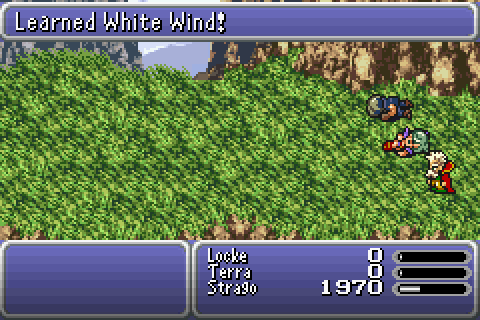
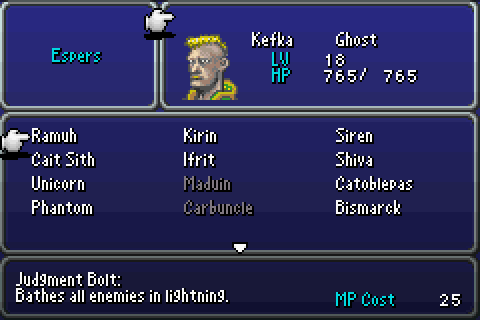
Strago's special ability is Lore, which means he can use abilities learned from enemies. Strago is a better blue mage than the characters from Final Fantasy V, and can learn an ability simply by seeing it used, he does not need to be targeted by it. He does actually have to see it though: he cannot learn if blind or confused.
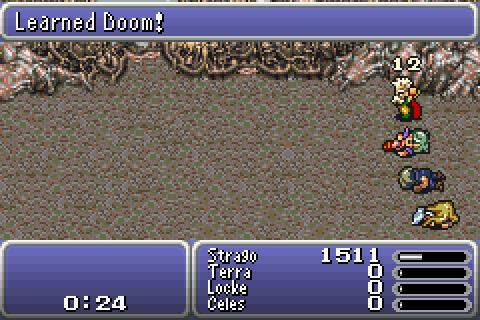
He starts with three lores in his repertoire: Aqua Breath (22 MP), which deals Water/Wind damage to all enemies; Stone (22 MP), which deals damage and inflicts confusion on a single enemy; and Revenge Blast (31 MP), which deals damage to one enemy depending on how much HP Strago is missing.
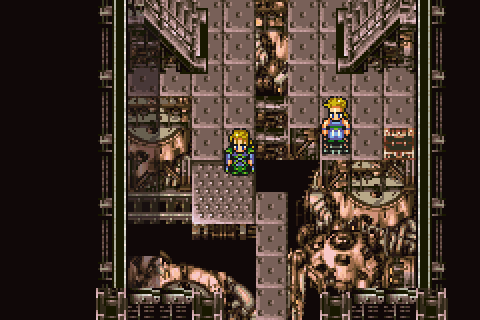
Strago's presence messes up Terra's palette during this first bit. This issue fixes itself after Biggs and Wedge disappear.
If any one character in the party has the MagiTek status set, all of the characters will be drawn as riding MagiTek armour, but only those with the actual status will have their Attack command replaced with MagiTek. This is actually something of a problem, because Strago is only level 2, and there are two bosses between him and the healing water in the tutorial building. He doesn't even have enough MP to cast even one of his Lores!
What I'll do is give him MagiTek armour for the first bit, and give him a full restore after the esper cutscene, since that's what the game does for Terra.
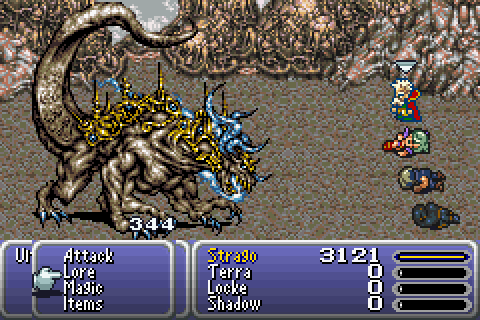
I take Strago up to level 7, giving him a mighty 131 HP and an astounding 58 MP (enough for two casts of Stone!) before facing Ymir.
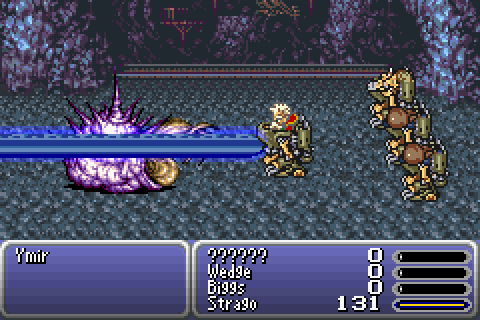
Who is a complete non-issue, of course.
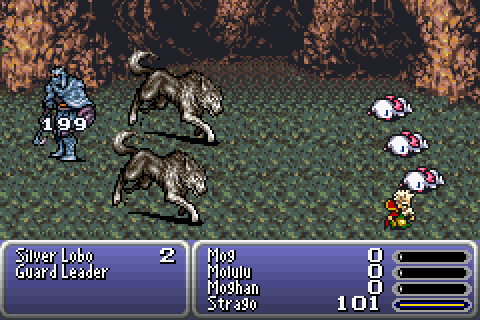
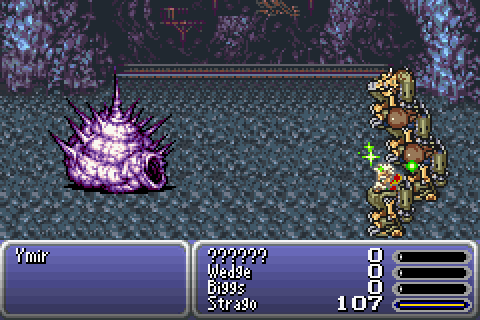
The Guard Leader isn't. He can cast Stop (in the form of the ability Net), which might as well be instant death. Fortunately, he is vulnerable to confusion. All I needed was the luck to survive long enough to cast the lore, which I got on the second try. He charged one of the wolves and then himself. I would have preferred that he cast Thundara, since spells do not break the confusion, but the second Stone was enough to kill him, so no problem.
The MagiTek Armors did a lot of damage, but went down to a Stone each.
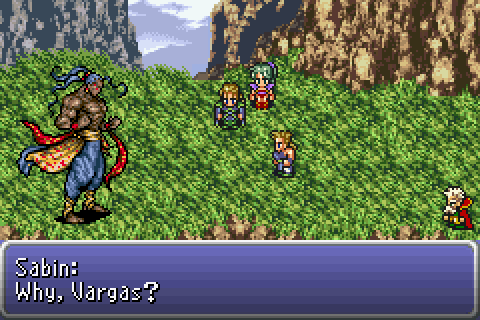
The enemies get more dangerous in the Figaro Cave, and I grind out a few levels while I'm next to a healing spring (I'd never last through Mt. Kolts unless I run from everything, and then I'd stand no chance against Vargas). At 11 I figure trying Vargas is reasonable. I'll still probably have to run a lot in the mountains, but I only have so much patience for level grinding.
Before Mt. Kolts, South Figaro starts the game's tendency to throw great relics at you on a regular basis. South Figaro hides the Hermes Sandals, which confer Haste status on the wearer, causing the ATB gauge to rise ~30% faster. Also the Hyper Wrist, which raises strength a bit. Not as impressive, but still a little bit helpful.
And then I got distracted. For about a year and a month, according to the time stamps on this file. For comparison, the file was created three days before I last edited it, which included writing the entire Hacking and Reasoning sections. Good thing I document these things as I go.
I took some time to check that what I was planning to was reasonable, which it was, and took advantage of my hiatus having slightly recharged my patience for grinding by giving Strago another two levels. And then it was on to Mt. Kolts, for real this time.
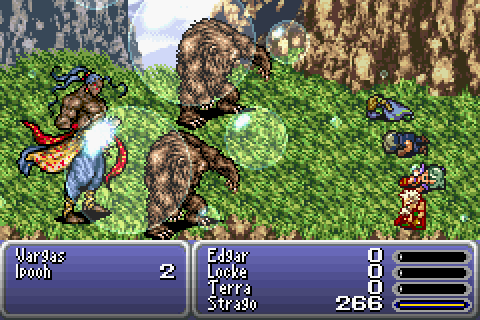
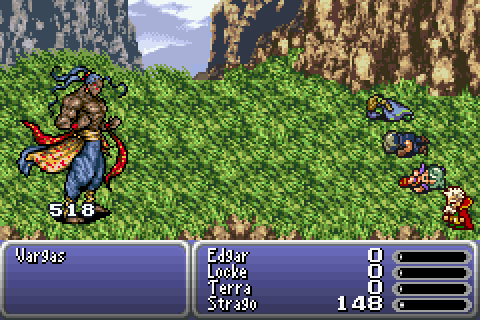
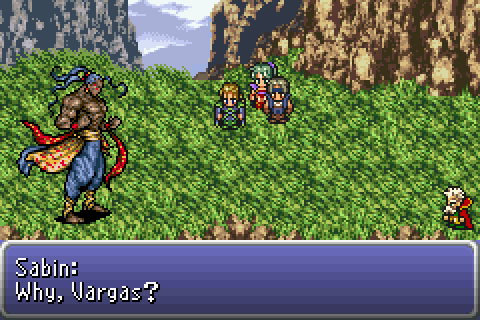
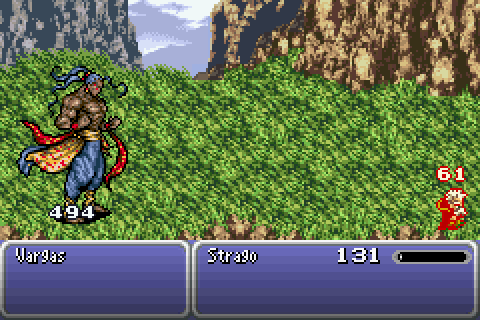
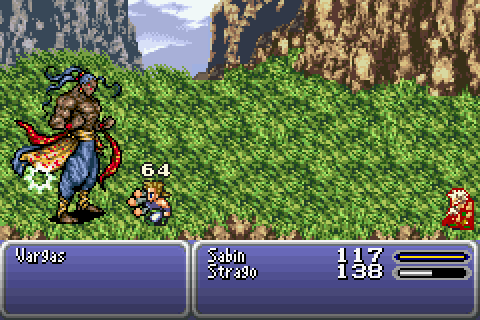
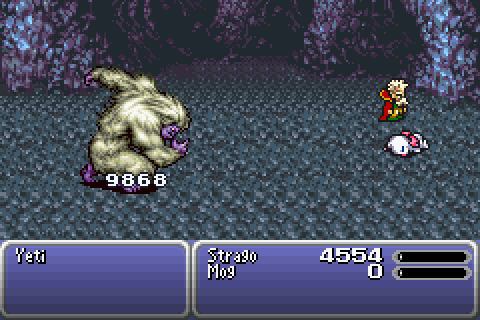
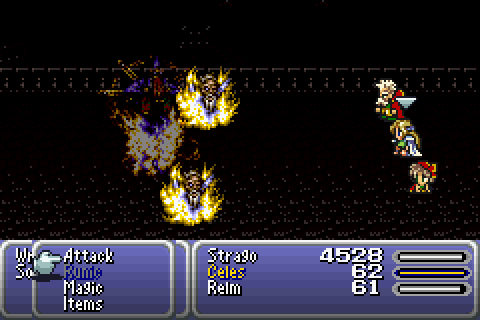
Strago's starting Lores having an MP cost befitting the midgame is balanced by them having a power also befitting the midgame. Old man Strago may only be able to cast six Aqua Breaths before needing a rest, but he only needs two to kill Vargas's bears, and two more to trigger the cutscene.
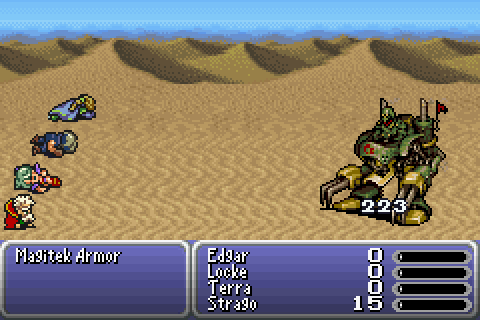
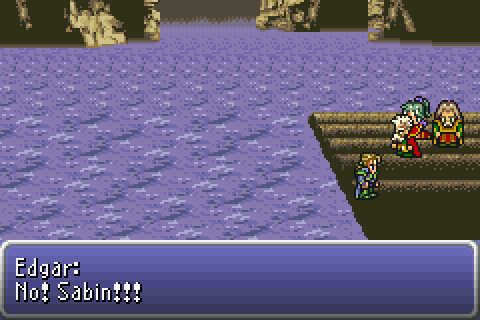
This leads us to the first point in the game where having a party other than the expected one gives us trouble. Without an empty slot in the party, only Sabin's disembodied voice joins us, and not his distinctly embodied muscles, making the battle's enforced Blitz usage kind of a problem. Hopefully nothing a reload and some messing with who's in the party can't fix.
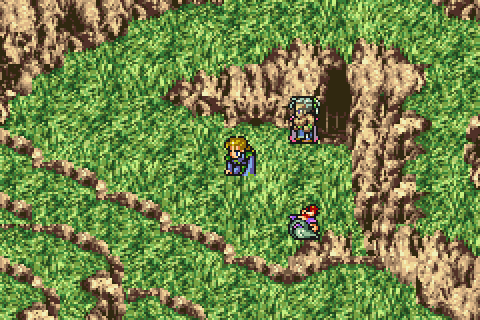
Okay, removing Locke from the party before talking to Vargas causes the game to lock up at the screen above. Attempt one was a failure...
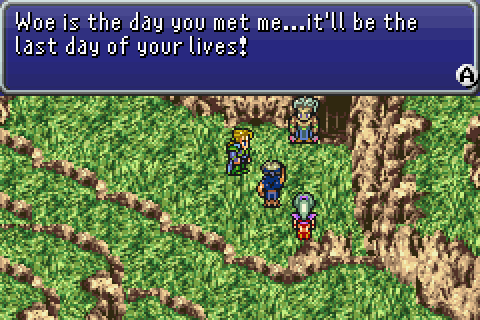
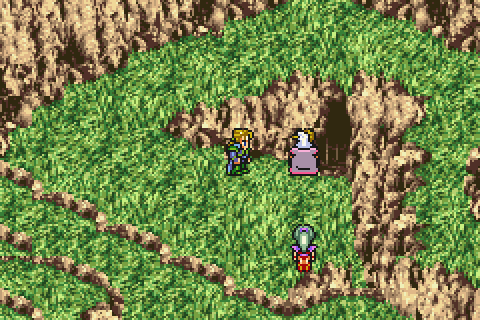
The second attempt, which consisted of removing Locke from the party at the last text box of the dialogue went better, but instead locked up a few lines into the post-battle scene, probably because Locke was supposed to do or say something at that point. But that was most of the solution: the third attempt was simply to do the same, and then remove Strago from the party and adding Locke back before the battle ended.
The part after the Returner hideout also creates a problem for solo characters. The game is set to immediately cause a game over if Banon ever is knocked out, so it's inherently impossible to solo in that sense. But in addition to this, due to all of the characters that are actually supposed to be in the party having low levels, so does Banon. He starts at level 3, with 69 HP. That's not really going to cut it... fortunately, the game does allow you to leave the Returner hideout and grind a bit before going down the river (the entrance to Mt. Kolts is blocked by the empire, so you can't make it back further than the little area after Mt. Kolts and before the hideout). At level 10 and 219 HP, I decide he can probably survive until the next boss.
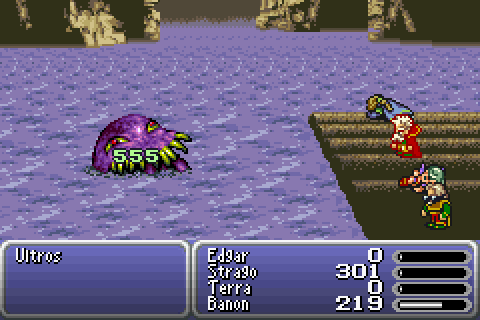
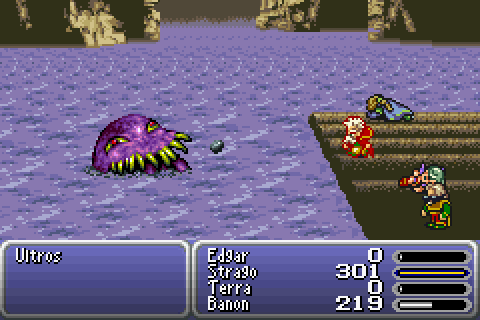
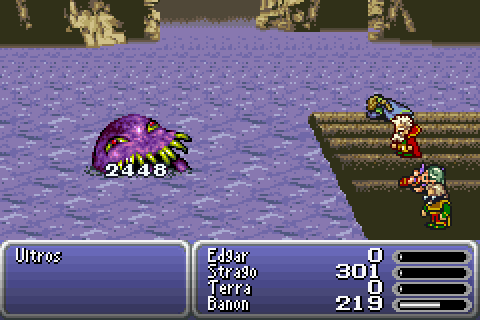
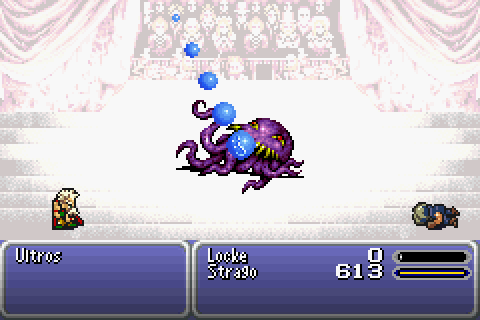
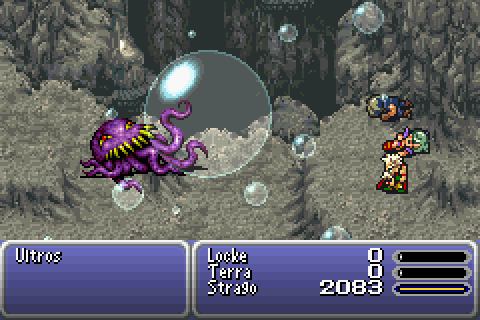
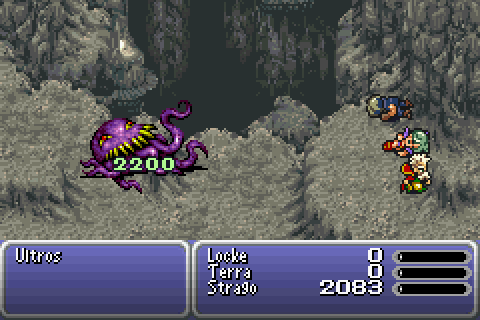
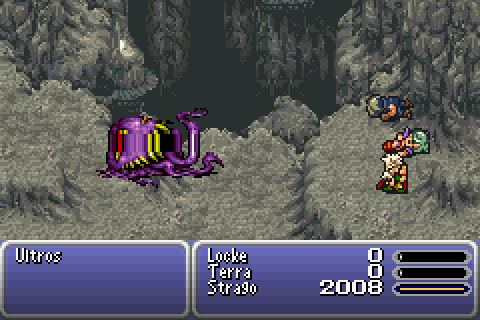
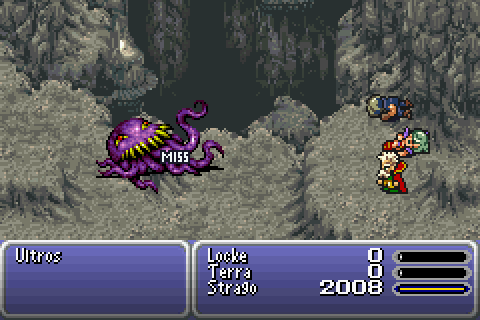
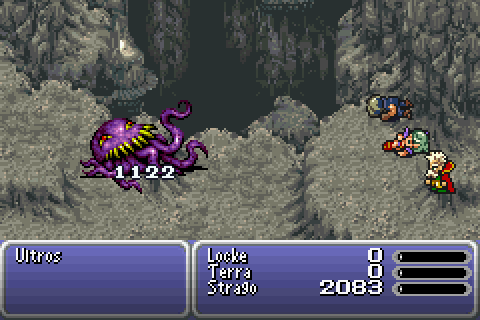
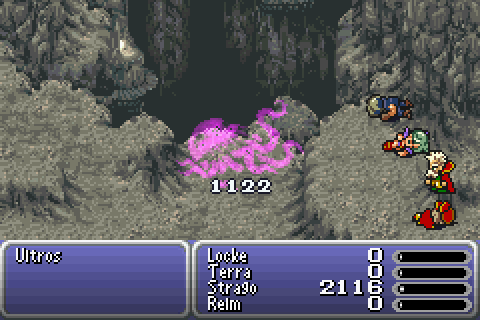
My go-to lore so far has been Aqua Breath, which is quite powerful. However, Ultros absorbs water elemental damage, leaving me with the weaker and much less accurate Stone. That's not a problem though, because Stone is the Goblin Punch of this game: if Strago's level matches the enemy's level, its damage is multiplied by 7.5. Ultros's level is... 13. Good thing thing I didn't grind more!
The post battle scene plays out without real problems even without Sabin in the party. In general, in-battle scenes seem to be much more error resistant than out of battle scenes.
Strago being in the party after the Ultros battle results in some weirdness, but it appears to be strictly cosmetic. I quickly run through the Terra/Edgar/Banon scenario, as it doesn't really contain anything relevant, and then proceed to Sabin's scenario, where something exciting awaits us: a new lore!

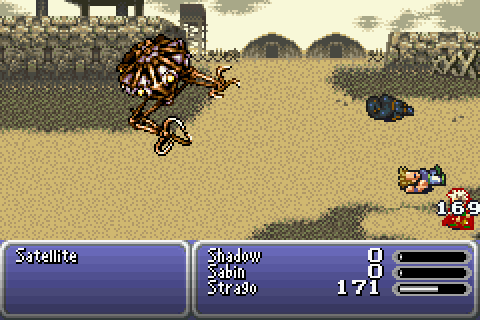
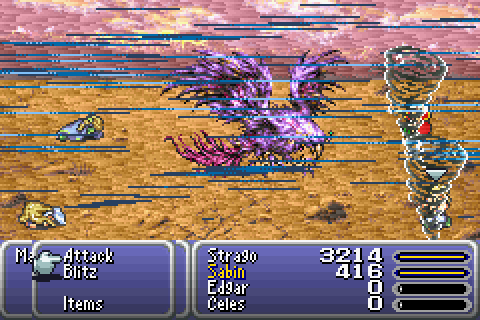
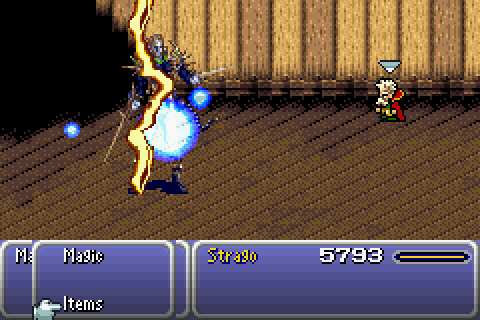
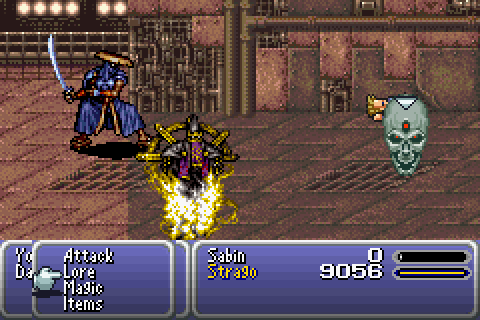
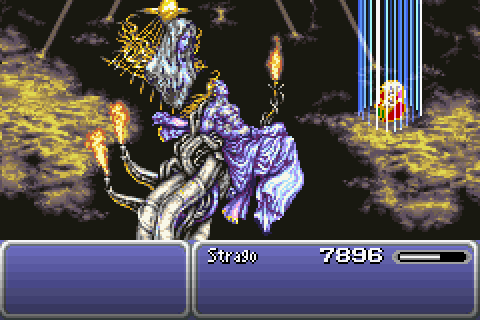
Satellite is not difficult to kill; it drops to two Aqua Breaths. The problem is learning Dischord from it. Dischord is its tenth actual attack (and some of the nine before it are threatening), and it will also summon enemy soldiers at various points in the battle. As an additional annoyance, it can cause blindness and confusion, both of which would prevent me from learning the lore. It's not terrible if I can't do it, as Dischord becomes available from an easier source in the MagiTek factory, but let's see if I can get ahold of it now.
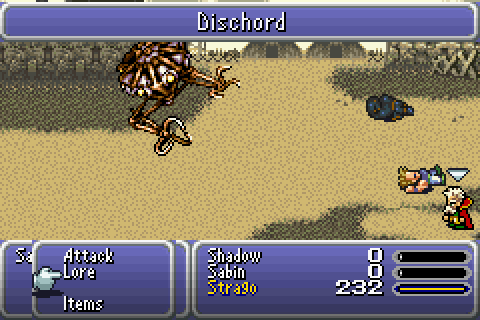
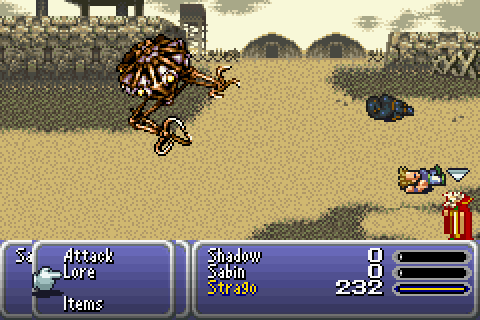

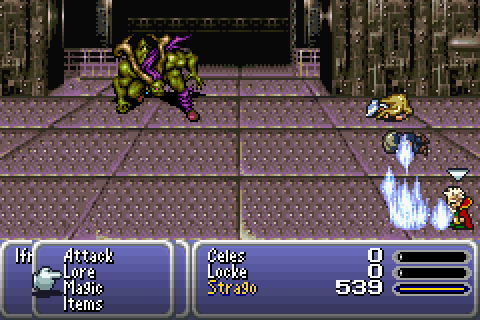
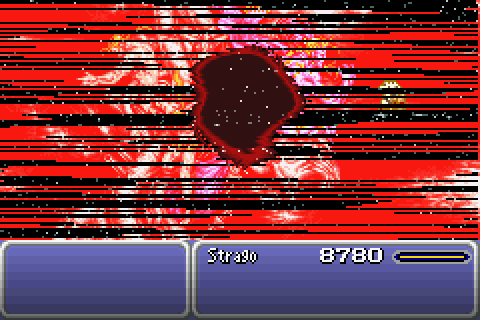
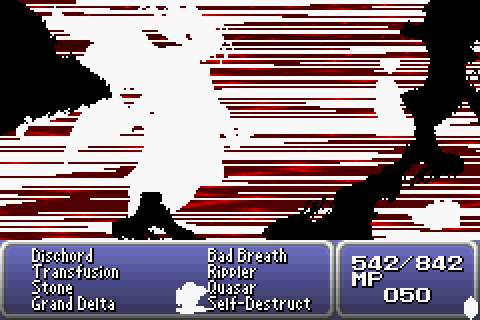
In the end, it was pretty easy. The only really dangerous attack was MagiTek Laser (the first image), and the summoned soldiers were easily killed by Aqua Breath, though some of them did counterattack upon death. I could keep up with healing with Potions with no real trouble.
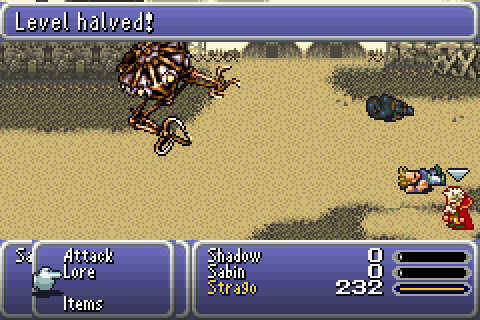
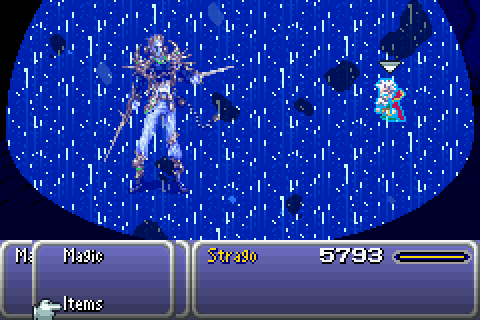
As shown, Dischord halves the target's level. Level is used directly in a number of calculations, including damage, so this is potentially a powerful debuff.
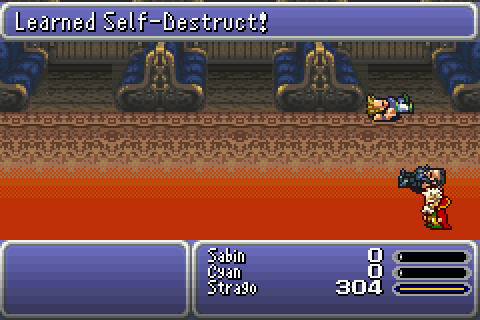
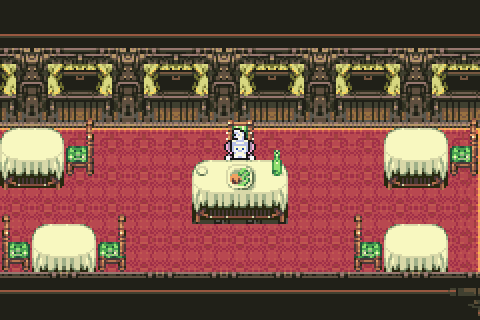
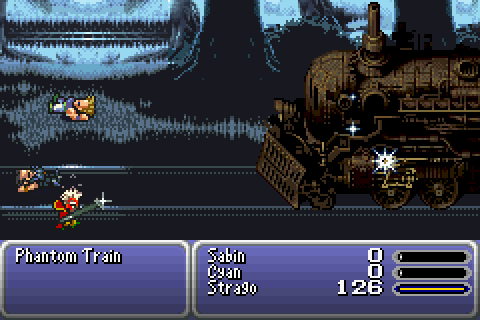
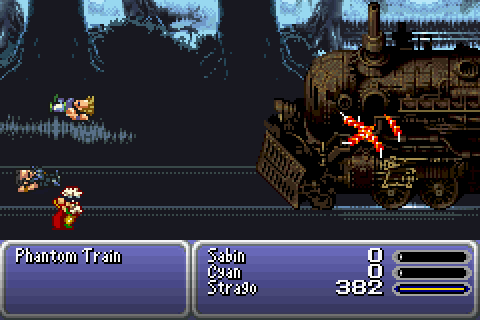
On the Phantom Train I immediately learn Self-Destruct from a Bomb. Strago's interest in the lore is strictly of intellectual curiosity, but I appreciate filling in the hole in the lore table anyway.
An interesting detail about this are is that, since Strago shares a character slot with one of the ghosts (see the Hacking section for an explanation) cut scenes on the train actually have movement directions for him, so he walks around a bit and pretends to participate when Cyan freaks out over machinery and similar. He uses his shocked sprite in the dining car. This also meant that Strago was forced out of the party at the point where the ghosts usually leave, but that was easily remedied.
I ran from basically everything in here. Many of the enemies have high damage or instant death attacks, and the rewards are meagre. I also skipped fighting the Apparition (monster in a box), as it is very capable of killing me, and I have no use for another Hyper Wrist (or for the one I already have, to be honest).
As for the boss, I tried fighting it the non-cheesy way once, but it berserked me, so I just went with the easy solution.
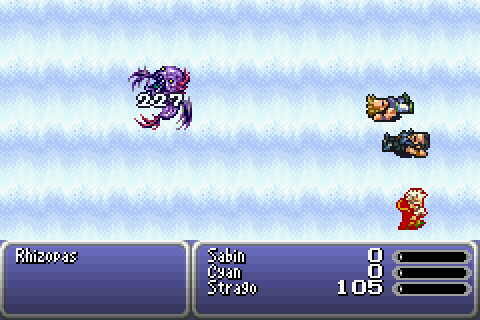
Rhizopas absorbs water, but is vulnerable to confusion, and in general unthreatening.
In Mobliz, a Tintinabulum joins the Awesome Relic Club, though you do have to work a bit for this one. Other than that, the rest of Sabin's scenario is uneventful, though Nikeah offers Strago the game's first body armour upgrade in the form of a Silk Robe.
Locke's scenario is another part where Strago is forced to take on an assistant, at least if I don't want to glitch myself past a guard and skip South Figaro entirely (assuming that works in the GBA version). And while the consequences of doing so are pretty entertaining, there's good loot in here, and I think I'm abusing the game sufficiently as it is.
The scenario was pretty easy. None of the enemies had any problematic attacks, and Strago was powerful enough to easily melee them at this point, with the Tintinabulum keeping his health up. Speaking of the Awesome Relic Club, there's a Ribbon in a hidden section of the underground passage leading out of town. Because obviously immunity to most status effects is an early game kind of item.
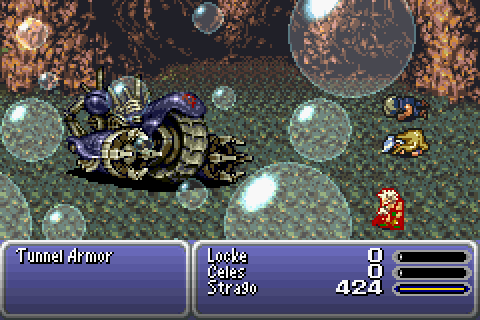
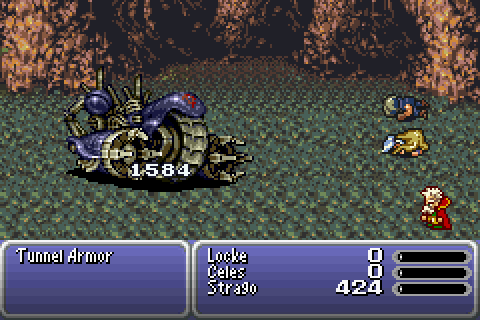
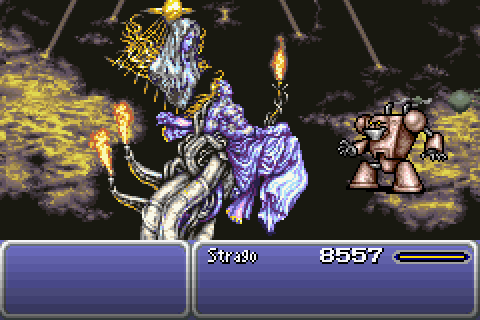
Tunnel Armor could have been a tricky fight, given the gimmick of having you use Celes's ability to avoid damage... but not when it dies to a single Aqua Breath (being a machine, it's weak to water).
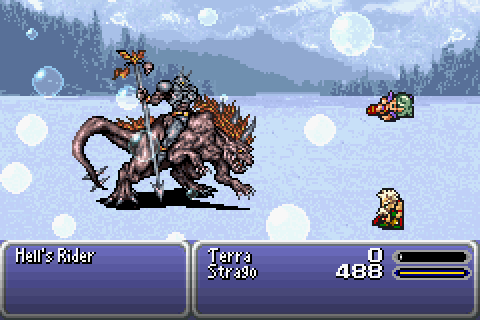
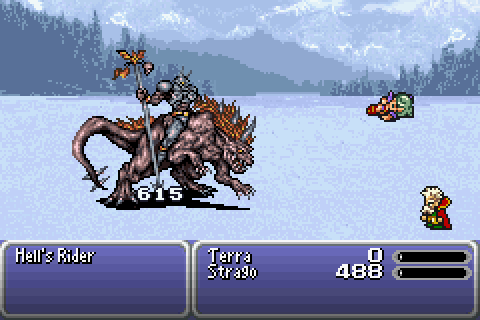
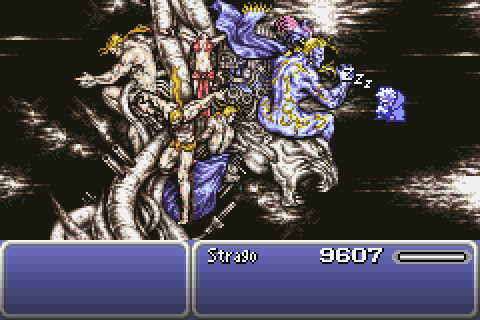
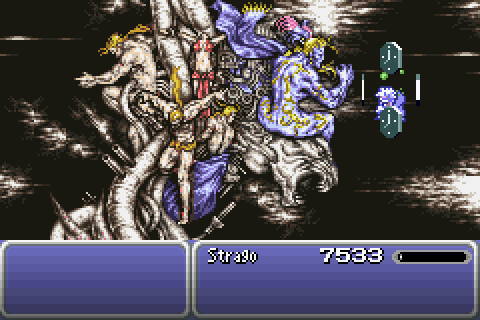
The Hell's Rider is a non-issue, dying to two Aqua Breaths and a melee attack. Kefka is more of a problem. He has two attacks of concern: Blizzara, which does almost enough damage to kill me from full health, and Confuse (Aqua Breath does more than enough to kill me). But Final Fantasy VI's friendliness in allowing you to equip two relics provides for a great deal of flexibility. I choose the Ribbon to defend against confusion, and the Barrier Ring (gathered from the Imperial camp in Sabin's scenario), which casts Shell when HP hits the critical range, thinking that it'll have a nice synergy with an attack that only almost kills me.
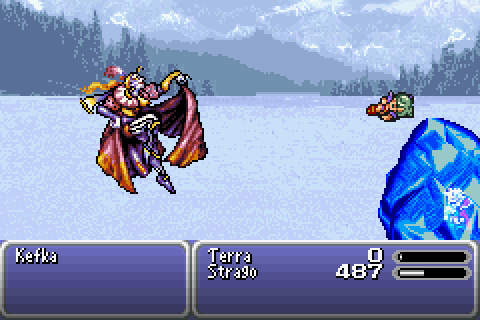
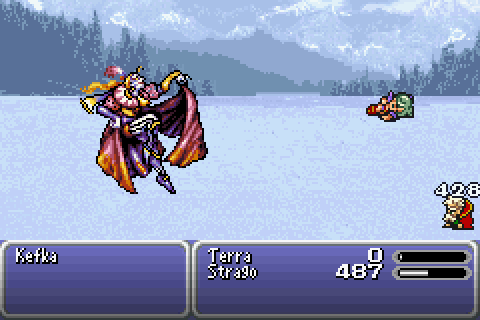
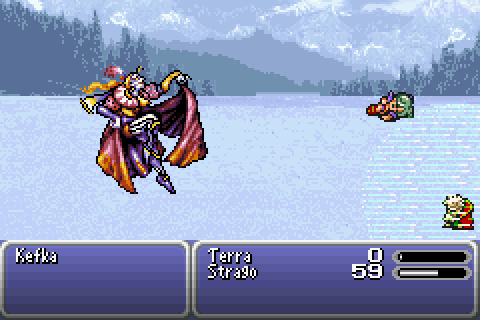
The plan worked, though even with Shell status, Kefka did significant damage, and he was also quite a bit faster than Strago, so frequent healing with Hi-Potions was a necessity. It wasn't harder than that, though. For a while I was afraid I'd run out of MP before defeating him, but the very last Aqua Breath did the trick.
And then Terra freaks out and flies off, and we get to the part of the game where you get to make choices about who should be in your party. Fine by me, should mean that the game will have less trouble with characters not being in the party when it expects them. So far, the only part that required me to get creative was when Sabin joined; hopefully the rest of the game will be smooth sailing.
The next few locations offer nothing more interesting than shopping. I pick up a Chain Flail and Mythril Vest before hitting Zozo. And there, I proceed to not use them at all, instead running from everything. For a few reasons: Zozo is fairly lengthy, and Strago still has MP problems. There are reasons why holding of on levelling right now is advantageous. And Veil Dancers. Veil Dancers attack with second tier elemental spells when alone, and there are encounters where they show up alone from the start. I'm at severe danger of dying to them, and it's better to lose three minutes of running than fifteen of fighting.
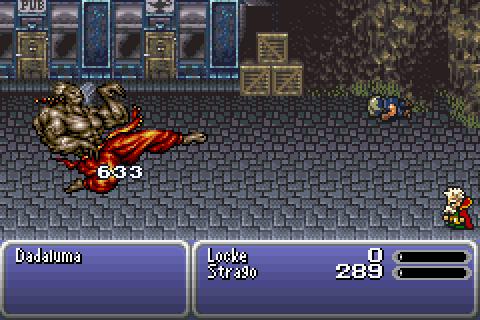
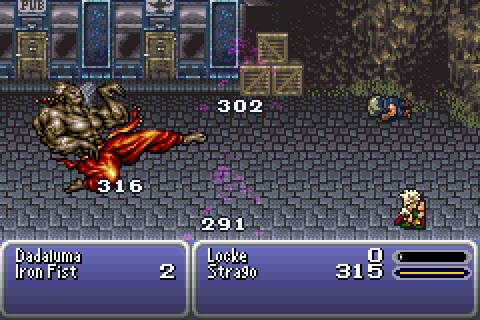
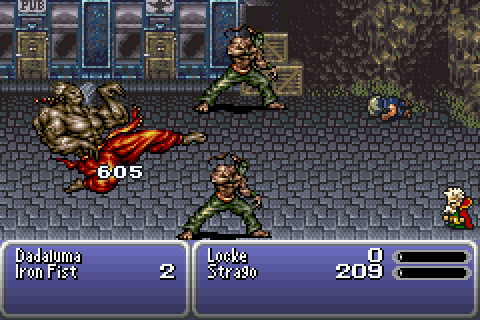
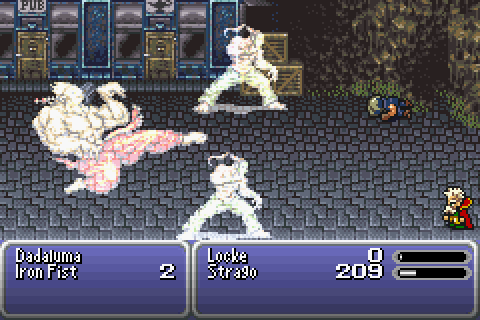
Dadaluma has a quirk where two parts of his AI script are activated every fourth Attack or every other time he's targeted by Magic, respectively. Guess who doesn't use either of those commands to do his damage? I'd forgotten to change my relics from the "least annoyance while travelling" setup of Ribbon/Tintinabulum, and it was still no kind of problem. I might have been able to forgo my one Hi-Potion us if I'd been wearing two Earrings instead...
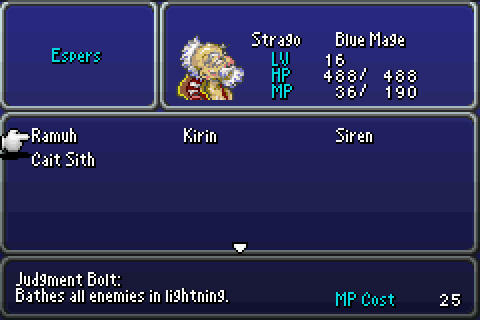
And that gives us access to magicite, which means it's time to talk about the levelling system. Generally, when a character gains a level, only three values are affected: level, HP, and MP (though Terra and Celes may also learn spells... but not Strago or Relm, even though it would make all the sense for them to do so). Level is used directly in many formulas, so this has the effect of the character generally getting more powerful at everything they do. The other attributes do not change... normally. However, some pieces of magicite have a level up bonus. When levelling up with that magicite equipped, the character's attributes are raised accordingly. The possible bonuses are that strength, stamina, speed or magic is raised by 1 or 2, or that HP or MP is raised by 10%, 30% or 50%. In the latter case, the percent refer to the standard gain at that level up. So if Strago were to normally gain 40 HP upon reach level 20, with an HP+10% bonus, he would instead gain 44 HP. So let's take a look at what the attributes do, so we can decide what we want.
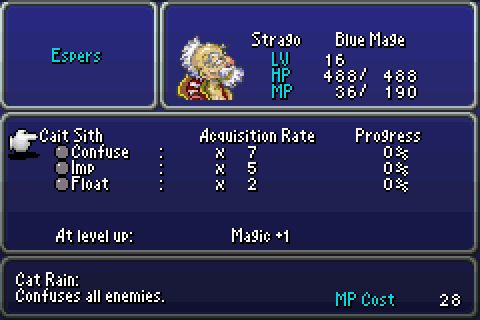
So the conclusion is simple: we want magic, and that means Cait Sith. For now. Which is convenient, because I also want to learn Confuse from it, as that spell is a helpful tool for learning Lores (Stone also works, when it doesn't kill the target in one hit).
Before continuing to the opera, I backtrack to the area around South Figaro. It's a surprisingly good area to grind spells (the lone Belmodar encounters give 3 AP), but that's not why I'm there.
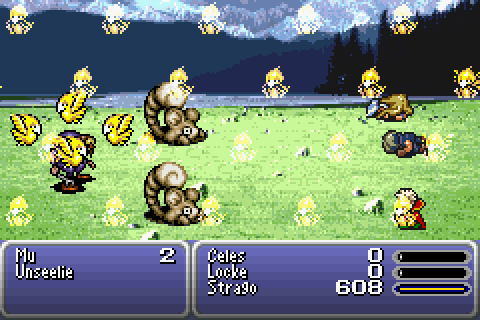
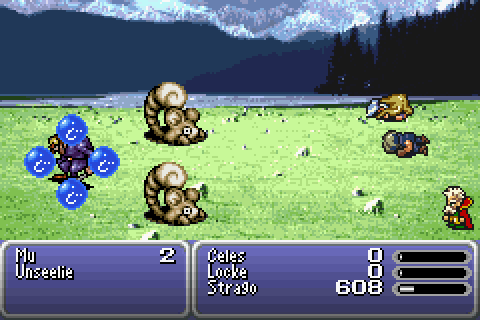
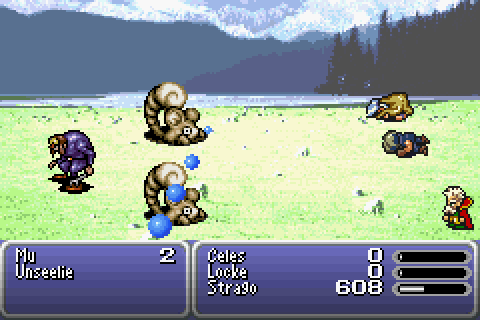
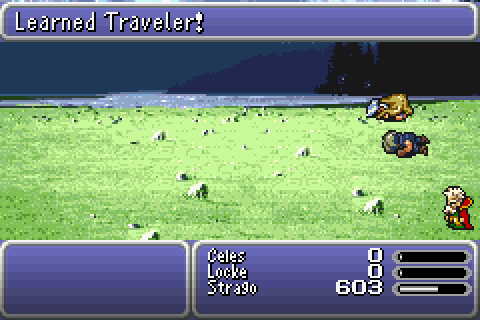
The Unseelie enemy gives up the Traveler lore when confused. This was called Step Mine in the SNES version, and now seems like a good time to give a slightly more thorough explanation of the Lores I have.
A cheesy way of powering up Traveler would be to run back and forth in town with Sprint Shoes. I won't do that, but as of now it's cheap and decently powerful, especially as I believe it (and all other lores with non-standard damage calculations) ignores magic defence. Revenge Blast is useless for now, since it does less damage than my other options even at critical HP, but it might be pretty good towards the end of the game.
While I was in the area, I also picked up a Thunder Rod from Figaro Cave. If I had left it until the World of Ruin, it would have turned into a Hero Ring, but I realised the rod would be much more useful (especially since I already have one). Unlike in Final Fantasy V, the rod will not boost lightning elemental spells, but it does have a 1 in 4 chance of casting Thundara when attacked with, and can be broken to cast that spell (at maximum damage and bypassing defence).
Well, let's get back to the plot.
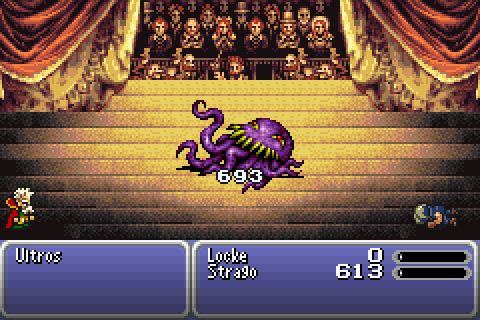
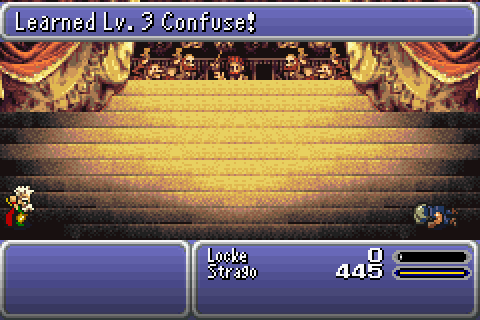
Ultros is weak to lightning, and Strago has in fact learned Thunder by now, but Traveler was still more powerful at 693 damage per casting. Ultros couldn't really do more than 100 damage at a time, and was defeated without issue, helpfully demonstrating Lv.3 Confuse before leaving.
The shops on the southern continent offers many equipment upgrades, almost none of which Strago can use. He did pick up a Priest's Miter, which improved his magic defence and increased his max MP.
The enemies in Vector strongly resist physical damage, and the MagiTek factory has a lot of treasures spread over a non-linear area, requiring backtracking and consequently quite a few battles... meaning, time to run from most of them, again. I look forward to the time when Strago can last through an entire dungeon... or at least to when he can afford to develop an Ether problem. Of course, if I ran less, I'd have more MP... but levelling more doesn't seem sensible, the boss battles are still all trivial.
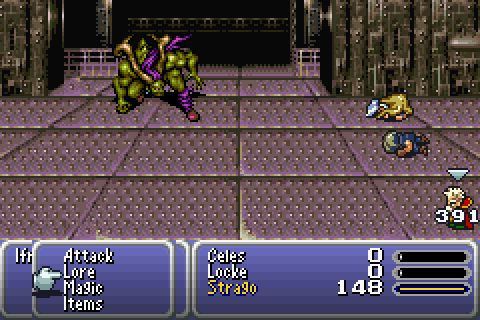
Or I may have spoken too soon! Ifrit and Shiva can put out a lot of damage. On my first try, I could only keep up by using a Hi-Potion literally every single turn, and even then, an unlucky combo could have ended the battle. I could probably win the battle by using my limited store of X-Potions and Elixirs, but doing that as a first resort would be dumb. I could try the Barrier Ring strategy again... or I could wear a Reflect Ring.
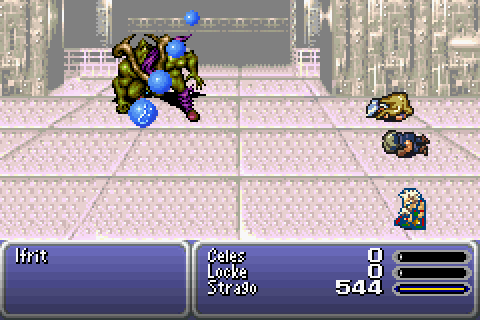

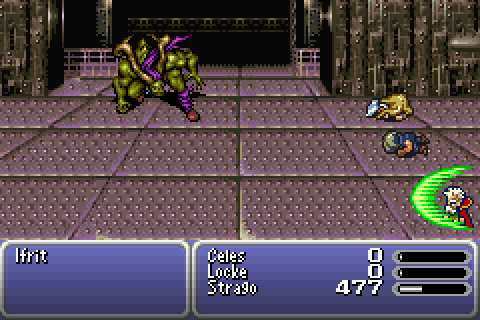
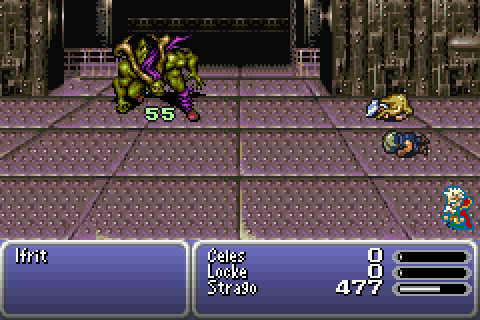
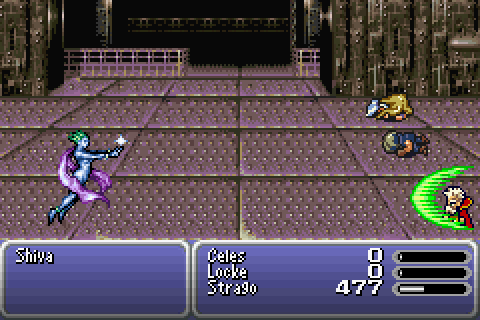
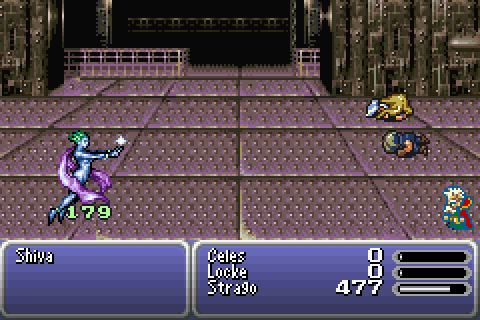
Sure, it heals them, but not remotely fast enough. I don't know if Blaze or Snowstorm would have been reflected, as I was lucky enough that they never used them, but if not, Hi-Potions heal enough that I could have kept up. Correct relic usage saves the day again!
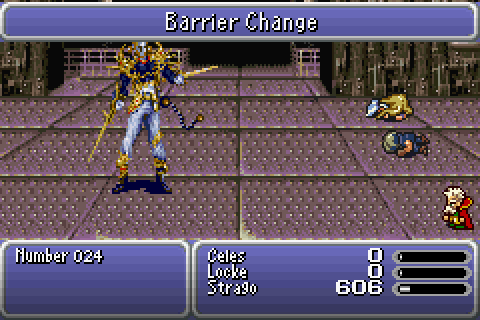
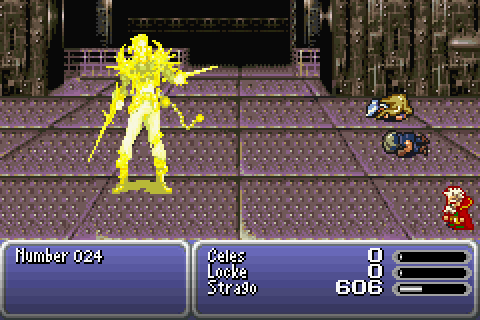
Number 024 is your classical elemental weakness changing boss. The things I need to know are, if he uses lightning elemental spells he's weak to water, and if it's earth elemental ones (specifically Magnitude 8 or Cave In) he's weak to wind, so then it's time to use Aqua Breath. Otherwise, more Traveler.
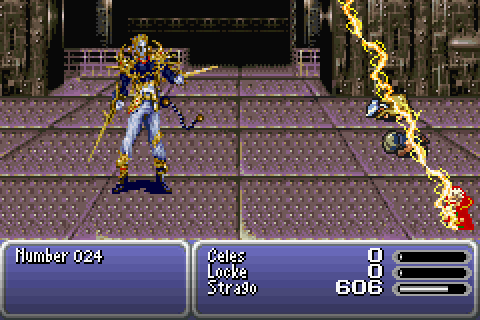
And he did use Thunder! And I did cast Aqua Breath! And it did no damage! My interpretation of this is that he's immune to all elements except the weakness, and that immunities take precedence over weaknesses for multi elemental spells. Anyway, it didn't matter; Traveler did the job fine.
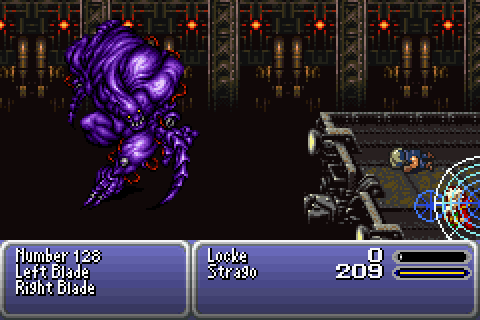
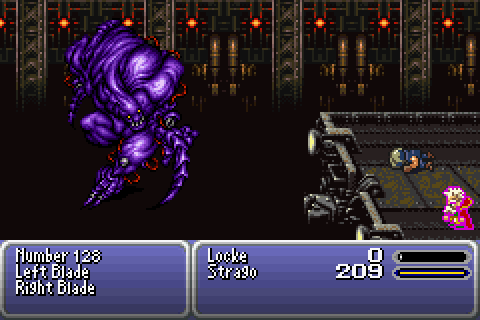
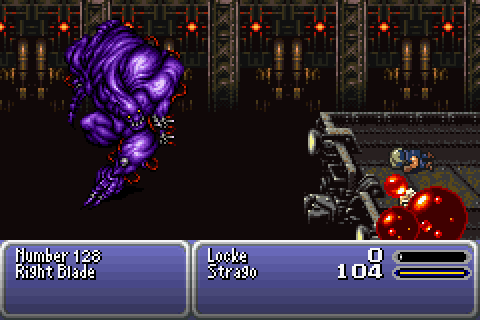
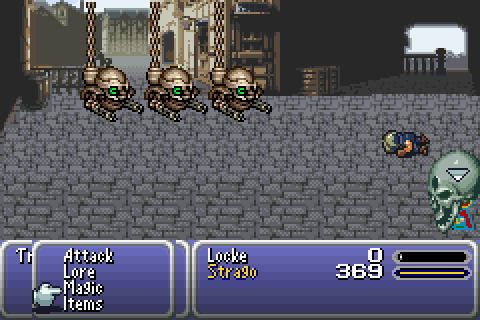
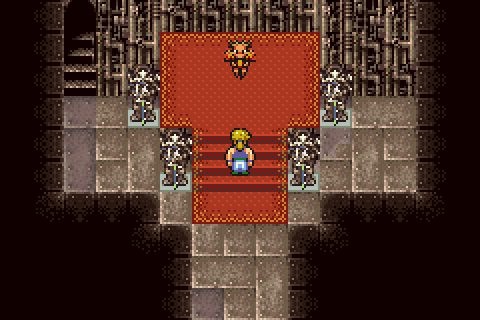
And then there's Number 128. I remember this being a hectic battle when playing normally, and it's not different when alone. A foe with three separate parts, dealing a lot of damage, and having the chance to inflict Stop. The careful reader may have noticed I described the Ribbon as stopping most status ailments rather than all. Stop is, of course, one of the ones it doesn't block (stop, slow and death are the big holes in that defence, from what I can see).
That's the bad news. The good news are that I only need five Travelers to kill it (and another 1000 steps would make that four). And also that the stopping ability, Net, can only come up every other turn, at a 1 in 3 chance.
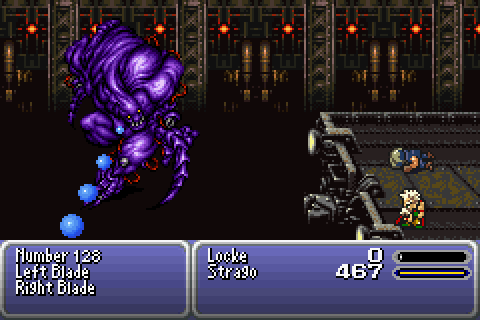
The blades are fragile enough that I could probably kill them with a single Aqua Breath, or at least an esper summon. However, they come back, and when alone the main body hastes itself and uses more dangerous attacks... admittedly no longer Net, but instead Blaster, which I believe is an instant death attack (I'm theorycrafting from the AI script here, I haven't actually seen all of this in action). However, killing just the Left Blade seems like a good idea: it uses Shamshir, which halves current HP, and has a longer respawn timer than the Right Blade.
So that seems like an initial plan. For relics, I try a White Cloak and Zephyr Cloak to maximize magic evade. That... probably looks ridiculous.
 So I wore two cloaks, which was the style at the time...
Sure Strago, whatever you say.
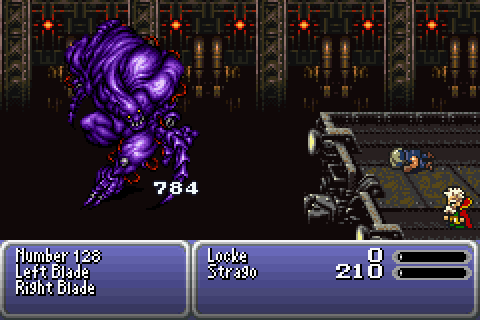
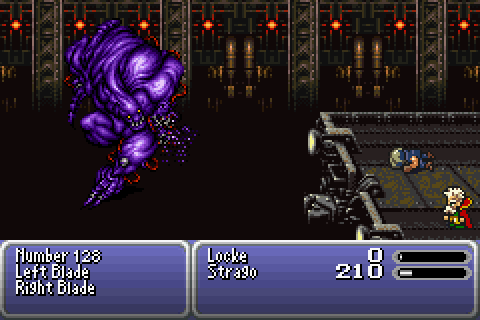
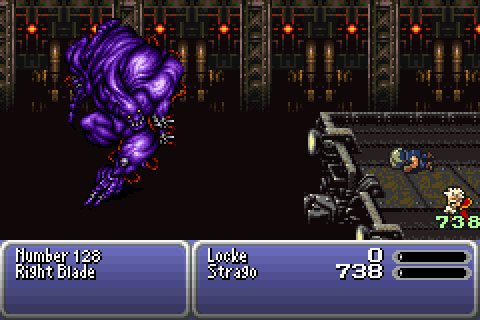

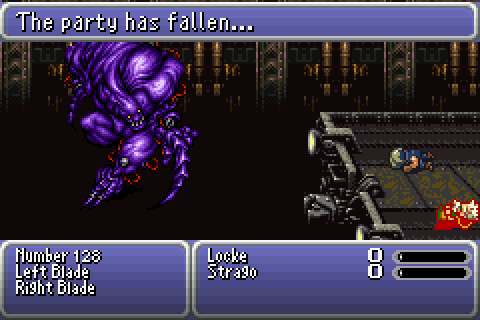
Success didn't take too many tries, though in the winning attempt Number 128 didn't even use Net, so Strago was a bit overdressed for the occasion. I killed the Left Blade twice and healed with an X-Potion twice. I could probably have gotten away with only one X-Potion, except that the Left Blade got in a Shamshir at the very beginning of the battle. Oh well, certainly good enough.

Why, thank you.
The whole sequence of (unskippable battles -> hard boss with rest before -> other boss with no chance to save) is kind of unfair of the game. Fortunately, Strago can be unfair right back. An elemental weakness is a beautiful thing.
And that opens up the game a bit, giving us the freedom to take the airship wherever we wish. However, the most interesting things available are in places we've already visited.
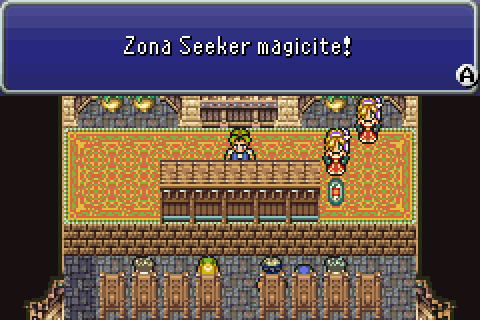
Yes, it is at this point in the game that the Jidoor auction house opens. In addition to the two pieces of magicite on offer there, a fine, law abiding citizen hiding at the edge of Tzen offers the Seraph magicite. Of these, Zona Seeker is of greatest interest, offering optimal level ups.
Of course, the only new place available is Thamasa, which currently only offers us some loose consumables. There really isn't much to keep us from getting on with the plot, though I did take the time to grind some levels and spells first.
At level 25, Strago has over a thousand HP and almost 400 MP, which together with the first and second tier elemental attack and healing spells, plus various other useful things, is Good Enough For Now.
Of course, Narshe offers other things than just plot advancement. This thing is quite possibly never leaving Strago's head again.
Oh, and there was a moogle or something. I don't know, it didn't seem very important.
Of course, the level grinding didn't stop me from gaining a level every two or three encounters in the Sealed Cave. There's a major bump in experience gain at this point in the game. The battles are pretty dangerous too, but nearly everything is weak to Water Fire or Ice, and it doesn't matter if a group can destroy Strago in two turns if he can destroy them in one.
At the end of it, Strago had gained eight levels, and it would have been more had I walked out after the scene at the gate, instead of using a Teleport Stone.
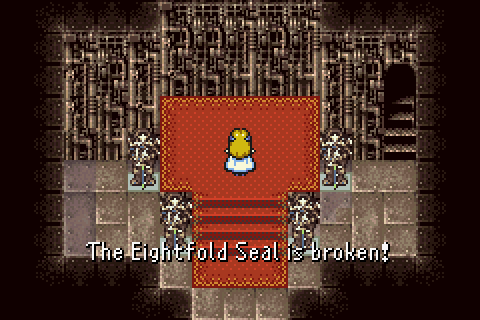
And then there's the banquet and travelling to Thamasa and all that, leading up to a most momentous occasion.
Oh boy.
The game subsequently locks up, as Strago (the player character, not the NPC) is blocking the way for Relm, so the scene can't finish, so this is a point where the game does not tolerate a nonstandard party.
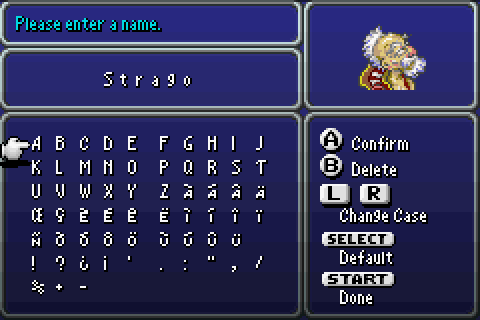
Another interesting wrinkle is that the game does initialization of Strago's character data in two pieces: his name and palette are set during the naming scene right here, but the rest of the data appear to be set later, when Strago joins you in the burning house. To be safe, I just keep Strago's entire character record frozen during the period between those two points. The palette is not part of the character record, so it gets corrected anyway (but then again, if it had been part of the character record, it would have been correct from the beginning).
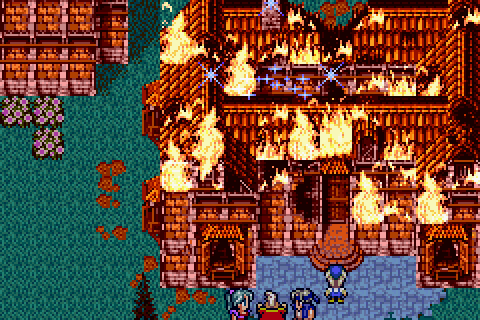
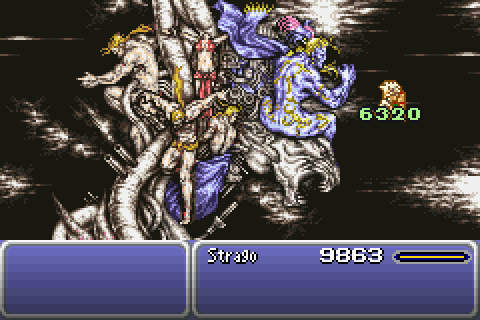
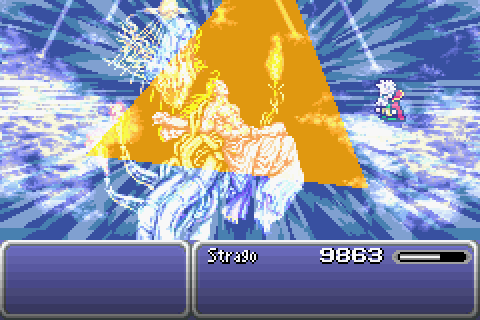
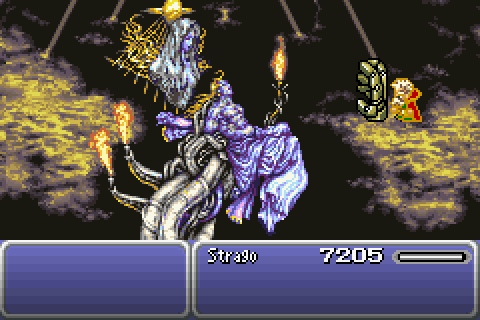
Pictured: Strago casting Blizzard. That being a spell he actually knows, for once. To be fair, what he actually says in the GBA version is "Flames BEGONE", so one can easily claim he's casting Aqua Breath. The explicit reference to the spell is in the SNES version, which could have been a translation error, for all I know. Or if it wasn't, perhaps the GBA translators repaired a plot hole present in the Japanese original. I'm not really curious enough to play through the entire game up to this point in Japanese.
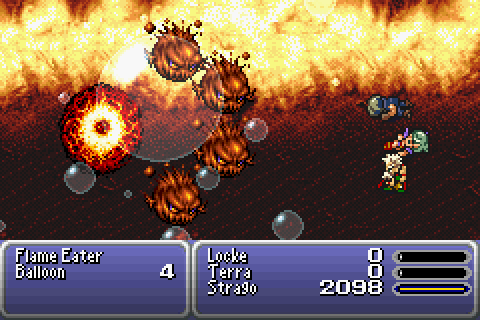
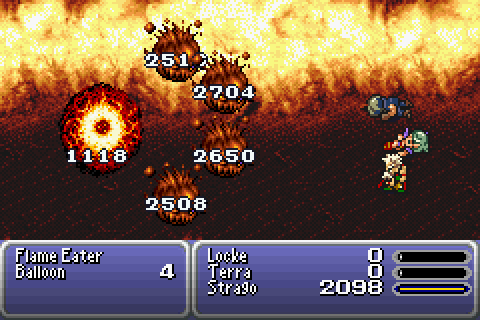
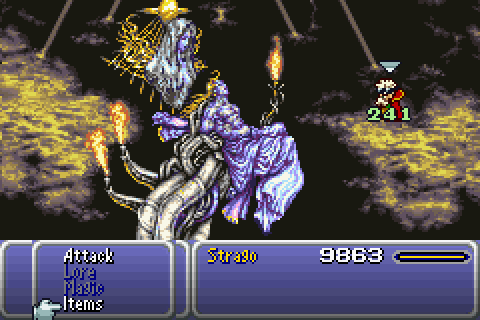
Interestingly, the Flame Eater is not weak to water. It's still no problem, it only has 8400 HP, and is quickly doused by Strago's onslaught. To be honest, it feels like Strago's growing stronger much faster than the enemies are. If this keeps up, there may be no more challenge left in the game. Still, I'll leave that evaluation to after the game is over.
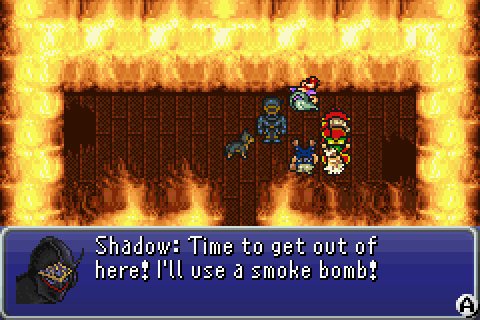
Of course, Shadow. That makes perfect sense, a smoke bomb is exactly the thing you'd want to escape a burning building.
(This is especially dumb considering there is an item in the game that would be perfectly reasonable to use: a Teleport Stone. But I guess that wouldn't be the ninja thing to do.)

Moving along with the plot, the Venobennus on Esper Mountain quickly offer up a useful lore. In addition to the Healing Rod found in a chest very near the entrance, Strago now has considerable healing power at his command. This inspires me to try an additional challenge: no Magic command. It'd thematically appropriate for Strago to learn and use any magic he can, but it might just be too powerful, and also make playing him feel less unique. So I'll go with that, at least for a while.
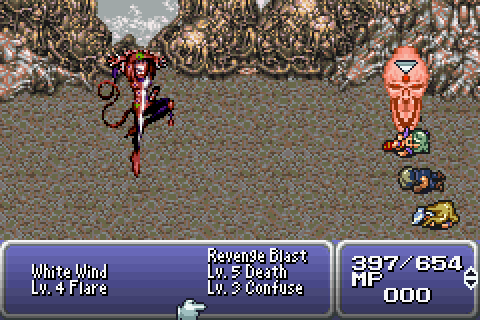
Ultros quickly arrives to test my resolve. He absorbs water, disabling my first choice for damage. Traveler is possible, at slightly above 1100 damage. Ultros's level is 25, but he's immune to Death, and unlike in FF5, Lv. 5 Death does not bypass immunity. He also appear to be immune to Dischord (this is possibly true for all bosses) so no pulling him down to level 4 and Flaring him down. Revenge Blast is only better than Traveler when I'd really rather be healing. No, Traveler appears to be the best option.
It's good enough. Ultros has some big attacks, but nothing I can't outheal. I considered letting Relm go ahead and do her thing, as I didn't foresee the rest of the battle being anything more than alternating Traveler and Healing Rod (it wasn't) but since she dropped to a Tentacle hit immediately, I went ahead and just killed him.
Then, after the events in Thamasa and a short trip to loot Doma, only the Floating Continent remains.
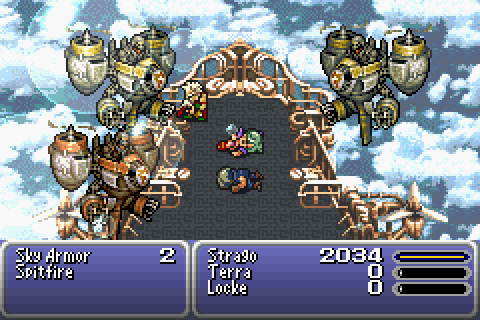

The Imperial air force was not a serious threat. They're not weak to water, despite being machines, but they are weak to wind, which works just as well.
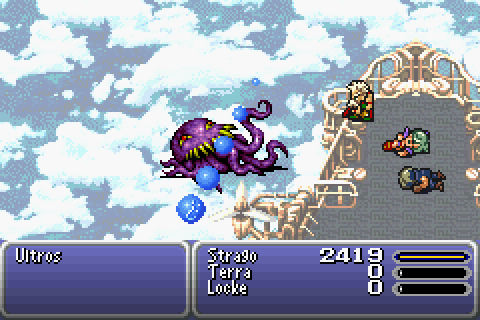
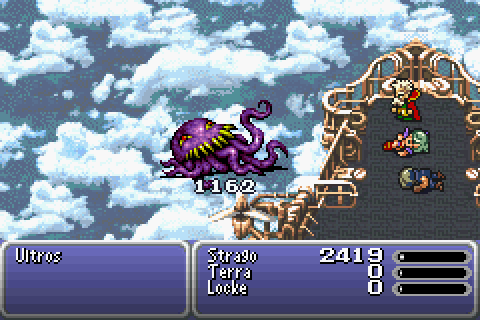
Ultros has the same resistances as before, but less dangerous attacks. Typhon isn't much more threatening, and weak to water. They're not a serious threat.

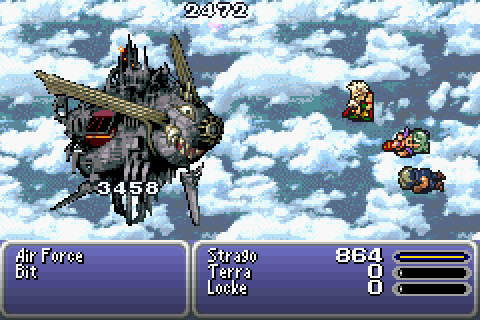
The Air Force is. All of its parts are weak to water, but the attacks of the auxiliary parts become quite dangerous when they're wounded (and one Aqua Breath is not enough to kill them). On the first attempt, the fact that the party is healed between battles meant that I had to waste time killing Terra and Locke, so that I was already wounded by the time I could start attacking, forcing me into an attack-and-then-heal cycle that proved to be my undoing when the big attacks started coming. On the second attempt, I locked Terra's and Locke's HP and status in memory to keep them from reviving, and just won the damage race.
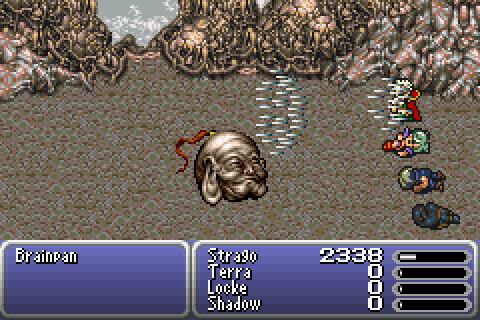
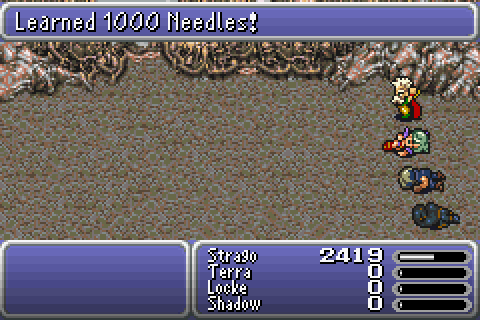
On the Floating Continent, the Brainpans offer up another lore. Like Traveler, it's unresistable damage. However, it is weaker, and will be more expensive until twelve more hours have been added to the game time. It's useless to me.
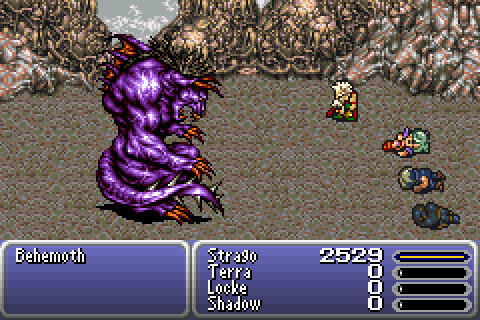
Also, the Behemoths here are the first reasonable opportunity to farm X-Potions. The Aspirans in the Serpent Trench can also drop them, but considering the huge detour required for each pass through it, one would have to be quite desperate to go for them. For my part, I don't expect needing any more than I have at this point.
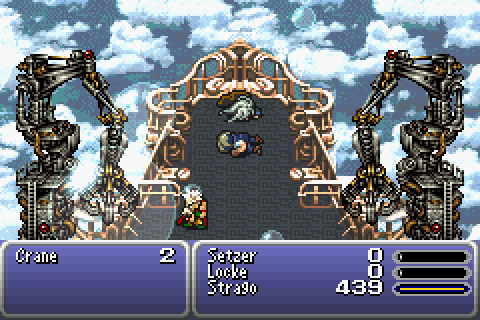
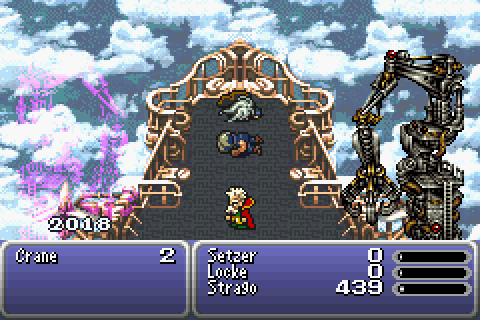
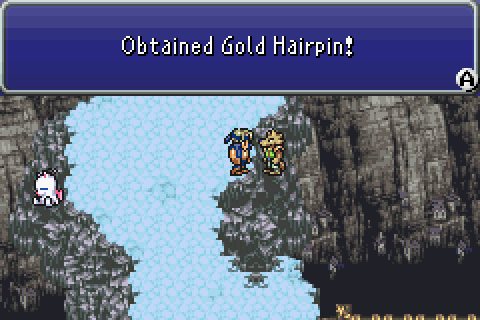
Judging by the AI script, Ultima Weapon appears to have quite a few reflectable attacks, so I choose a Reflect Ring as one of my relics before the fight. Additionally, I replace the Gold Hairpin with a Hero's Ring, raising damage, and (probably) also the healing from the Healing Rod. So I guess I did take it off, after all.
End result: Strago wins the damage race. Ultima Weapon had time for four attacks: two (reflected) Flares, one Meteor, one Graviga. The Flares helped, despite the pitiful damage; without them, I would have needed another Aqua Breath to end the battle.
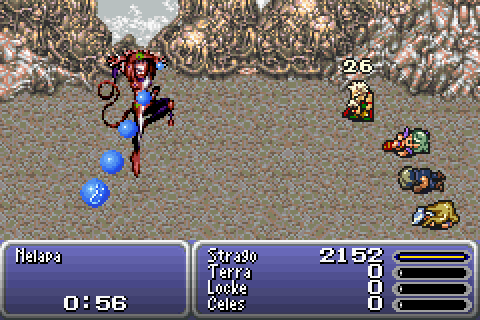
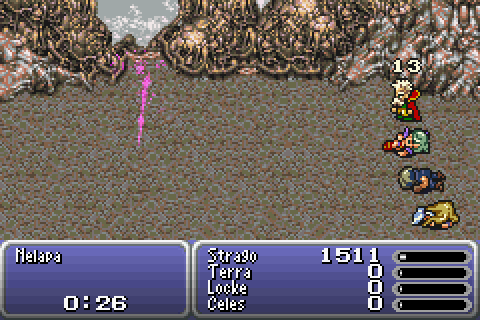
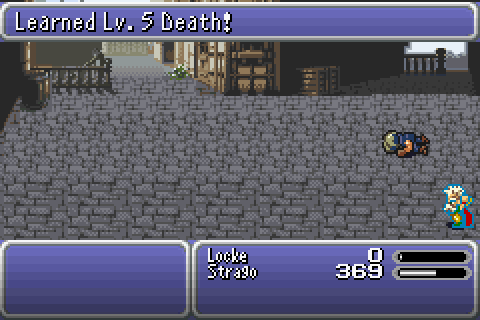
Nelapa is immune to Aqua Breath, so Traveler it is. Fortunately, three is enough. In addition to Doom, it can also teach Strago Roulette, but that would require physically attacking it six times, and I was kind of short on time. And I would like Death immunity before I try learning it... there'll be more opportunities.
And then the world ended.
Before going on with the rest of the game, let's consider a few things, including what "the rest of the game" entails. Given that most of the World of Ruin is optional, I could go on to Kefka's Tower as soon as I get the airship. However, I intend to do most every quest, recruit all the characters, etc. There is also the Dragons' Den, a dungeon new to the Game Boy Advance version. I've never played through it, and have not yet decided if I will, but if I do it will certainly be after finishing the game.
This also seems like a good time to have another lore rundown.
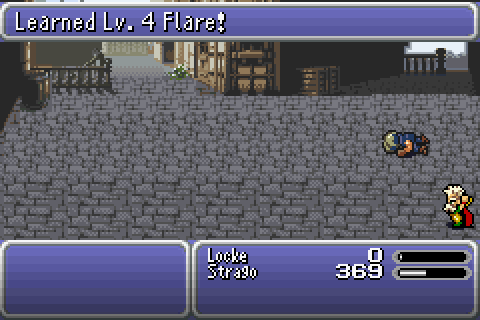
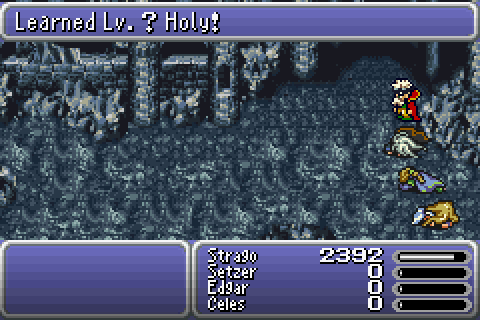
Of the new ones, the only one I've actually used so far is Lv. 4 Flare, which was very helpful against the Naude enemies during the final escape sequence from the Floating Continent.
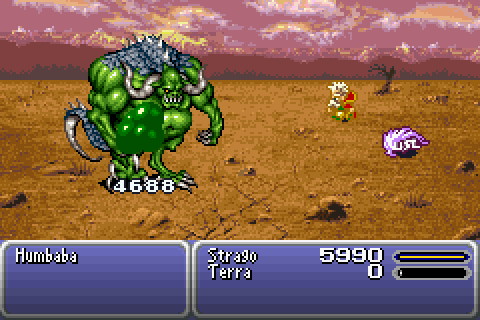
Starting off the World of Ruin, neither the crumbling house in Tzen nor the initial fight with Humbaba in Mobliz required anything more than casting Aqua Breath until victory arrived. In hindsight, recruiting Sabin was a mistake, though. Since the party size will now exceed four before the game expects it, I'll have to do some extra fidgeting with the memory I wouldn't have needed to if I had skipped Tzen. But it's not a real problem.
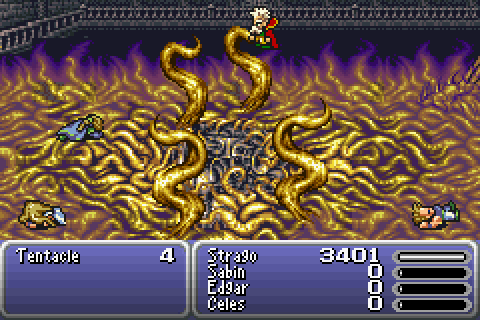
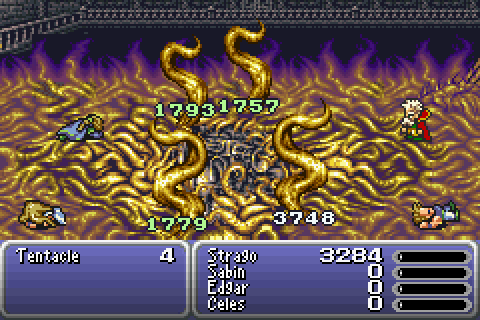
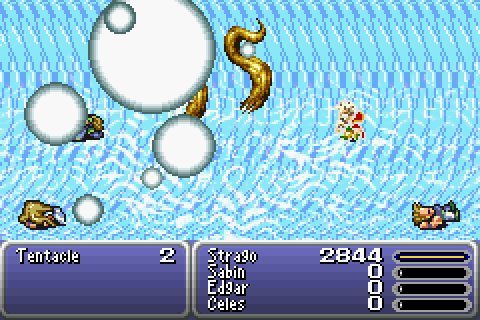
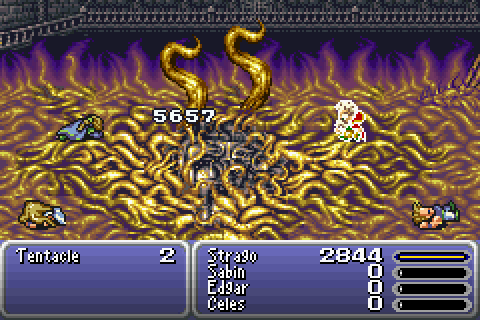
The Tentacles are the first boss in the World of Ruin (not counting the short and optional battle with Humbaba), and pictured above are the main problems with it. The Grab attack is just an annoyance; while grabbed Strago cannot be targeted by any attacks, and the only effect is that the tentacle drains a few hundred hit points. That three out of four Tentacles absorb water is much worse, as once again I lose most of my damage. At least the fourth one is weak to it.
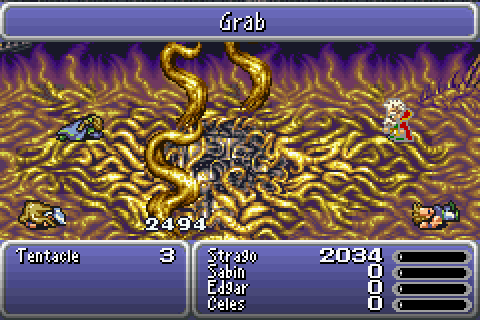
The lower left tentacle is weak to fire and fell without much trouble to hits from a Flame Rod. The remaining two have no elemental weaknesses, but none are required when you're lucky enough to have a Holy Rod connect properly.

Which brings us to Kohlingen, and thus the game's first source of the Aero lore. Could have used that against the Tentacles! Still, I expect it'll be very helpful in the future. In addition to that, Strago learned a new and exciting way to commit suicide.
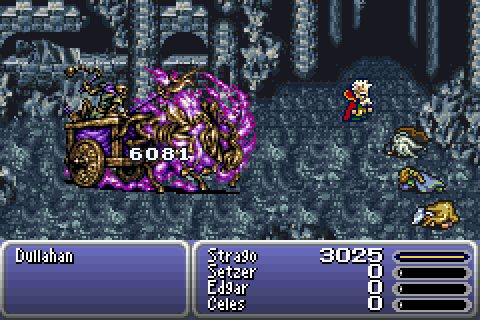
Inside of Darill's Tomb, the Malboros demonstrate something at least potentially useful.
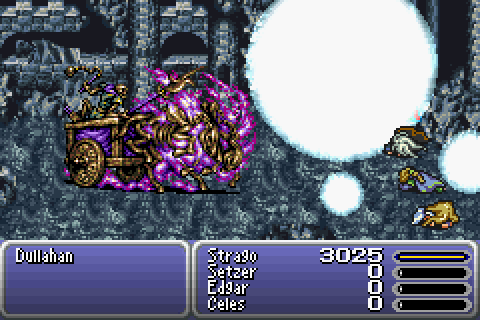
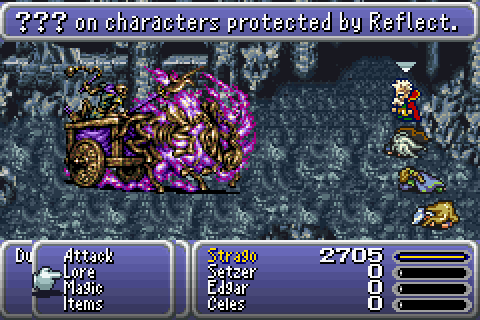
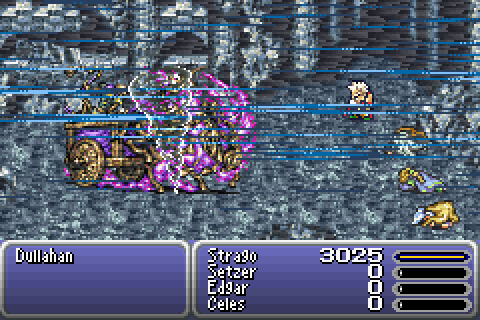
Dullahan offers two new lores. The first one casts Holy on every foe whose level is divisible by the last digit of the party's gil. That digit was actually 1 when I reached Dullahan, so I fought an extra battle to be safe. The second one inflicts Darkness, Silence and Slow on enemies that have Reflect status. Strago wore a Reflect Ring to convince Dullahan to use it, and so had to occasionally use an Echo Screen during the battle.
Other than that, Aero leads to victory.
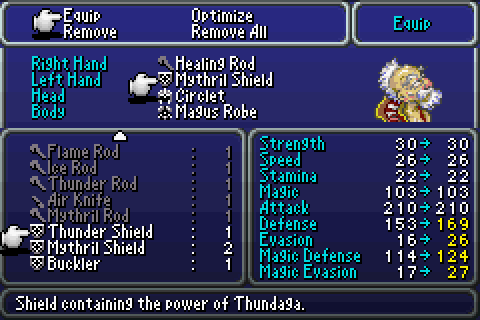
Which brings us to the freedom of nonlinearity. The game guides you toward recruiting Cyan first, but I have other priorities. To begin with, I'd like it if the game shared my opinion that Strago is one of my playable characters, so my first major goal will be recruiting Relm and then Strago. Thus, to Jidoor. However, since the game has deposited me at Maranda I take a minute to check the shops, and a good thing too: I pick up a Magus Robe, one of Strago's rare armour upgrades. Jidoor adds a Circlet to that. And since I'm talking about equipment, I should add that Strago has a selection of rods to use, and otherwise is still using the Mythril Shield he stole off Mog near the beginning of the game.
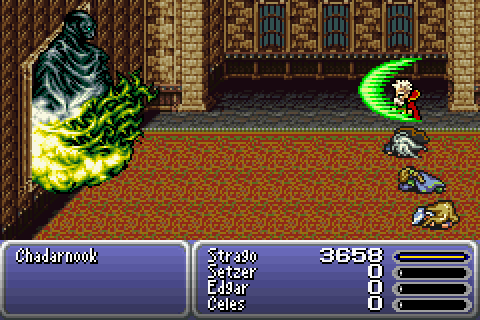
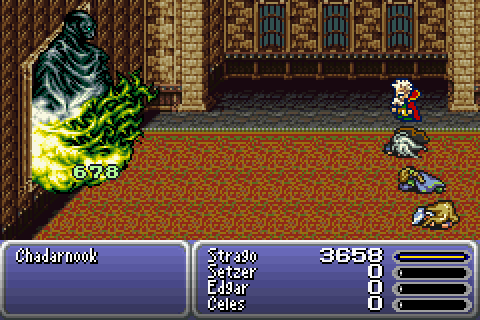

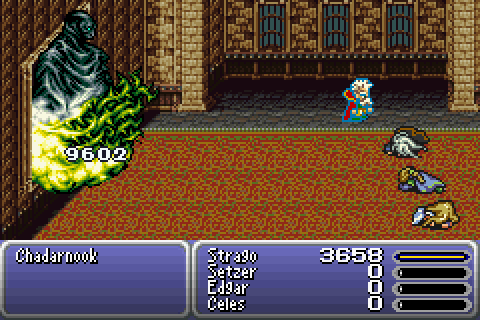
With a Reflect Ring and a Ribbon, the main danger in the Chadarnook fight is accidentally attacking the goddess picture, which did spell my doom on the first attempt. I was more careful the second time, and won without issue. Reflected spells gave Chadarnook some healing, but it amounted to nothing with Aero doing 9600 - 9999 damage.

Yes Strago, I agree, that is pretty surprising. Anyway, with that I am freed from having to mess with the party structure, except when dealing with the multi party dungeons. My next two targets are also for convenience, though not for playing the game: I need to recruit Gogo and Umaro before I can make the save files mentioned in the Hacking section. The cave under Triangle Island also has some interesting loot, so I'll go there first.
To be specific, there's a shield upgrade. In addition to the numbers, it offers resistance to ice and fire, immunity to wind, and absorbs lightning. I'll be getting the fire and ice varieties as well, of course, but they give elemental weaknesses along with their resistances, so they're much worse for general use. They can, of course, be extremely useful for specific battles. In particular, my first attempt at recruiting Umaro showed me that getting to him at all will be a lot easier with an Ice Shield, so it is time to accept the game's guidance and go to Mt. Zozo. The Ice Shield is actually very near the entrance, but I figure I might as well do the entire place while I'm there. The loot also includes another Thunder Shield, and an Aegis Shield. Maybe I really should have gone here first...
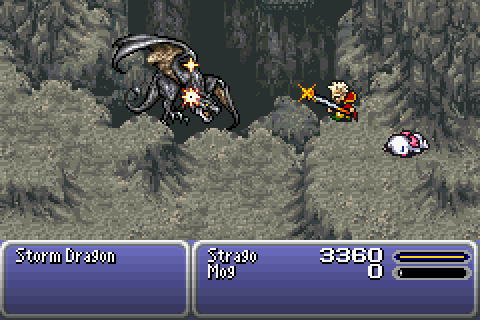
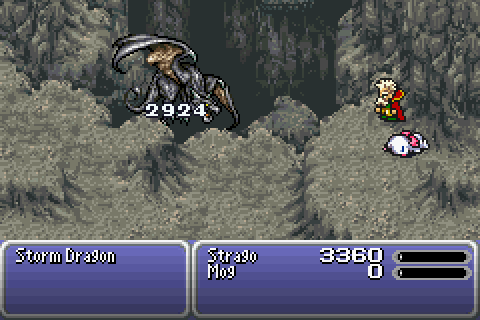
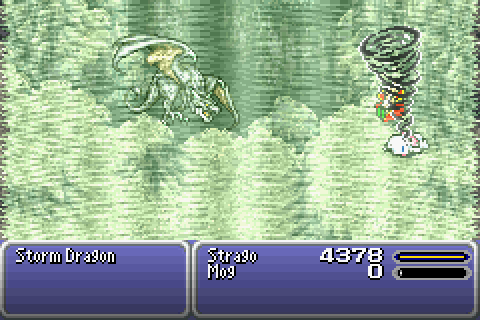
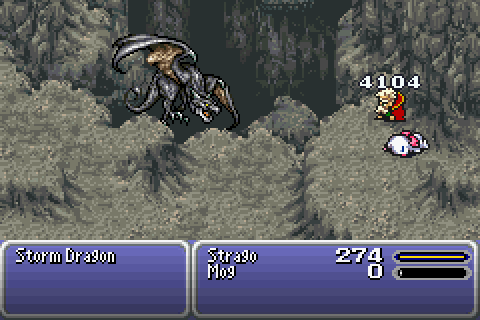
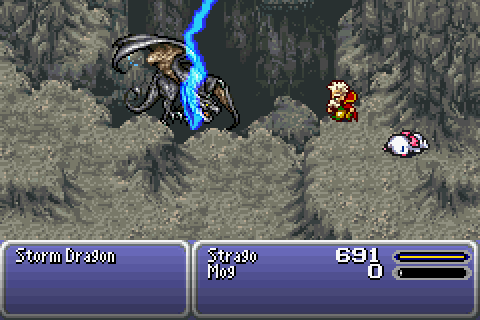
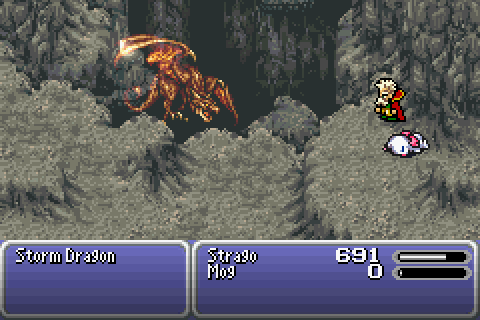
Mt. Zozo doesn't have a boss, but it does have the Storm Dragon. It's a bit problematic, as it absorbs wind, making Strago's standard methods for solving problems useless. However, you can always fall back on the tried and true: beating it with a stick. The Storm Dragon is weak to lightning, and the Thunder Rod does almost 3000 damage from the front row, with an additional 8500-9000 when the Thundara procs at 25%. Meanwhile, the Thunder Shield blocks most of the damage. However, the dragon is not defenceless: at low health it can cast Cyclonic, which sets HP to the critical range. Since the Storm Dragon is a lot faster than Strago, that tends to end badly.
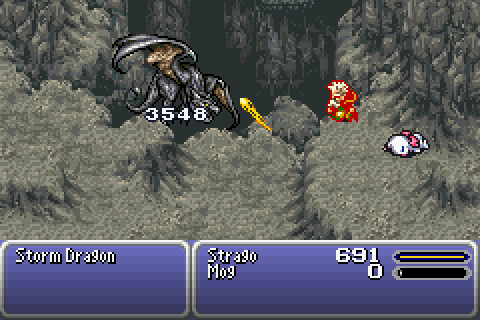
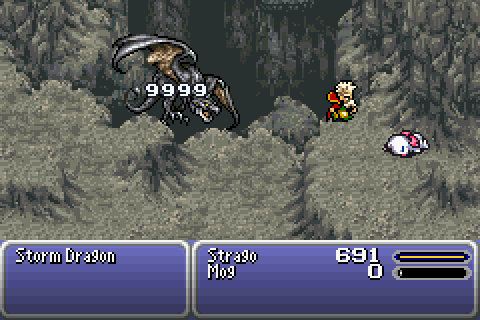
However, with a Hero's Ring upping those damage numbers (it's not often you get to use both the physical and magical damage boosts at the same time), and Hermes Sandals increasing speed, Strago manages to win on the second try, with some luck.
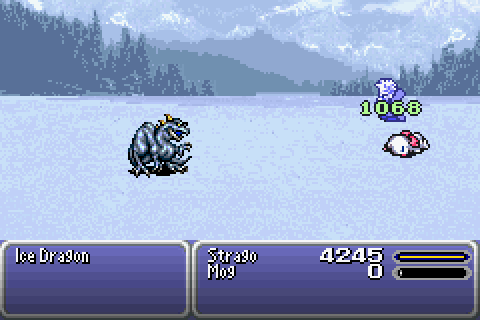
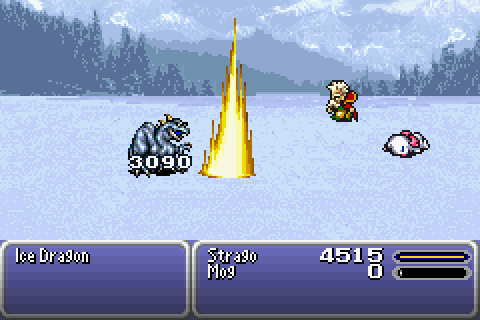
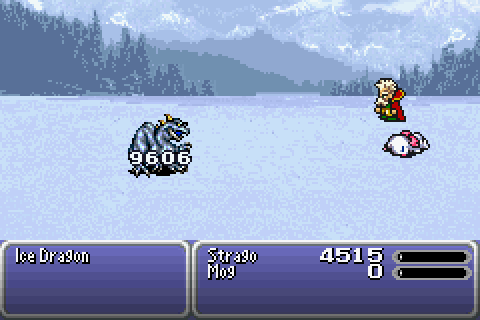
The Ice Dragon was not what I wanted the Ice Shield for in Narshe (it's not blocking my way, after all), but it does entirely trivialize the fight. I equipped it and the Flame Rod, held down A, and fast forwarded. It died. Though the Freeze status from Northern Cross prolonged the battle by quite a bit.
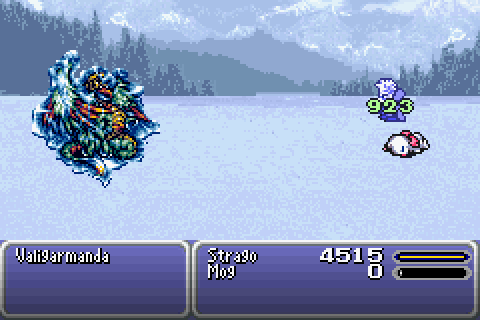
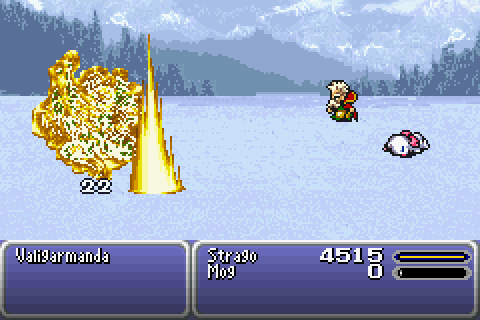
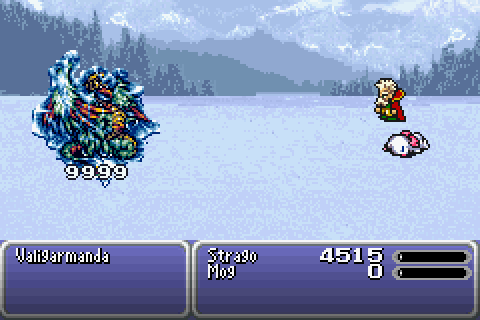
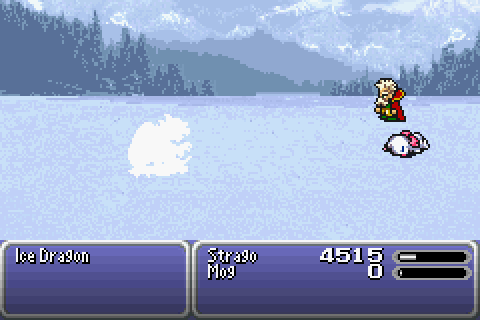
Next battle, same as the previous battle, though Valigarmanda's near perfect physical defence meant that only the Fira procs did any real damage.
Umaro is no harder. Aero does enough damage that the first cast triggered his buffs, and then two more put him down.
At this point I feel ready to go get some things I want from the Coliseum. First I bet an Elixir to fight a Cactuar for a Rename Card. It's an annoying fight, but Strago has several lores that can win it... he just has to actually cast them instead of wasting his time with physical attacks and spells. He uses Traveler on the fifth try or thereabouts, and that's the end of that.
Then I of course bet the Rename Card to get what I actually want. Fighting a Fiend Dragon offers me Miracle Shoes. That's an enemy from Kefka's Tower, and it's pretty dangerous, especially since it can counterattack with Heartless Angel (sets HP to 1). That said, I was lucky enough to win on the first try, with a Holy Rod doing most of the damage.
Miracle Shoes provide Haste, Protect, Shell and Regen status. The Hermes Sandals (which I didn't use much) are now completely obsolete.
There are probably other things worth getting from the Coliseum, but for now at least, I'd rather go visit the Ancient Castle than pore over FAQs.

The cave leading there offers up the final elemental attack lore. Yes, it's water, of course. Almost everything in this area has very high magic defence, by the way, so it's time to beat things with sticks (they all have elemental weaknesses).
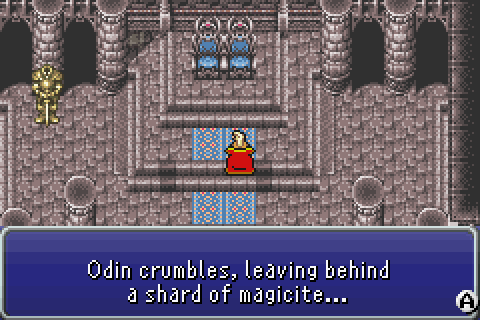
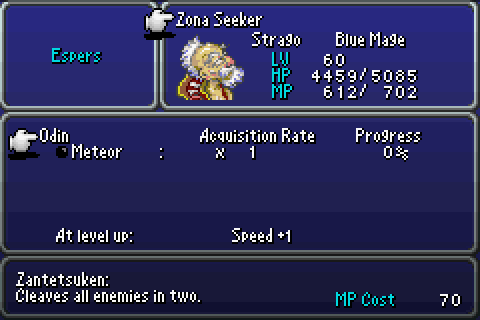
The main thing I want from this place is the Odin magicite, enabling Strago to finally get (ever so slightly) faster.
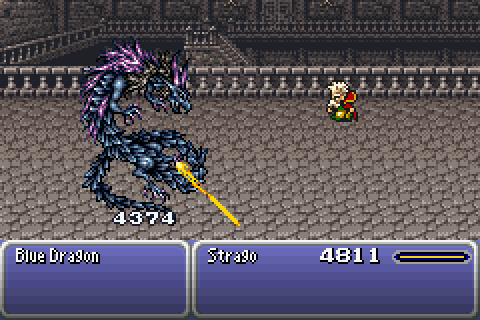
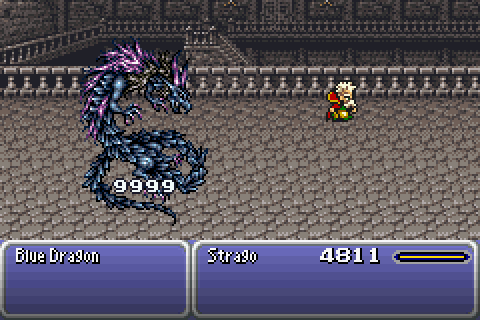
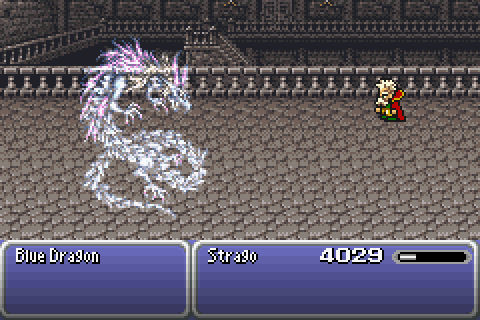
But there's also the Blue Dragon, which is the water elemental dragon. The Thunder Shield is very helpful, negating or halving damage from some of its attacks that are part wind or ice elemental. The Miracle Shoes are bad though, since the Blue Dragon will switch any Haste status it detects with Slow via the Rippler lore (which can more easily be learned from other sources). But most of that is unimportant, as it is weak to lightning and dies quickly.
I make sure to not talk to the lady statue on the way out...

Since I mentioned Rippler, let's go get that, in the woods near Maranda. Incidentally, getting it showed me that I was somewhat wrong about what I wrote above: the Miracle Shoes apparently continuously reapply the status effects, so both Strago and the Leap Frog ended up with the various buffs it provides.
Next, I make a quick run into the first treasure room of the Cultists' Tower. I'll be back here later, but for now I just want this handy little thing.

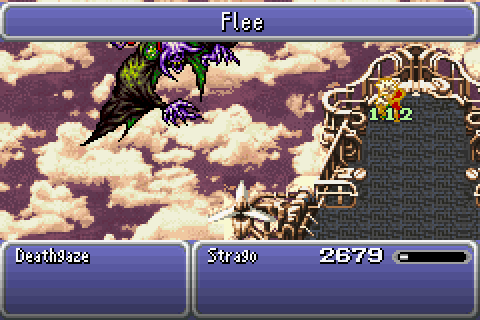
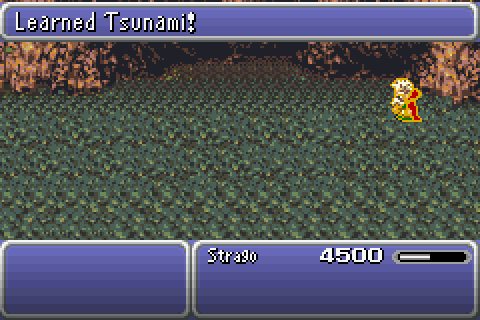
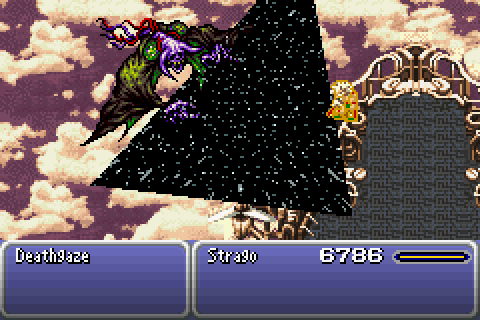
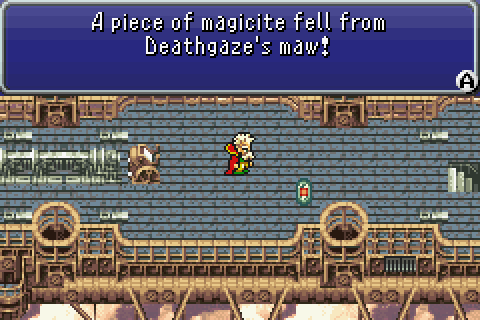
My next target is Doma and Cyan's dream, but on the way I ran into Deathgaze for the first time. I gave it three Aeros, totalling slightly less than a third of its health, before it ran away.
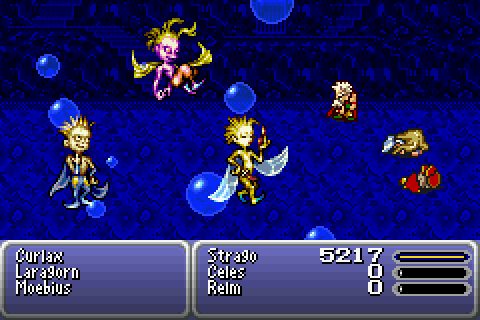
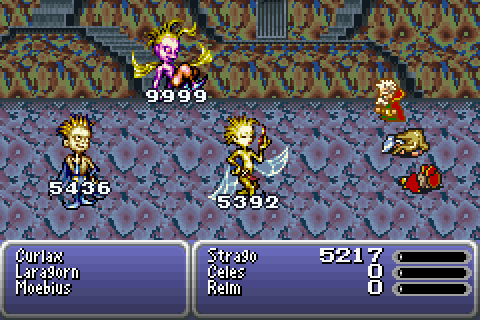
The Dream Stooges have some complex interactions in their AI, but the main point is that Curlax will revive the other two if they die before him. Curlax is weak to water, which neither of the other two resist, making Tsunami the obvious weapon. And that's about it; Curlax and Laragorn fell to the second Tsunami, and Moebius to the third, all without doing anything noteworthy.
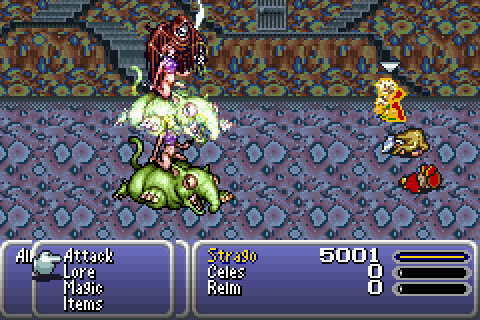
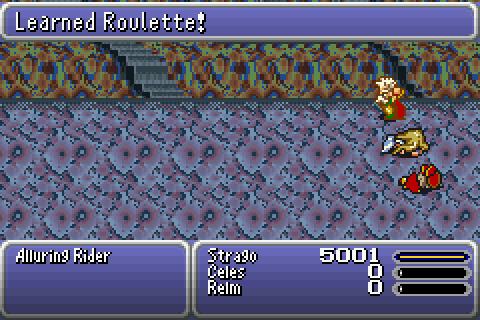
Before leaving the first area of the Dreamscape, the reason I wanted the Safety Bit (which protects against instant death). Alluring Riders actually use quite a few lores, but that's the only one Strago hasn't learned yet.
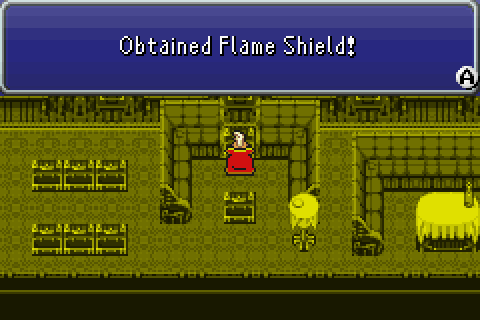
In the next area, I also complete the collection of elemental shields.
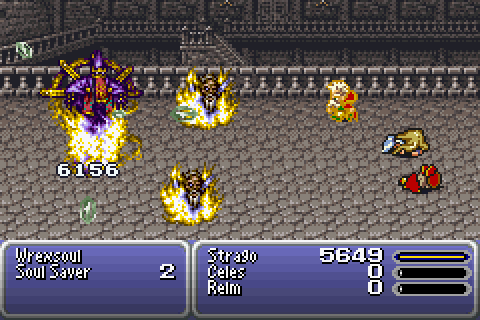
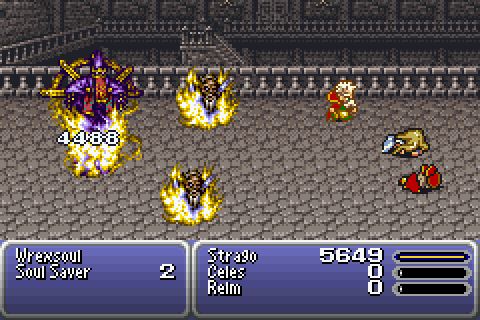
The game forces you to bring a full party into this area, and that's because of Wrexsoul. The gimmick of this battle is that Wrexsoul will possess one of you characters, and only reappear once killed. Wrexsoul will repeat the procedure if you take too long killing it, so it's good to be quick about it. Wrexsoul has high magic defence and is weak to ice, so an Ice Rod supported by a Hero's Ring was the way to go.
And then I'm lucky enough to run into Deathgaze again, and also lucky that it didn't run away for quite a few rounds, but much less lucky in that one of its Death spells connected. Dang. Good thing I saved after beating Wrexsoul.
Our next target is Ebot's Rock, a dungeon that is only unlocked if you bring both Strago and Relm to Thamasa. The dungeon itself is a strong contender for being the worst piece of game design found in Final Fantasy VI. It restricts your vision and teleports you randomly between an assortment of rooms containing chest with pieces of coral. The goal is to gather enough coral to feed a talking treasure chest, so that it will let you pass. Reaching the room with said treasure chest is as random as anything else, and can take a long time to reach once you've collected enough. And of course, there is no save point before the boss, to make sure you get to appreciate the clever dungeon design all over again if you die. I'm not ashamed to admit I made a save state before facing Hidon.
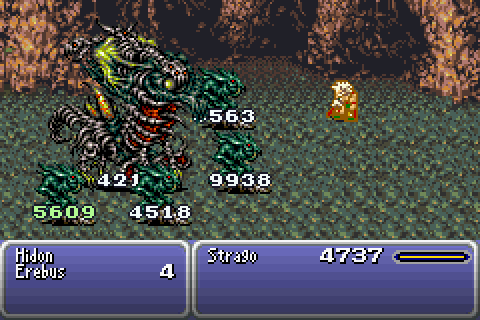
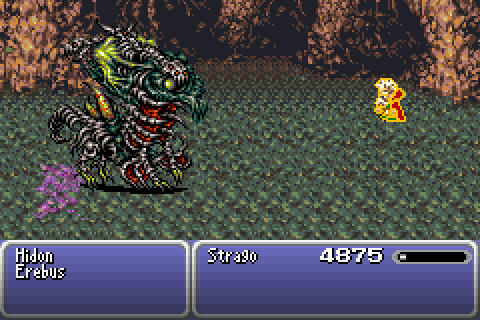
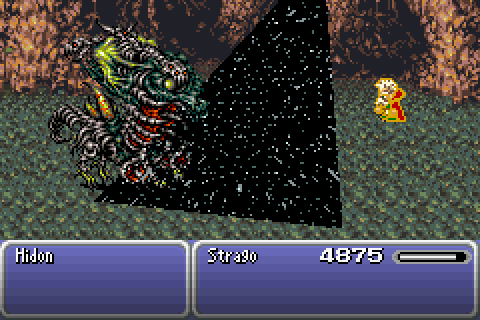
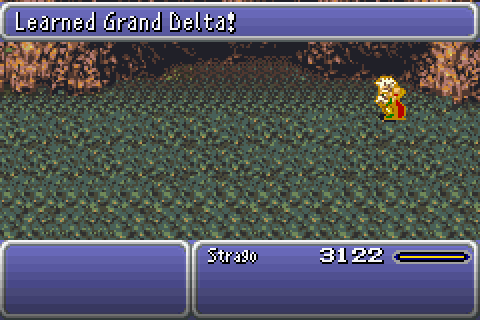
This being a quest specifically for Strago, Hidon is of course the sole source of a lore, Grand Delta. In order for him to use it, his followers, the Erebuses, must be defeated. A Tsunami takes care of most of them, except for one that absorbs all elements except earth. It proves amenable to stabbing.
As for Hidon itself, it is weak to holy, so Strago raised his staff, and let him have it! Bam! Thwack! Pow! Right in the kisser! Or at least that's how Strago describes it in the subsequent cutscene.
And with that, there are no more lores to learn and not much useful loot to find outside of Kefka's Tower. So let's go there! Specifically, let's run through some of the areas reachable by the second party.
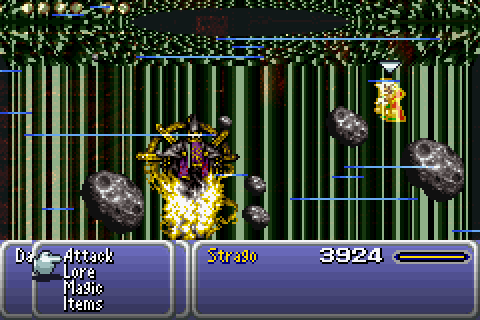
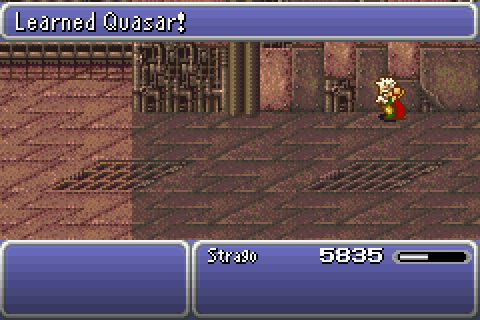
In the cell block from the Imperial Palace we encounter Dark Force, an enemy that uses most of the lores in the game. It is one of only two enemies that uses the Quasar lore, the other being the Goddess in the boss rush at the end of the tower.

And in the very next room, we encounter Movers, a difficult to kill enemy that uses Mighty Guard when alone.
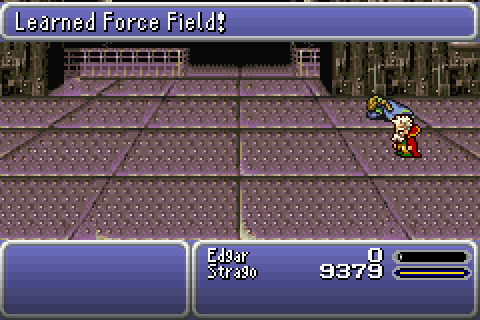
And that leaves one and only one lore left to learn: Force Field. That one is only available from Fiend, another of the bosses at the end of the tower. I'm not interested in going that far until I'm ready to beat the game, but I'll include it in the final lore run-through:
The only difference between Quasar and Grand Delta is that Grand Delta is stronger. Both are unblockable and ignore defence. Grand Delta is a guaranteed 9999 damage to all enemies at this point...
Rippler is legendarily buggy, in that "status effects" includes such concepts as "is riding MagiTek armour" and "is protected by Interceptor". Possibly the GBA version fixes this; I haven't checked.
Force Field is a bit odd, and shows up so late I doubt most people who have played the game understand how it works. When casts, one element is randomly chosen. Until the end of the battle, all damage of that type (whether from weapons or spells or whatever) is nullified, for both player characters and enemies. If cast multiple times in a battle, a new element will be chosen each time, so eight casts will nullify all elemental damage.
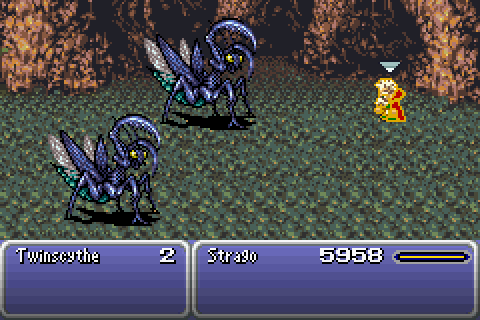
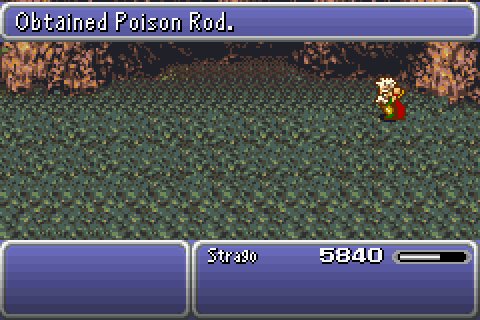
Next stop is the Cave on the Veldt, where I rectify a mistake I made: I forgot to buy a Poison Rod before leaving the World of Balance. Fortunately, Twinscythes drop them. This means that Strago has access to melee weapons for all elements except water (wind from the Air Knife, and earth from the Gravity Rod), which he of course has lores for. Master of all elements, that's our Strago.
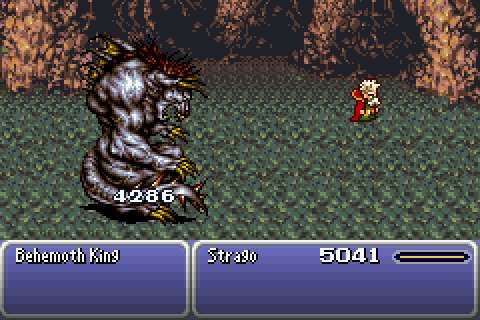
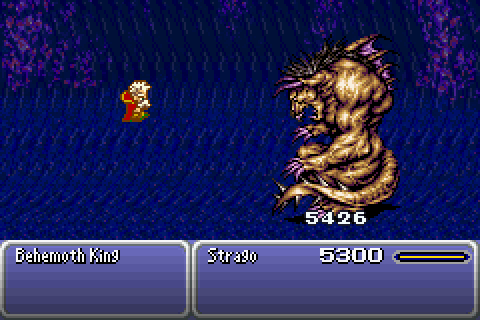
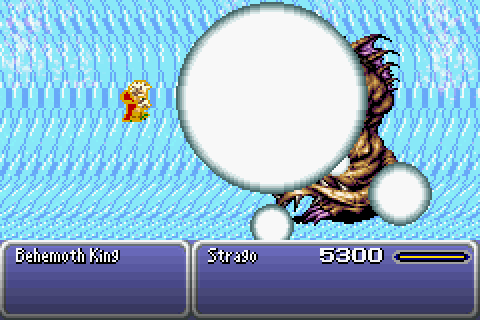
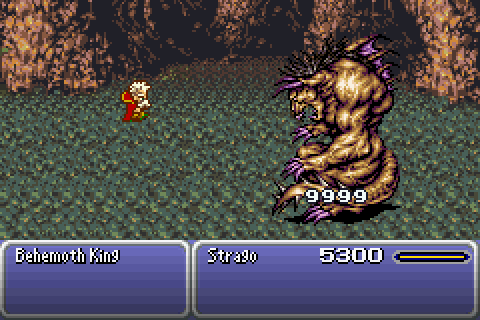
The cave ends with a fight against the Behemoth King. Its first form is weak to fire and poison, and its second against fire and holy, so Strago has no trouble dealing damage, but it's not without dangerous attacks of its own, in Meteor and Death. However, Strago managed to evade them, so it fell on the first attempt.
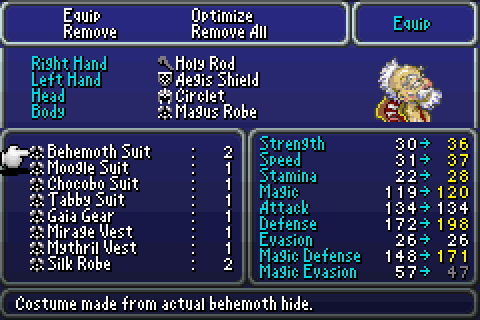
His majesty also provided Strago with a nice armour upgrade.
I take the time to recruit Gau and Shadow before moving on to the next challenge.
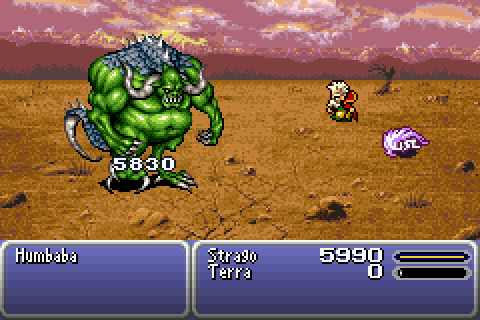
Which isn't much of a challenge. Humbaba is weak to poison and presents no real danger. I think you're expected to come back to Mobliz shortly after getting the airship.
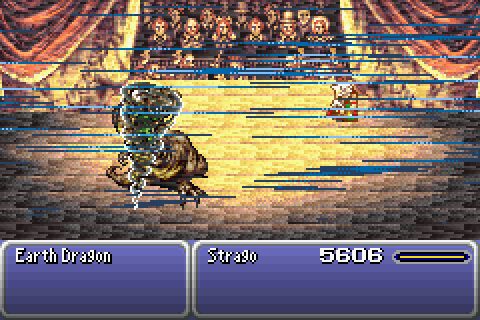
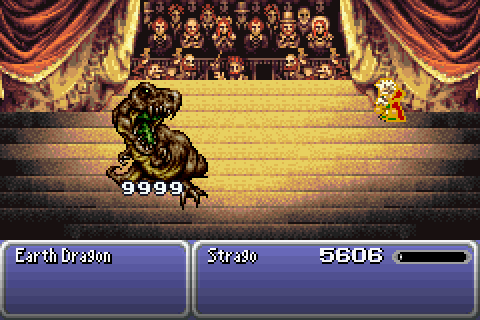
Over at the Opera House, the Earth Dragon does have some powerful physical attacks, but with Gaia Gear to absorb its earth elemental stuff, and Aero to hit its weakness to wind, it's not a problem.
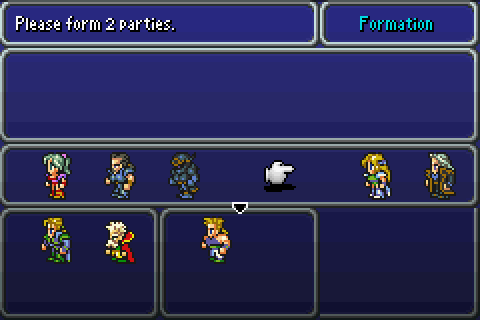
Having recruited everyone else, it's time to track down Locke. In order to minimize the degree to which I'll have to confuse the game, I let the Figaro brothers take the lead, and Strago can hop back and forth between the parties.
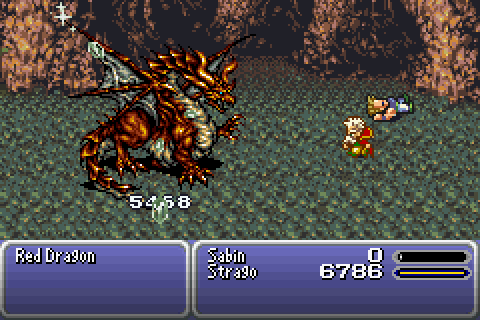
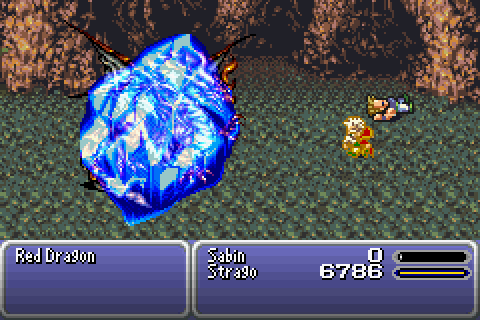
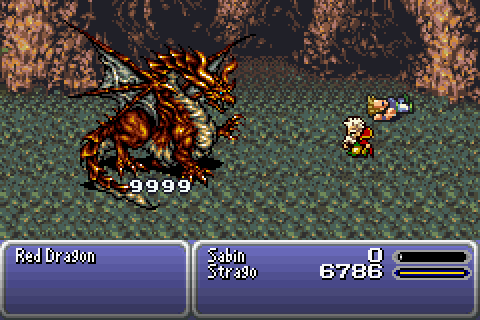
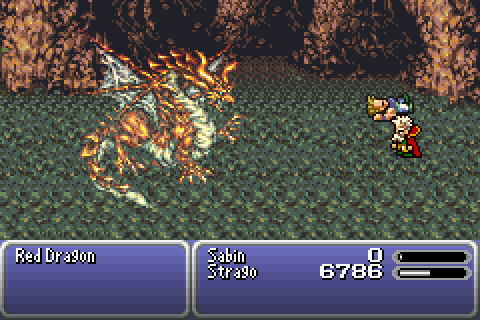
The Red Dragon was dealt with like its brethren: by equipping the correct shield and rod.

All character's recruited, I decide it's time to deal with Deathgaze, with the aid of Grand Delta, the Safety Bit, and emulator speedup.
That leaves the Cultists' Tower as the only thing left to conquer. The deal with that place is that you're restricted to the Magic and Items commands, and to make sure you actually fight things instead of just running, every single enemy in the place blocks you from running away (a difference from Final Fantasy V here: in the previous game, whether you could run away or not was an immutable characteristic of an encounter, but in Final Fantasy VI it's defined per enemy. If some enemies in an encounter block escape and others do not, you can escape once the ones that do are dead). Strago could of course blaze through the tower with spells, but I said I wasn't going to, and I don't think I have to.
The other possible source of damage is consumable items, of course. There are three different ones that can be bought in stores in the World of Ruin: Gravity Rods, Holy Rods, and Super Balls. All three have weaknesses as weapons: the Gravity Rod casts Graviga and can therefore not actually kill anything, the Super Ball does random and insufficient damage, and the Holy Rod is single target only (which also goes for the Gravity Rod). I could probably make it through (expensively) with Holy Rods, except some enemies in the place are immune to or absorb the holy element.
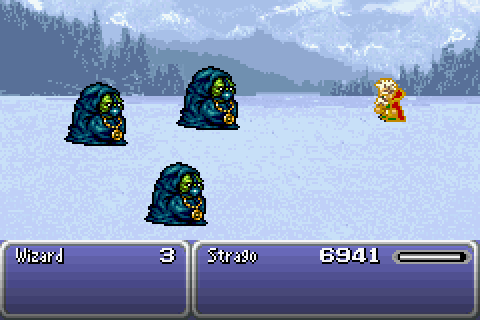
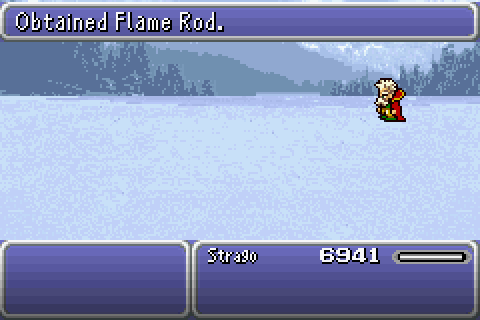
Fortunately, there is one more source of attack items in the World of Ruin. The Wizard enemies on the Narshe Cliffs drop Flame Rods, and they're by no means rare encounters. In fact, I picked up five spare Flame Rods just by passing through and fighting the Ice Dragon earlier. It doesn't take very long to amass ten more, which I hope will last me.
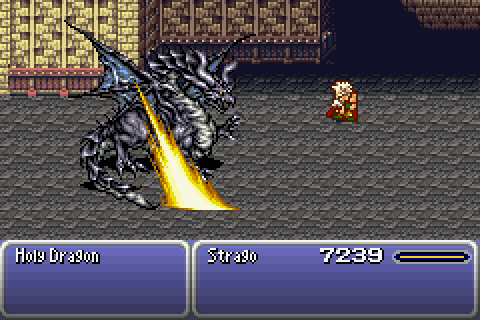

One of the enemies Holy Rods will not work against is the... Holy Dragon. Fortunately, two Flame Rods were plenty.

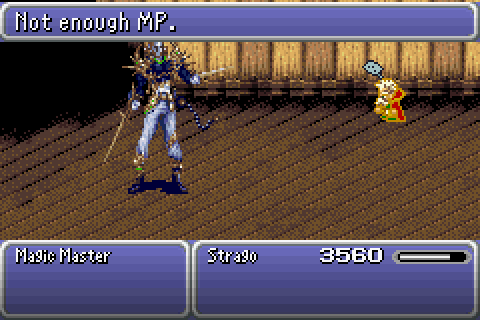
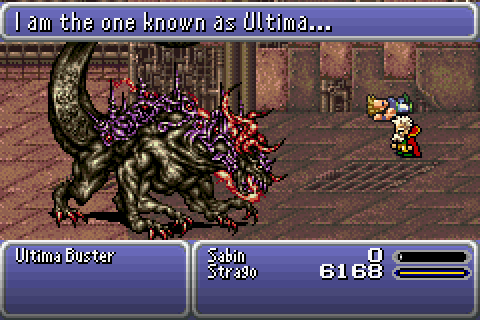
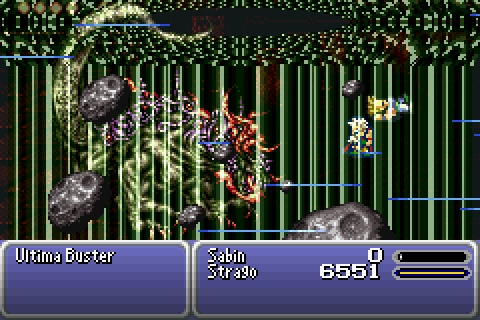
At the top of the tower awaits the Magic Master, and killing him is trivially easy; just wear a Reflect Ring. Of course, upon his death, he says something along the lines of "Oh, you think you're cool because you've got an undodgeable, guaranteed 9999 damage attack? Well guess what?"
There are a few ways to survive the Magic Master's death, but the only way I know of that doesn't require the use of magic is to wait until he runs out of MP. Of which he has 50000. He uses some pretty expensive spells, but it'll still take a while.
The correct equipment is key here. A Thunder Shield to absorb lightning and reduce the damage of fire and ice. As high magic defence as possible. A Safety Bit to ward off Death spells. Miracle Shoes for Regen and Shell status both. With all that, Strago is gaining more health than he's losing... on average. But there's a lot of randomness involved, and a long streak of no lightning spells can end the battle prematurely, so I can't just blindly fast forward, but instead have to pay attention and use an X-Potion or Elixir when things look dangerous.
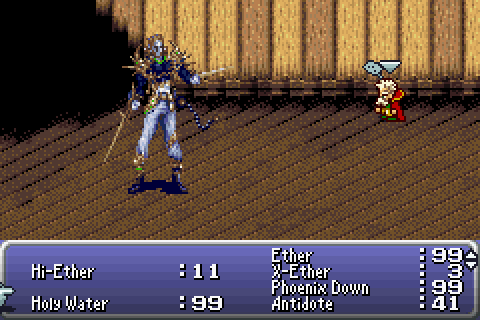
I had just barely enough X-Potions and Elixirs. Those two empty spots are where they used to be.
...except he didn't die. The Magic Master has a flag set that's supposed to cause him to die when he runs out of MP (and he did reach 0 MP), except apparently that only triggers when you do actual MP damage, as with the Rasp spell.
Hmm. That's a problem. The Magic Master uses Barrier Change when attacked, which causes him to be immune to and absorb various random elements. Some testing suggests that most rod breakings will do nothing, and those that don't are as likely to heal him as hurt... what I actually could use right here are Super Balls, but, uh, I didn't buy any. Whoops.

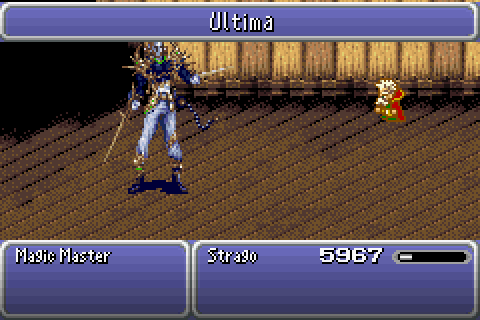
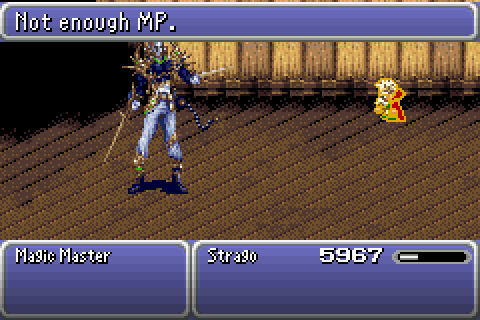
Fine, Magic Master, you win. I'll use ONE spell.
Incidentally, that battle took almost two hours, in game. Emulator speed up means it was probably more like half an hour, but still.
So that leaves us with only Kefka's Tower remaining. Well, there are a few GBA exclusive optional bosses available even before unlocking the Dragons' Den, but if I do the GBA content, I'll do it all together. Kefka's Tower is not vast, for a final dungeon, but it does have fairly dangerous enemies, and a fair few bosses. It's a three party dungeon, so I repeat the setup I had for the Phoenix Cave, this time with Celes joining the brothers, for palette consistency.
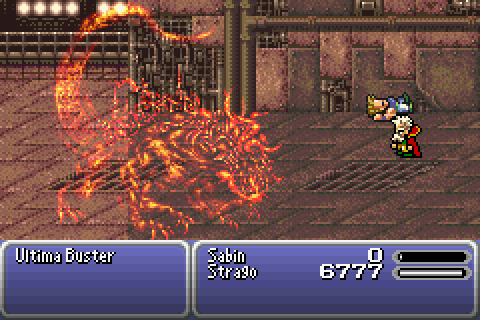
On the first pass through party 2's path through the tower, I passed up this friendly thing. It absorbs a lot of elements, and can use Ultima if you attack it at least twelve times.
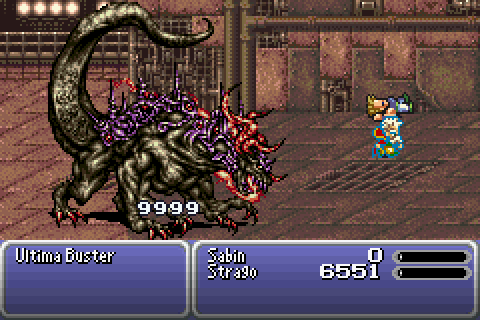
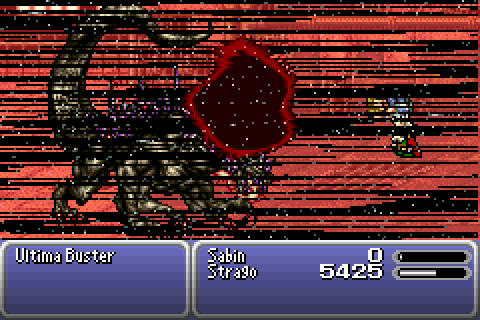

Fortunately, Strago has moved beyond such lowly things as attacks that ever deal less than 9999 damage. Unfortunately, Ultima Buster has attacks of its own that ignore defence. Still, Strago does have enough maximum health to survive that, so I just have to heal as well as attack.
It falls on the next attempt without too much trouble and rewards me with a save point. Save points are highly exploitable in multi party dungeons. That you can save whenever at least one party is standing on a save point is unavoidable, but that parties other than the one on the save point can use Sleeping Bags and Tents must reasonably be seen as an error on the part of the programmers. At any rate, this seems like a good point at which to switch over to party 3. Party 3 does not have a boss between the start and the save point though, so soon it's back to party 2 (which needs to step on a switch before party 1 can get very far).
Incidentally, did you know that the Eye for an Eye attack Yojimbos use upon death bypasses Death resistance? It does. Stuff like this is why I have no compunctions about abusing the save point mechanics. Of course, I could just run away, but still.
With the bridge in place, party 1 can proceed...
...to another blocked of point. I guess that one's opened by party 3, but since they (by which I mean Celes's corpse) are doing save point duty, I'll move party 2 ahead instead.
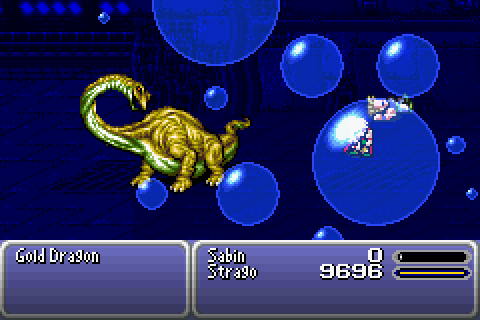
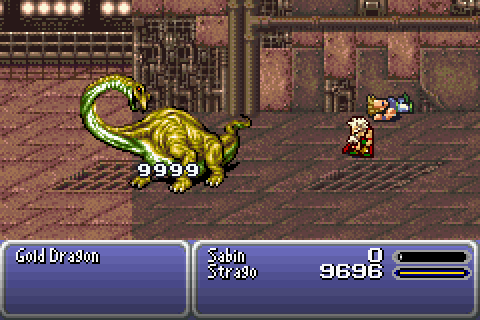
Who encounter the Gold Dragon, which uses lightning and is weak to water.
The Gold Dragon is also the last thing before the end for party 2, so it is time to leave the comforting glow of the save point and venture on with party 3.

Which meets a forgettable (seriously, I have no memory of encountering this thing before) palette swap boss just a few steps from the save point, which dies to Grand Delta and Quasar.
Party 3 does indeed unblock the way for party 1, which lets it reach the end of the dungeon (no save points on that path). Meanwhile, party 3...


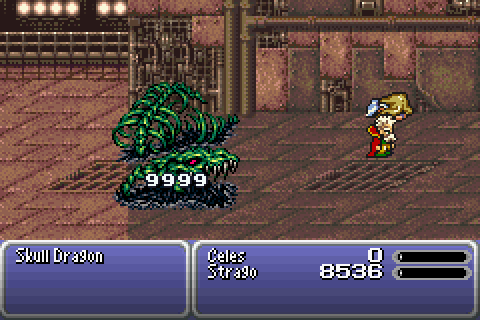
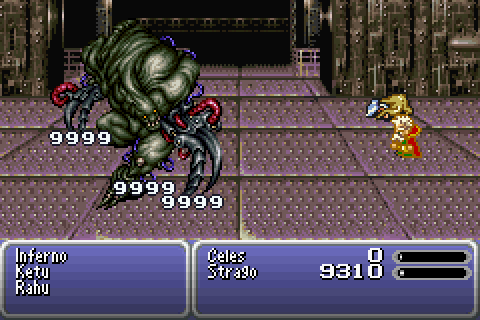
...faces down the Skull Dragon, which is weak to holy and fire. Its most dangerous attack is Doom, which a Safety Bit deals with (at least, I think it does).
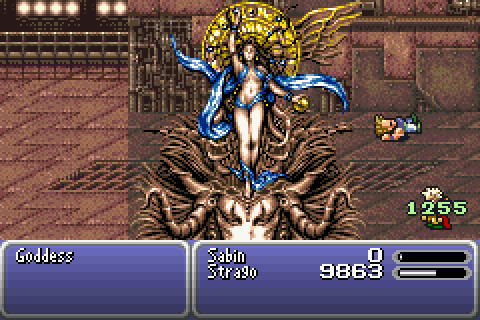
Which brings us to the non optional bosses. I choose Goddess first, as she seems unthreatening and I don't have any special goals other than killing her. She primarily uses lightning.
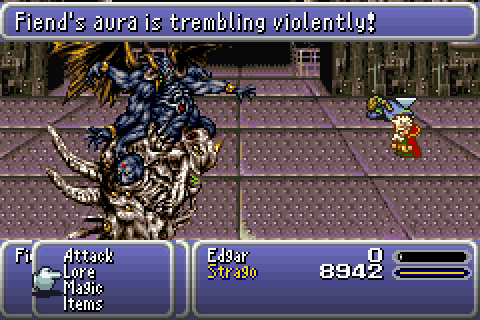
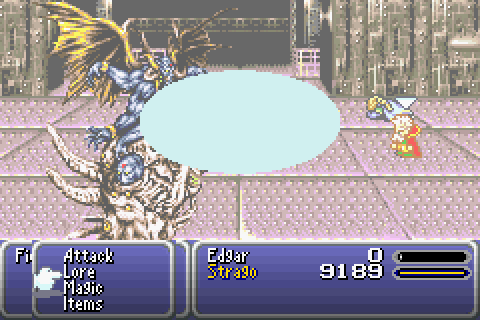
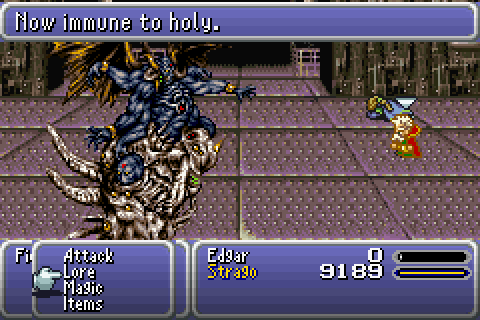
Fiend, meanwhile, uses ice. Northern Cross can cause Freeze, but I was lucky enough that Fiend skipped using it. The main point of interest is the final lore, of course.
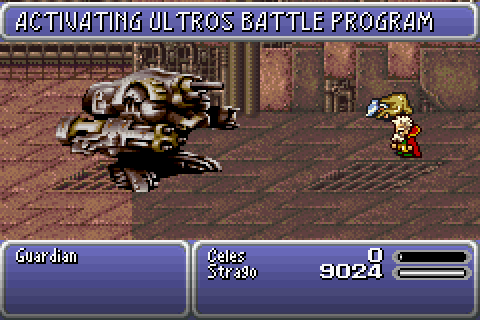
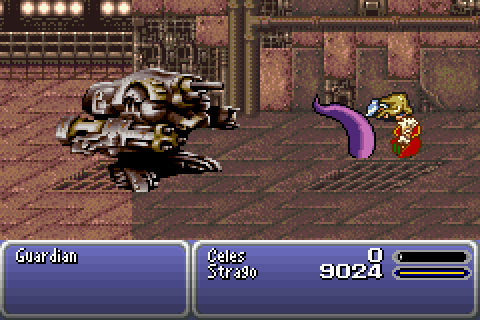
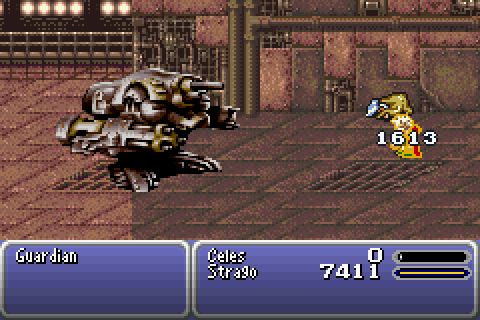
Guardian's gimmick is that it has attack patterns themed on earlier bosses. However, while it is of course much stronger than Ultros was, it's still not that scary, and dies well before it gets to the point of its script where it would start throwing Flares, Meteors and Ultimas around.
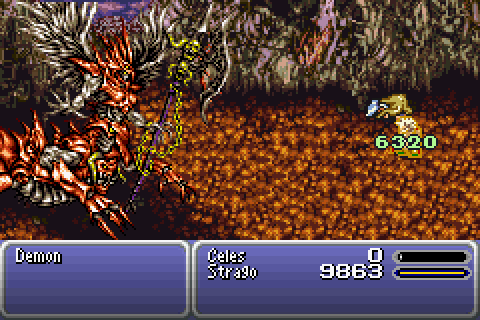
Demon actually seemed slightly terrifying until I learned that Flare Star is fire elemental. I'd been thinking of it as a more powerful version of Flare, which it sort of is in that it ignores defence, but still: fire elemental. That left Meteor and Stop as Demon's only dangerous attacks, and I was lucky enough that neither was used (I haven't actually seen Meteor used so far in this game, so I have no real idea how much damage it would do, but I assume a lot).
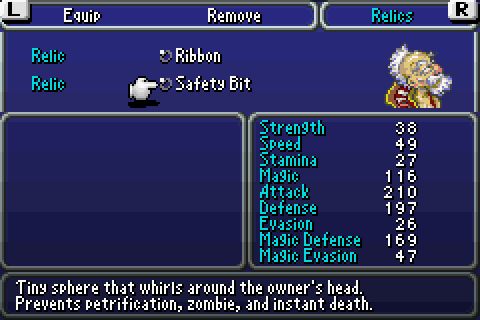
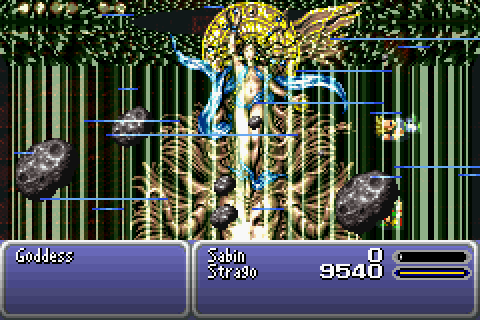
Now, the sensible thing to do would probably be to study the AI scripts for the final battle and make plans, but screw it, let's go in blind and see what happens. I'll use a Ribbon and Miracle Shoes for relics, and Aegis Shield/Red Cap/Behemoth Suit for armour.
The first phase seems not too dangerous, except that the death attacks do significant damage. Nothing a Healing Rod can't fix, though it got pretty close.
A Flare Star during the second phase convinces me to switch to a Flame Shield, after which it does nothing at all threatening.
Okay, fine, I'll use the Safety Bit (and look at the AI scripts a little bit).
Upon said inspection of the AI scripts, it appears that Doom, and some additional instant death when that part of the third phase is killed, seem to be the main surprises. I saw no water attacks, so the Flame Shield should be safe. The status effects I saw that a Ribbon would prevent were Imp, Sleep and Poison. It might be a mistake, but I'll keep the Miracle Shoes, at least for the second attempt.
For the second attempt, the first phase went much as the first time. During the second phase, Strago managed to get put to Sleep, then Frozen, and finally Stopped in one long sequence of doing nothing. However, with the Flame Shield, he was basically impossible to kill.
During the third phase, I learned some interesting things. For example, Trine is a status inflicting attack, that causes at least Darkness and Silence. And that Meteor does about 1500 damage (from that enemy, at least).
And that Repose is another instant death attack that bypasses Death resistance. Isn't that interesting? I think it's interesting. We're learning things! Hooray!
Anyway... research suggests that Repose is a physical attack, and that either the wall effect from the Golem summon, or Image status (from the Fenrir summon). High stamina does not, I tested as much. In fact, I'm starting to suspect that what the Safety Bit does is make you automatically pass stamina checks, as it appears to give protection from gravity type attacks, which also use the stamina check.
So on the third try, Strago summoned Golem, but when the time came, he actually blocked the first Repose with his shield, while Golem took care of the second. I suppose stacking physical evade would also have been a possibility.

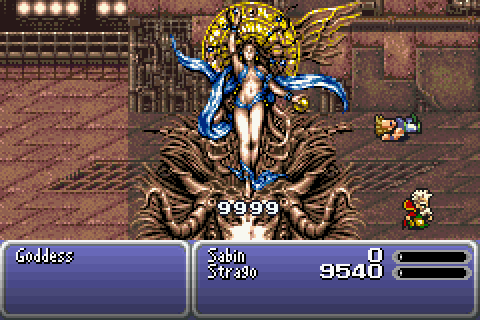
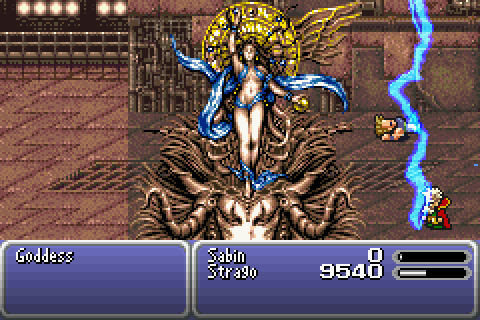
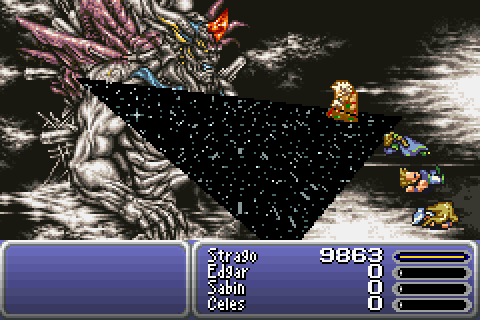
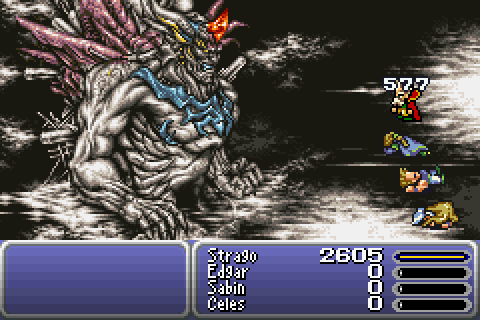
On the subject of learning things, it seems that Terra will jump into the battle's final phase, even if you didn't bring her along. Kefka's initial Heartless Angel (sets HP to 1) was very convenient for getting rid of her. Other than that, he used Trine a lot, almost running me out of Remedies. Occasionally, he used Forsaken, which is probably has the most over the top full screen attack animation in the game. It did about 1800 damage. Meanwhile, Havoc Wing, which looks like standard attack, did over 4000, and was probably the most dangerous thing in his repertoire (it wasn't dangerous enough).
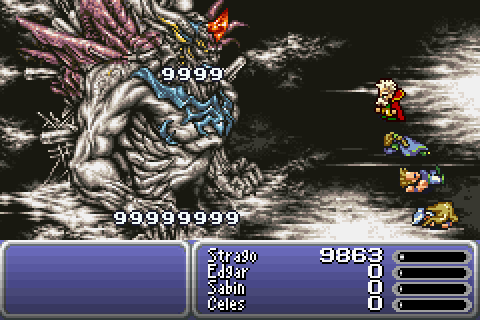
If you've read this far, you've probably noticed that the game didn't put up a very hard fight. Other than the hiccup with the third phase of the final boss, I think the last time the game felt hard was against Number 128 when escaping from the MagiTek Research Facility. There are several reasons for this. Part of it is that I chose a powerful character. Strago is really good once he starts getting access to a wide variety of attack elements. Part of it is that the game throws great equipment at you (the elemental shields in particular are great). Part of it is that I was focusing all that experience into one character, when the game expects you to spread it over 14, and levels have a very strong effect on how much damage you do. But a very very large part of it was that I was using magicite level up bonuses. All that magic I pumped into Strago more than doubled his damage output, and that means almost everything died before it could do anything dangerous. For example, Kefka can counterattack with Ultima in the final phase... when his health is 10240 or less. When you're doing 9999 damage per attack, he only gets one chance at that. Lots of bosses had parts of their scripts that only activated when they had been attacked a sufficient number of times, which they never reached. So if I were to do this again, I'd prohibit or greatly restrict level up bonuses (possibly to one level up per magicite, just to give a small reward for hunting the things down).
On the other hand, going without magic entirely, as I did during the second half of the game, was a bit unnecessary, and that nonsense I got up to in the Cultists' Tower was just dumb. I still think restricted magic is a good idea, but I'd probably allow any spell you can learn at a rate of x20 or greater (though possibly only once you hunted down magicite that teaches it at that rate), plus Terra's and Celes's natural magic, of course.
I should mention that these are only my thoughts on what would be entertaining to me personally. Anyone else should form their challenges as they prefer them.
As for doing the GBA exclusive stuff, I'm leaning towards yes, but I'm taking a break from the game for now. And given what happens when I get distracted, I guess that's more of a "probably not". Or perhaps a "maybe next year".
First, I would like to direct you to Elephantgun's exploration of the bugs of Final Fantasy VI. Apart from being a great read if you're interested in seeing classical console games being taken apart at the seams, it was also a source of knowledge for me regarding the data structures of FF6.
Second, the program I use to view and edit the memory of a running process is called ArtMoney. There are probably other programs just as suitable for this purpose.
Other than that, let's get right into it.
Each character's data is stored in a 37 byte area of the game's memory. There are sixteen of these, all in a row. Unlike in FF4, these slots do not correspond to a slot in any party, and rearranging your party will change not even a single bit in any of these records. Rather, each character will spend their entire existence in one and only one of these slots. The reverse is not true: a slot may contain different characters at different points in the game. Specifically, the characters inhabit slots like so:
| Slot | Character |
| 0 | Terra |
| 1 | Locke |
| 2 | Cyan (Kupek/Moglin) |
| 3 | Shadow (Kupop/Mogret) |
| 4 | Edgar (Kumama/Moggie) |
| 5 | Sabin (Kuku/Molulu) |
| 6 | Celes (Kutan/Moghan) |
| 7 | Strago (Kupan/Moguel, Ghost 1) |
| 8 | Relm (Kushu/Mogsy, Ghost 2) |
| 9 | Setzer (Kurin/Mogwin) |
| 10 | Mog |
| 11 | Gau (Kuru/Mugmug) |
| 12 | Gogo (Kamog/Cosmog) |
| 13 | Umaro |
| 14 | Wedge, Banon, Leo |
| 15 | Biggs |
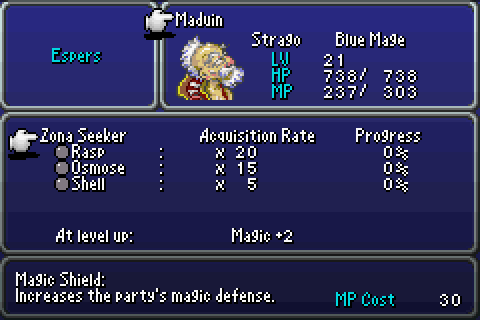
I've limited the above table to usable characters you have in your party during at least one battle. Some more incidental characters can also be found in these slots, such as Kefka from various battles where he shows up as a character sprite, Mog from the scenario select screen, Maduin during the flashback to Terra's conception, and possibly others.
In order to find the address of a given character record in your emulator of choice, the easiest thing to do is to find the address of a character's HP and count back 9 bytes (as seen from the table below). The character's name is unfortunately not ASCII-encoded, so searching for text strings will not work.
Each character record has the following structure:
| Byte | Data |
| 0 | Character ID |
| 1 | Class/portrait ID |
| 2 | Name letter 1 |
| 3 | Name letter 2 |
| 4 | Name letter 3 |
| 5 | Name letter 4 |
| 6 | Name letter 5 |
| 7 | Name letter 6 |
| 8 | Level |
| 9 | HP low byte |
| 10 | HP high byte |
| 11 | Max HP low byte |
| 12 | Max HP high byte |
| 13 | MP low byte |
| 14 | MP high byte |
| 15 | Max MP low byte |
| 16 | Max MP high byte |
| 17 | EXP low byte |
| 18 | EXP mid byte |
| 19 | EXP high byte |
| 20 | Status byte 1 |
| 21 | Status byte 2 |
| 22 | Battle command 1 |
| 23 | Battle command 2 |
| 24 | Battle command 3 |
| 25 | Battle command 4 |
| 26 | Base strength |
| 27 | Base speed |
| 28 | Base stamina |
| 29 | Base magic |
| 30 | Magicite |
| 31 | Equip right hand |
| 32 | Equip left hand |
| 33 | Equip head |
| 34 | Equip body |
| 35 | Relic 1 |
| 36 | Relic 2 |
Most of that is pretty self-explanatory. The first two bytes are a bit odd though. For all of the permanent party members, these bytes are both equal to the number of the character slot they inhabit. For temporary members, they can differ in value not only from their slot number, but also from each other (for example, Leo in slot 14 has byte 0 set to 15 and byte 1 set to 16).
Changing the second byte changes the character portrait and class title in the menu, and the character sprite in battle. So, for example, if you set Strago's second byte to 3 he will appear as Shadow in the menu and battles.
Changing the first byte has no noticeable effect in the menu, unless you change it to 1 (Locke's ID), in which case the character's portrait and class title is changed to Locke's, just as if you had changed the second byte to 1 (I have no explanation for this). The first one appears to control mainly which character's data is used when entering battle. As in, changing it may cause the battle loading routine to pull data from a character record belonging to a different character than the one entering battle. For example, if you change Strago's first byte to 2, he will be called Cyan in battle and have Cyan's battle commands and HP, but still Strago's sprite.
Oh, and also? If you change both, the change to the second byte appears to have no effect. So Strago's first byte to 2 and second byte to 3 means Cyan's battle data with Strago's sprite, with Shadow nowhere to be seen. Clearly, there are complex interactions going on here.
As I mentioned, none of that controls the character's position in any party. That leaves us with the question: where is the data describing which character is in which party? And the answer is: immediately after the end of the last character record is a sequence of sixteen bytes that describe the location of each character. The value that goes in this byte is not simply a number corresponding to a slot in a party, but a somewhat more complex bit encoded set of information:
| Bit | Data |
| 0 (high bit) | display on screen? |
| 1 | mystery |
| 2 | row |
| 3 | which slot (high bit) |
| 4 | which slot (low bit) |
| 5 | unused? |
| 6 | which party (high bit) |
| 7 (low bit) | which party (low bit) |
Bit 5 appears to always be unset. Setting it causes no obvious effect, and rearranging the party causes it to be unset.
Bits 3 and 4 determine which of the four slots in the party the character inhabits, from 0 (first slot) to 3 (last slot).
Bit 2 signifies whether the character is in the back row. It took me an embarrassingly long time to figure that one out. As in, this section originally started "Bits 2 and 5 appear to..."
Bits 6 and 7 determine which party the character is in. Party 1 is the party used most of the time, while parties 2 and 3 are the additional parties used in multiparty battles and dungeons. Party 0 appears to be used for special circumstances (for example, Maduin is placed in party 0 during his flashback).
Bit 0 appears to signify whether the character should be placed in the game world. Most of the time this bit will be set for the lead character, and unset for any other characters. However, in cutscenes where all characters in the party appear, it is also set for the other characters. But sometimes it is set for unclear reasons.
The second bit appears to always be set for any character in any party. Additionally, I observed that during the scene just before the battle at the cliffs of Narshe, where you can switch out characters to change their equipment before making your parties, that bit and only that bit was set for the characters waiting in line. Normally all bits are unset for characters not in any party (except the row bit, if the character was in the back row when they left the party).
One oddity is that changing party members while outside of the menu will often "not stick", with the location byte being changed by the game soon after being changed in you memory editor. Changing while in the menu seems to work fine, and changes persist after leaving the menu.
The astute reader may have realised that there is nothing in this encoding that prevents you from placing two characters in the same slot of the same party. This is true, you can do this. It leads to some odd results and is generally not advisable.
At any rates, in practical terms, if four characters are in your party, their location bytes will generally have the values 193, 73, 81 and 89 (if all four are in the front row), and changing which location bytes have these values will let you determine which characters are actually in the party.
One thing I wanted to explore was whether the more interesting temporary characters could be made properly playable. The things that prevent them from being fully usable are that you can't change equipment or relics, and you cannot equip magicite and learn magic.
The first of these turns out to be controlled by the first byte of the character record. If it is less than 13, you can enter the characters equipment screen, if greater or equal, you can't. For relics, the magic number is 14 (remember that you can change Umaro's relics, but not his equipment). That means you have to go to your memory editor every time you want to change equipment, which is annoying, but it's doable.
Access to magic is even simpler: any character with one battle command set to magic (the value 2) can access the magic menu and equip magicite:
There is some evidence that the game is confused at this point.
Solving these problems uncovers two more, though. The first is that just because you can access Leo's equip screen doesn't mean you can change his equipment. You see, Leo cannot equip anything, not even the equipment he starts with.
The problem with the magic is more subtle and more dangerous. Consider this: each character that can normally learn magic has their own spell list. When we open Leo's spell list, where is the game reading that data from? And more importantly, if he learns magic, where is the game writing that data? Did the developers waste space keeping a spell list for a character that will never learn any, or is it opening a section of memory that belongs to something else, that just coincidentally happens to be blank at this point in the game? If we write magic there, will this lead to horrible data corruption?
The solution to both of these problems is the same. What equipment is usable and what spell list is used are both keyed into the character slot. So if we copy Leo's data to Celes's slot...
It's okay Leo, we all have secrets.
If we additionally leave the first byte of the character record with Celes's character ID, Leo will load into battle correctly and appears to be playable in every respect. He appears as Celes in towns and dungeons and similar, but as Leo on the world map.
There are three characters that can equip all of Leo's starting equipment: Terra, Edgar and Celes. Unless you think Leo wearing a dress was especially funny, or want him to have natural magic acquisition, Edgar's slot is probably the best option.
For Banon, it is Strago, Relm and Gogo that can equip his stuff. Gogo does not have a normal magic list, and Banon does not strike me as the painting type, so Strago's slot may be best.
If you want to play with a specific character from the start, you would normally have to play to the point in the game where they join in order for the game to generate their data, and then copy it to an earlier point. For your convenience, I have compiled some saved games with the characters already initialised. Both save files below have in their third slot a saved game at the first save point in the game, with each character generated at the lowest level I could tease the game into creating them at. All of the characters are in their normal slots, except that Locke's slot contains Banon, and Mog's slot contains Leo. None of them are assigned to the party, so the saved games will appear normal at first glance. Keep in mind that most of those characters will be promptly overwritten by moogles, so make sure to protect any character you want to keep.
The SNES save was created by copying character data from the GBA version. I can not guarantee that it is correct, but nothing appears amiss from my testing; the only differences in character data I noticed was that the text encoding for the names was different.
A word of warning if you want to try this for yourself: which characters you have in the party during cutscenes matters. If you lack a character or have an extraneous one, the cutscene may not go as intended. Sometimes the effect is purely graphical, but sometimes the cutscene will not complete correctly and you'll be stuck. Be sure to make a save state before each cutscene as a safety precaution.